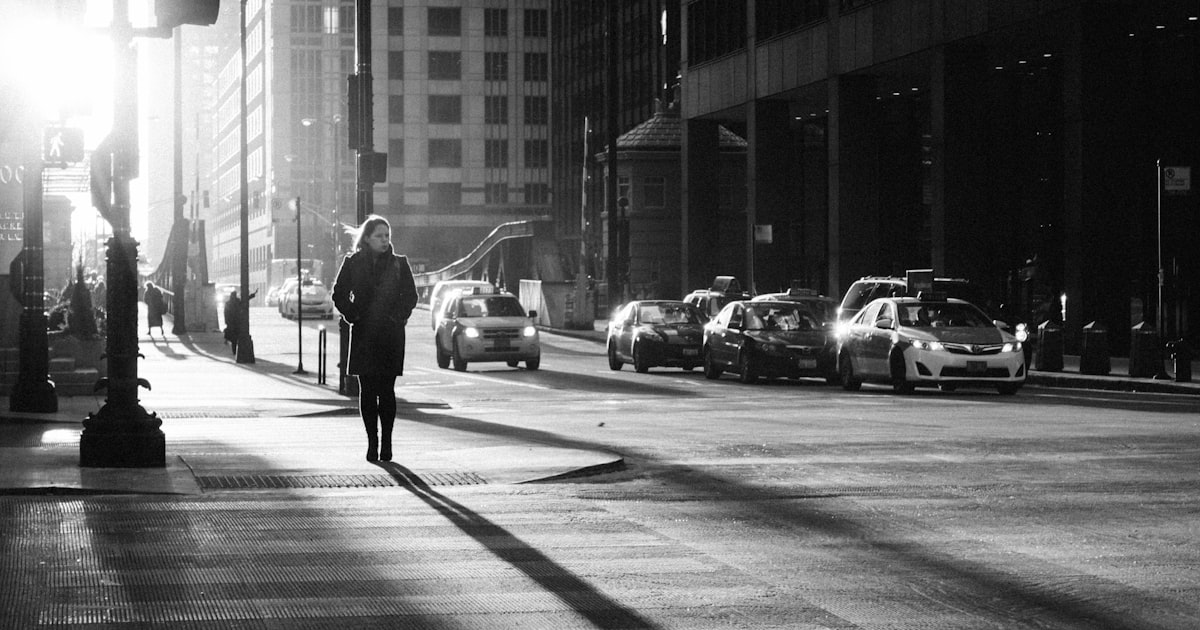
Fujifilm Neopan Acros 100 Recipe for the Ricoh GR III: The Ultra-Fine Black & White Film Look
If Kodak Tri-X is the gritty, grainy voice of photojournalism, Fujifilm Neopan Acros 100 is its serene, meticulous counterpart. Acros is the black-and-white film photographers reach for when they want cleanliness above all else — the finest grain of any 100-speed stock, a beautifully long tonal scale, and a smooth, almost sculptural rendering of light. It's the film of quiet architecture, patient portraits, and long twilight exposures. The best part? You can get remarkably close to that look in-camera on your Ricoh GR III — no darkroom, no scanning, no film budget.
In this guide we'll build a complete Fujifilm Acros 100 film recipe for the Ricoh GR III, explain why each setting matters, and cover the light and subjects where the look truly sings.
What Makes the Fujifilm Acros 100 Look
Before diving into the menu, it helps to know exactly what you're chasing. Acros has a signature that sits at the opposite end of the spectrum from a punchy, grainy stock like Tri-X:
- Exceptionally fine, near-invisible grain — the smoothest, cleanest black and white you can shoot
- A long, gentle tonal scale that holds detail from deep shadow to bright highlight
- Smooth, luminous highlight roll-off with no harsh clipping
- Rich but open shadows — blacks are deep without swallowing detail
- A neutral, slightly cool rendering that feels precise and modern rather than vintage-gritty
Think of Acros as the perfectionist of black-and-white film. Where Tri-X documents the world with grit and energy, Acros describes it with clarity and calm. The GR III's Monochrome Image Control is perfectly suited to this — the goal here is to pull back on grain and contrast while keeping detail crisp and the whole tonal range intact.
The Fujifilm Acros 100 Recipe for Ricoh GR III
Navigate to MENU > Still Image Settings > Image Control and select Monochrome as your base. Then dial in the following:
- Image Control: Monochrome
- Filter Effect: Off (or Yellow for slightly deeper skies)
- Toning: 0 (neutral — Acros is a clean, true black and white)
- Saturation: N/A (monochrome)
- Hue: N/A (monochrome)
- High/Low Key Adjustment: 0
- Contrast: 0
- Contrast (Highlight): -1
- Contrast (Shadow): +1
- Sharpness: +2
- Shading: 0
- Clarity: +1
- Grain Effect: Off (or Weak)
- White Balance: Auto (white balance has no effect on tone in Monochrome, but Auto keeps your live view neutral)
- ISO: Auto 100–1600
- Exposure Compensation: +0.3 as a starting point
Save this as one of your User custom modes (U1–U3) so you can recall it instantly.
Why these settings work
Monochrome with neutral toning is the foundation. Acros is a clean, honest black and white — no sepia warmth, no heavy selenium cool — so toning stays at zero for a precise, neutral rendering.
Contrast at 0 with a slight shadow lift (+1) and highlight pull (-1) is the heart of the Acros look. Rather than the muscular mid-tone punch of Tri-X, Acros is prized for its long tonal scale — it holds detail everywhere. Keeping global contrast neutral while gently opening shadows and softening highlights gives you that smooth, luminous gradation from black to white without ever clipping.
Sharpness at +2 matters more here than with grainier films. Because Acros has almost no grain to add texture, its crispness comes from genuine detail resolution. The GR III's 28mm lens is exceptionally sharp, and pushing sharpness lets that acuity shine — exactly the razor-clean feel Acros is known for.
Clarity at +1 (not higher) adds just a touch of mid-tone structure to architecture and texture without tipping over into a gritty, over-processed look. Acros should feel smooth, so we use clarity with restraint.
Grain Effect set to Off (or Weak) is the single most important choice for an authentic Acros feel. This film is famous for being nearly grainless — a strong grain setting would instantly break the illusion and turn it into a Tri-X impression instead. If you want a hint of organic texture, set it to Weak, but never more.
A gentle +0.3 exposure compensation leans into Acros's bright, airy highlight character and keeps shadows open, which suits the film's long, delicate tonal scale.
Best Conditions for the Fujifilm Acros 100 Look
Acros was engineered for clean rendering across a huge range of light, but a few situations make it truly sing.
Soft, even light
Acros thrives where the tonal range is wide and gradual — overcast skies, open shade, hazy afternoons, and diffused window light. Its long scale captures every subtle step of grey, so scenes that would look flat on a punchy film come alive with quiet depth. This is where the smoothness of the recipe pays off most.
Architecture and cityscapes
The combination of fine grain, high sharpness, and a long tonal scale makes Acros a natural for buildings, geometry, and urban detail. Clean concrete, glass, and shadow all render with a crisp, sculptural precision. Add a Yellow filter effect to deepen skies and separate clouds for extra drama.
Long exposures and low light
Real Acros film was legendary for its reciprocity characteristics, making it a favorite for long exposures. On the GR III, the digital equivalent is its clean high-ISO performance paired with this grainless recipe — blurred water, night streets, and twilight scenes stay smooth and detailed where a grain-heavy recipe would get noisy. Mount the camera on a small tripod, drop to ISO 100, and let the shutter drag.
Portraits in gentle light
Acros renders skin with a smooth, flattering tonality — no harsh grain, no crushed shadows. In soft light it produces beautifully clean monochrome portraits with delicate gradation across the face. Expose for the skin and let the gentle highlight roll-off do the rest.
Where to be careful
Because this recipe deliberately keeps contrast neutral, it can look slightly flat in already-flat light if you're expecting punch. That softness is the Acros character — but if you want more bite for a moody scene, nudge contrast to +1 or add a Yellow filter effect. For a grittier, higher-contrast documentary feel, reach for our Kodak Tri-X 400 recipe instead.
Shooting Tips for the Acros 100 Look
- Keep ISO low when you can. The whole point of Acros is its clean, fine-grained smoothness. Keep the GR III at ISO 100–800 whenever the light allows to preserve that glassy quality.
- Expose to the right (slightly). A touch more light protects the delicate shadow detail Acros is famous for. Start at +0.3 exposure compensation and adjust to taste.
- Use a Yellow or Orange filter effect for skies. Since Acros renders blue skies fairly bright by default, a Yellow filter effect darkens them naturally and makes clouds pop — a classic black-and-white technique built right into the GR III.
- Look for tonal range, not just contrast. Acros rewards scenes with a full spread of tones — bright sky, mid-tone walls, deep shadow. Train your eye to find gradation rather than just bold black-and-white graphic shapes.
- Shoot wide and get close. At 28mm, fill the frame and let the GR III's sharpness resolve Acros's famously fine detail.
Acros 100 vs. Tri-X 400 on the GR III
If you've already tried our Kodak Tri-X 400 recipe, think of Acros as its refined, disciplined opposite. Tri-X runs high contrast (+2) with a Strong grain effect and a slightly dark, moody exposure — it's built for grit, energy, and the decisive-moment street frame. Acros keeps contrast neutral with grain Off, higher sharpness, and a brighter exposure — it's built for cleanliness, tonal range, and calm precision. Many GR III shooters keep both saved to User modes: Tri-X on U1 for gritty street work, Acros on U2 for architecture, portraits, and long exposures.
Trying the two on the same scene is the fastest way to feel the difference — a great exercise for any Ricoh GR III owner developing a black-and-white eye.
Final Thoughts
Fujifilm Neopan Acros 100 earned its reputation one clean, luminous frame at a time, and the Ricoh GR III is uniquely suited to chasing that look — small enough to disappear on the street, sharp enough to resolve Acros's famously fine detail, and equipped with a Monochrome Image Control flexible enough to render the film's long, delicate tonal scale. Dial in the recipe above, lock it to a User mode, and go looking for soft, even light. You'll come back with black-and-white frames that have that unmistakable smooth, grainless clarity — straight out of camera.
Ready to make it effortless? Browse our complete collection of Ricoh GR III presets, including film-emulation recipes like this one, or grab a bundle to get our most popular looks together at the best value.
Get a free recipe + 15% off your first order
Our Natural Analog recipe (exact settings for the GR III, GR IIIx and GR IV) and a personal discount code, straight to your inbox.
No spam. Unsubscribe in one click.