Ricoh GR III Astrophotography: Settings, Tips, and Best Recipes for Milky Way and Starry Skies
The Ricoh GR III is not the first camera most people think of for astrophotography, and that is exactly why it deserves attention. Its compact size makes it the perfect companion for remote dark-sky locations where every gram counts, and its APS-C sensor captures far more starlight than any smartphone or smaller-sensor compact ever could.
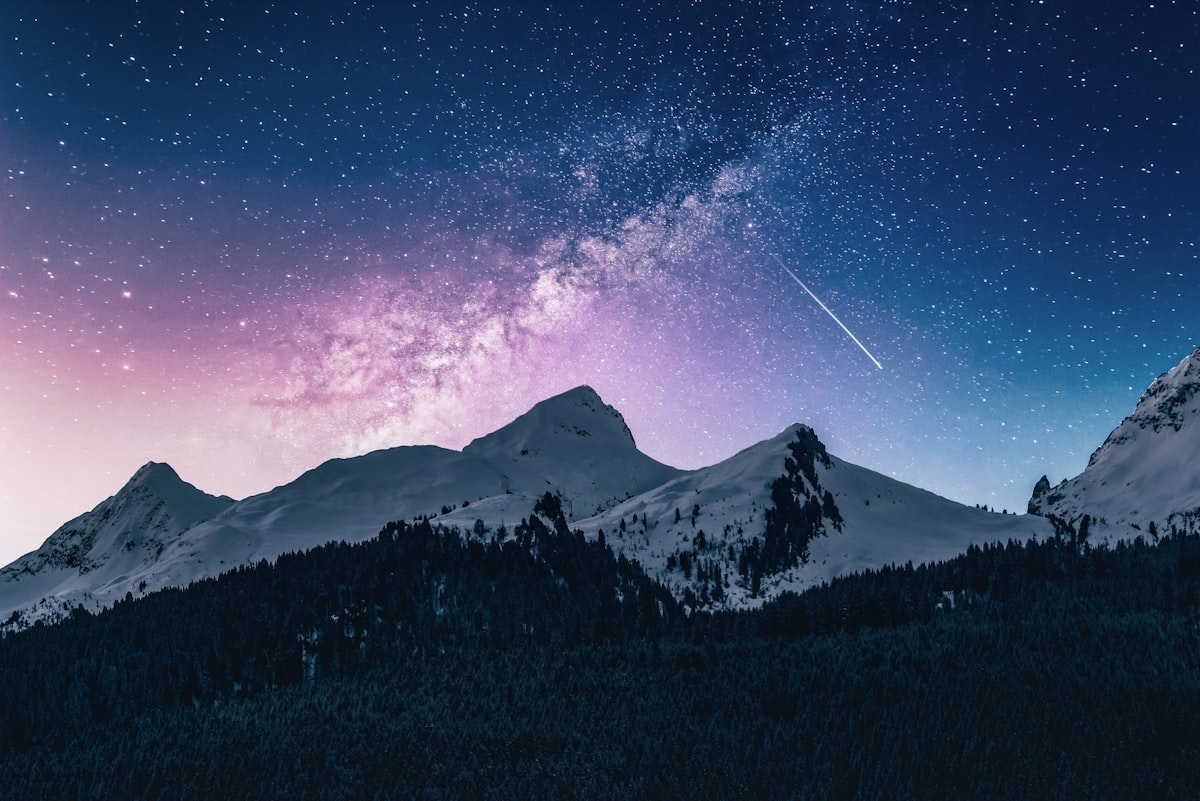
This guide covers everything you need to photograph the Milky Way, star trails, and starry landscapes with your Ricoh GR III -- from essential camera settings and custom preset recipes to field techniques that separate sharp, detailed night sky images from blurry, noisy ones.
Why the Ricoh GR III Works for Astrophotography
Astrophotography demands a lot from any camera. Here is why the GR III holds its own against much larger setups:
- APS-C sensor with 24.2 megapixels delivers clean high-ISO performance critical for capturing faint stars
- f/2.8 maximum aperture on the 18.3mm (28mm equivalent) lens gathers enough light for single-exposure Milky Way shots
- 28mm equivalent focal length provides a wide field of view ideal for sweeping night sky compositions with foreground interest
- Compact, lightweight body at just 257 grams is perfect for hiking to remote dark-sky locations
- Manual focus with magnified live view allows precise focusing on stars, which autofocus cannot reliably achieve at night
- Interval shooting mode enables star trail composites and time-lapse sequences without an external intervalometer
Understanding the 500 Rule for the GR III
The 500 Rule helps you calculate the longest exposure time before stars begin to trail due to Earth's rotation. For the GR III:
500 / (crop factor x focal length) = maximum shutter speed
With the GR III's 1.5x crop factor and 18.3mm lens:
500 / (1.5 x 18.3) = 18.2 seconds
Round down to 15 seconds as your safe maximum for sharp star points. If you want to be even more conservative, use the NPF Rule which accounts for pixel density -- for the GR III, this suggests closer to 10-12 seconds for truly pinpoint stars at 100% crop.
Essential Camera Settings for Astrophotography
Shooting Mode: Full Manual
There is no shortcut here. Astrophotography requires full manual exposure control. The camera's meter cannot reliably read a dark sky, and any automatic mode will produce inconsistent results.
Set the mode dial to M and take control of aperture, shutter speed, and ISO independently.
Aperture: Wide Open at f/2.8
Open the lens to its maximum aperture of f/2.8 to collect as much starlight as possible. While lenses are often sharper stopped down, the GR III's lens performs well wide open and the light-gathering advantage at f/2.8 far outweighs the marginal sharpness gain at f/4.
The only exception is star trail photography where you are stacking multiple shorter exposures -- in that case, stopping down to f/4 can improve corner sharpness without hurting the final stacked result.
Shutter Speed: 10-15 Seconds
Based on the 500 Rule calculation above:
| Subject | Shutter Speed | Notes | |---------|--------------|-------| | Milky Way core | 10-15s | Use 10s for pixel-perfect stars, 15s for more light | | Starry landscape | 12-15s | Balance between star sharpness and foreground detail | | Star trails (single frame) | 30s+ | Intentional trailing for circular star patterns | | Star trails (stacked) | 15-30s per frame | Stack 50-200 frames in post for long trail effect | | Meteor showers | 15-20s | Wide aperture, repeat continuously |
ISO Configuration
Astrophotography demands high ISO values. Navigate to MENU > Shooting Settings > ISO Sensitivity and set manually:
- ISO 3200 is the sweet spot for most Milky Way shooting -- it balances signal capture with manageable noise levels on the GR III's sensor
- ISO 6400 is usable when you need extra brightness for a faint Milky Way or when you want to keep exposures under 10 seconds for sharper stars
- ISO 1600 can work under exceptionally dark skies (Bortle 1-2) where the Milky Way is clearly visible to the naked eye
Do not use Auto ISO for astrophotography. The camera will choose inconsistent values between frames, making post-processing difficult, and its metering will not produce good results against a dark sky.
Focus: Manual Focus to Infinity
This is the most critical setting. Autofocus cannot lock onto stars reliably, and a slightly out-of-focus astro shot is not recoverable.
Step-by-step focusing procedure:
- Switch to Manual Focus via the ADJ lever or MENU > Shooting Settings > Focus
- Point the camera at the brightest star or planet visible in the sky
- Press the rear dial to activate magnified live view at maximum zoom
- Slowly rotate the focus ring until the star appears as the smallest, sharpest point of light
- If the LCD is too dim to see stars, temporarily raise ISO to 12800 or 25600 just for focusing, then return to your shooting ISO
- Once focused, do not touch the focus ring for the rest of the session
Important: The GR III's focus ring does not have a hard infinity stop, so you cannot simply turn it all the way. Infinity focus requires careful visual confirmation using magnified live view.
White Balance: Manual Kelvin
Auto white balance produces unpredictable color shifts between frames and often removes the natural color of stars and nebulae.
- 4000-4500K produces a natural-looking night sky with a slight cool tone that preserves the blue of the sky and the warm tones of the Milky Way core
- 3800K creates a cooler, more dramatic blue sky that emphasizes the contrast between sky and stars
- 5500K (Daylight) preserves the most accurate star colors but may make light pollution appear more yellow
Set your white balance in Kelvin manually and keep it consistent across all frames in a session. This makes batch processing much easier and ensures uniform results.
Additional Settings
- Image Stabilization: OFF. When using exposures of 10+ seconds, the shake reduction system can actually introduce micro-movement. Disable it in MENU > Shooting Settings > Shake Reduction
- Noise Reduction: OFF or LOW. Long exposure noise reduction takes a dark frame after each shot, doubling your wait time. Disable it for efficiency and handle noise in post-processing instead. MENU > Shooting Settings > Slow Shutter Speed NR
- File Format: RAW or RAW+JPEG. Astro images need aggressive post-processing. RAW files retain the dynamic range and color data you need to pull out the Milky Way's structure
- Self-timer: 2 seconds. Eliminates vibration from pressing the shutter button. Alternatively, use the Ricoh GR III remote app on your phone
Best Preset Recipes for Astrophotography
While RAW processing is essential for serious astrophotography, these JPEG recipes give you impressive straight-out-of-camera results and serve as a strong starting point for further editing.
Deep Sky Blue
This recipe produces rich, deep blue skies with bright, well-defined stars. Set Image Control to Vivid with saturation at +2 to bring out the subtle colors in the Milky Way core. Keep contrast at +1 to separate stars from the sky background. Set white balance to 4200K for a balanced cool tone. Reduce sharpness to -1 to avoid sharpening artifacts on star points. This is the go-to recipe for classic Milky Way landscape shots.
| Setting | Value | |---------|-------| | Image Control | Vivid | | Saturation | +2 | | Hue | 0 | | Contrast | +1 | | Highlight Adj. | -2 | | Shadow Adj. | +2 | | Sharpness | -1 | | Clarity | +1 | | White Balance | 4200K |
Warm Galaxy Core
Designed to emphasize the warm golden and amber tones of the Milky Way's galactic center. Use Standard image control with saturation at +1 and shift the hue slightly warm. Set white balance higher at 5000K to bring out the warm hydrogen-alpha regions in the Milky Way. Push shadow adjustment to +2 to reveal faint nebulosity. This recipe excels during summer months when the galactic core is high in the sky.
| Setting | Value | |---------|-------| | Image Control | Standard | | Saturation | +1 | | Hue | +1 | | Contrast | +1 | | Highlight Adj. | -1 | | Shadow Adj. | +2 | | Sharpness | 0 | | Clarity | +1 | | White Balance | 5000K |
Astro Monochrome
Black-and-white astrophotography has a dramatic, timeless quality. Switch to Monotone image control and push contrast to +3 for stark separation between the bright Milky Way band and the surrounding sky. Add grain effect at Low for a film-like texture that complements the organic pattern of stars. Set the filter effect to Green to brighten the Milky Way band against the sky background. This look transforms night sky images into something that feels almost otherworldly.
| Setting | Value | |---------|-------| | Image Control | Monotone | | Filter Effect | Green | | Toning | None | | Contrast | +3 | | Highlight Adj. | -1 | | Shadow Adj. | +1 | | Sharpness | 0 | | Clarity | +2 | | Grain Effect | Low |
Film Emulation Night Sky
Emulate the look of long-exposure film astrophotography with its characteristic warm color shifts and soft grain. Use Positive Film image control if available, or Standard with saturation at +1. Set white balance to 4800K for a slightly warm sky tone reminiscent of Fuji Velvia pushed a stop. Lower sharpness to -2 for the softer rendering typical of film lenses. Enable grain effect at Low to complete the analog look. This recipe brings a nostalgic, romantic quality to starry landscapes.
| Setting | Value | |---------|-------| | Image Control | Positive Film | | Saturation | +1 | | Hue | 0 | | Contrast | +2 | | Highlight Adj. | -2 | | Shadow Adj. | +1 | | Sharpness | -2 | | Clarity | 0 | | White Balance | 4800K | | Grain Effect | Low |
Field Techniques for Better Astrophotography
Scout Your Location During Daylight
Visit your shooting location before dark to find compelling foreground elements -- trees, rock formations, buildings, or water. The best astrophotography includes an interesting foreground that anchors the composition and provides a sense of scale against the immensity of the night sky. Use a compass or a star-tracking app to determine where the Milky Way will rise relative to your foreground.
Check the Moon Phase and Light Pollution
Two factors destroy astrophotography more than anything else:
- Moon phase: Shoot within five days of the new moon. A full or half moon washes out all but the brightest stars. Check a lunar calendar before planning any astro outing.
- Light pollution: Use a light pollution map to find locations rated Bortle 4 or darker. The GR III can capture the Milky Way from Bortle 4-5 skies, but Bortle 1-3 locations produce dramatically better results with visible nebulosity and star clouds.
Let Your Camera Adapt to Temperature
Moving a warm camera into cold night air causes condensation on the lens. Give the GR III 15-20 minutes to equalize with the ambient temperature before shooting. Keep a lens cloth handy in case fogging occurs, and store the camera in an outer pocket rather than against your body between shooting sessions.
Use a Compact Tripod
The GR III's light weight means even the smallest travel tripod provides adequate stability. A tabletop tripod like the Manfrotto PIXI works surprisingly well -- place it on a rock, wall, or car roof for a stable platform. For Milky Way shots requiring an upward angle, a flexible tripod that can tilt the camera toward the sky is ideal.
Shoot Foreground and Sky Separately
One of the most effective techniques for compact camera astrophotography is exposure blending:
- Shoot the sky at f/2.8, 15s, ISO 3200 for bright, sharp stars
- Shoot the foreground at f/2.8, 30s, ISO 6400 (or light paint it with a dim headlamp during a long exposure)
- Blend the two exposures in post-processing for a balanced image with detail in both sky and landscape
This technique compensates for the GR III's single focal length and limited light-gathering compared to dedicated astro setups.
Capture Multiple Frames for Stacking
Image stacking is the most powerful technique available to GR III astrophotographers. Capture 10-20 identical frames of the same composition, then align and stack them in software like Sequator (free) or Starry Landscape Stacker:
- Stacking 16 frames reduces noise by a factor of 4, equivalent to shooting at ISO 200 instead of ISO 3200
- The result is dramatically cleaner with more visible color in the Milky Way
- Use the GR III's interval shooting mode to automate capture: set 15-second exposures at 17-second intervals to allow buffer clearing
Common Astrophotography Mistakes to Avoid
Not verifying focus between compositions. If you reposition the camera or bump the tripod, recheck focus on a bright star. Even a slight shift in the focus ring ruins an entire series of shots.
Using autofocus. It will not work on stars. The camera will hunt endlessly and never lock. Always use manual focus for astro work.
Leaving image stabilization on. The shake reduction system fights against the tripod during long exposures, introducing subtle blur that is only visible when you zoom in on stars.
Shooting during twilight and expecting Milky Way detail. True astronomical darkness begins roughly 90 minutes after sunset (astronomical twilight). Shoot too early and the sky will be too bright for the galactic core to show.
Ignoring foreground composition. A sky full of stars is impressive, but without a strong foreground -- a lone tree, mountain ridge, or interesting silhouette -- the image lacks depth and visual interest.
Processing too aggressively. It is tempting to push clarity, contrast, and saturation to extreme levels in post. Restrained processing that preserves the natural gradation of the night sky produces images that hold up better at large sizes and look more believable.
Post-Processing Tips
Even with the best in-camera settings, astrophotography requires post-processing to reach its full potential:
- Shoot RAW and process in Lightroom, Capture One, or a dedicated astro tool like Siril
- Raise shadows and lower highlights to bring out the Milky Way structure without blowing out bright stars
- Add a slight S-curve to contrast for separation between the Milky Way band and the surrounding sky
- Adjust white balance to taste -- slightly cool (4000-4500K) for a classic blue sky, or slightly warm (5000-5500K) to emphasize the galactic core
- Use local adjustments to brighten the Milky Way core independently from the rest of the frame
- Apply noise reduction carefully -- preserve fine star detail while smoothing the sky background
Putting It Together
The Ricoh GR III may not replace a full-frame camera with a fast wide-angle lens for dedicated astrophotography, but it is remarkably capable for a camera that fits in your pocket. Its wide 28mm equivalent field of view, solid high-ISO performance, and featherlight build make it the ideal camera for those nights when you find yourself under a dark sky and want to capture the moment without hauling a heavy kit.
Master the manual focus procedure, apply the 500 Rule for sharp stars, use one of the preset recipes above as your starting point, and let image stacking work its magic for cleaner results. The night sky is one of the most rewarding subjects in photography, and the GR III is more than ready to take you there.
Browse our night sky and astrophotography preset collection to find recipes designed specifically for starry landscapes, or grab a complete preset bundle that includes astro-optimized looks alongside recipes for every other shooting scenario.