Ricoh GR III Desert Photography: Settings, Tips, and Best Recipes
The desert is one of the most visually striking environments a photographer can encounter. Vast sand dunes, cracked earth, dramatic skies, and extreme light create images that feel almost otherworldly. The Ricoh GR III, with its compact size, sharp 18.3mm lens, and robust image controls, is a surprisingly capable desert companion -- easy to carry through harsh terrain and quick to deploy when the light shifts.
This guide covers everything you need to shoot compelling desert photography with the GR III, from camera settings and preset recipes to field techniques and gear protection.
Why Desert Photography Stands Out
Desert landscapes offer visual qualities that are rare in other environments:
- Minimalist compositions with clean lines, repeating dune patterns, and vast negative space
- Extreme contrast between sunlit sand and deep shadows in ridges and valleys
- Warm color palettes ranging from pale gold to deep burnt orange depending on the time of day
- Textural detail in sand ripples, cracked mud, and wind-carved rock formations
- Dramatic skies with clear gradient blues, massive cloud formations, or star-filled nights with zero light pollution
The GR III's 28mm equivalent field of view is wide enough to capture sweeping dune vistas while still being tight enough to isolate patterns and textures in the sand.
Essential Camera Settings for Desert Shooting
Shooting Mode: Aperture Priority
Aperture Priority (Av) is the most versatile mode for desert photography. Light levels in the desert are typically very high during the day, so the camera will have no trouble selecting fast shutter speeds. You control depth of field while the GR III handles exposure.
Set your aperture based on the scene:
- f/8 to f/11 for landscape shots where you want sharp detail from the foreground dunes to the distant horizon
- f/5.6 for general walking-around shooting with a balance of sharpness and speed
- f/2.8 for isolating desert plants, rocks, or other foreground details against a soft sandy background
ISO Configuration
Desert daylight is intense. Keep ISO as low as possible for maximum image quality and dynamic range.
Configure Auto ISO through MENU > Shooting Settings > ISO Sensitivity:
- ISO range: 100-400 for daytime shooting (the GR III's base ISO of 200 is ideal, but 100 in extended mode works too)
- ISO range: 100-3200 for dawn, dusk, and night desert shooting
- Minimum shutter speed: 1/250s during the day to freeze any heat shimmer or wind-blown sand, 1/60s for calmer conditions
The harsh midday sun means you will rarely need to push above ISO 200 during the day. Save the higher ISO settings for blue hour and night sky shooting.
White Balance: Controlling the Warmth
White balance is critical in desert photography because the sand itself acts as a massive warm reflector. Getting this right determines whether your images feel naturally warm or artificially cool.
Daylight (5200K) is the safest default. It renders the desert's natural warmth accurately without overcooking the tones.
Shade (7500K) pushes the sand toward deeper gold and amber. Use this when you want to exaggerate the warmth, especially during golden hour when the desert glows.
CTE (Color Temperature Enhancement) amplifies the existing warm tones in the scene. During sunrise and sunset, CTE produces intensely warm, almost copper-toned images that capture the emotional impact of desert light.
Manual Kelvin at 5500-6500K gives you precise control. Start at 5500K for neutral warmth and push toward 6500K for richer golden tones.
Avoid Auto White Balance in the desert. AWB will try to neutralize the warm sand tones, producing images that look flat and lifeless compared to what your eyes actually saw.
Metering and Exposure Compensation
The desert is a high-key environment. Bright sand dominates the frame and fools the camera's meter into underexposing, just like snow.
Multi-segment metering works adequately for most desert scenes, but you will almost always need positive exposure compensation.
Use exposure compensation as your primary adjustment:
- +0.7 to +1.3 EV for scenes dominated by bright sand -- this prevents the sand from going muddy gray
- 0 EV when there is a mix of sky, sand, and darker elements like rocks or vegetation
- -0.3 to -0.7 EV at golden hour to saturate the warm tones and preserve highlight detail in the sky
- -1.0 to -1.5 EV for silhouettes against a blazing desert sunset
Check your histogram regularly. The histogram should be shifted right for sand-dominant scenes, with the sand tones sitting in the upper quarter but not clipping.
Focus Settings
Desert landscapes are generally straightforward to focus, but a few settings help:
Snap Focus at 2.5m or 5m is excellent for walking through dunes. Set it to 5m with f/8 and nearly everything from a few meters to infinity will be sharp. This eliminates autofocus hunting on featureless sand.
Manual Focus set to infinity works perfectly for distant dune landscapes. The GR III's focus peaking overlay confirms sharpness across the frame.
AF with Select mode is useful when you want to place focus on a specific element like a desert plant, rock formation, or footprint trail in the sand.
Best Preset Recipes for Desert Photography
Warm Sand Classic
This recipe captures the natural warmth of desert sand with a classic, true-to-life rendering. Set Image Control to Standard, push Saturation to +1, and set Contrast to 0. Use Daylight white balance to preserve the ambient warmth. Set Sharpness to +1 to bring out the fine texture in sand ripples. The result is clean, warm, and detailed -- the desert as your eyes remember it.
Burnt Sienna
For a richer, more cinematic desert look with deep warm tones. Switch Image Control to Vivid, set Saturation to 0 (Vivid already boosts it), and push Contrast to +1. Use Shade white balance to shift the sand toward burnt orange and copper. Set Key Adjustment to -1 to slightly underexpose for deeper, more saturated colors. This recipe makes golden hour desert shots feel like frames from a film.
Desert Bleach
A high-key, sun-bleached look that captures the scorching intensity of midday desert light. Set Image Control to Bright, Contrast to -1, and Saturation to -1 for a desaturated, faded palette. Use Daylight white balance and set Key Adjustment to +1 for a lifted, airy exposure. Sharpness at 0 keeps the rendering smooth. The result is a washed-out, heat-haze aesthetic that conveys the harshness of the desert.
Dune Monotone
Desert landscapes translate beautifully to black and white, where the play of light and shadow across dunes becomes the entire story. Set Image Control to Monotone with a red filter effect to darken blue skies and brighten the warm sand tones. Push Contrast to +3 and set Grain Effect to Low for a classic film look. The red filter is key -- it separates the pale sand from the deep sky dramatically, creating graphic, high-impact images.
Desert Night
For shooting the Milky Way and star fields over desert landscapes with zero light pollution. Set Image Control to Standard, Saturation to +1, and Contrast to -1 for smooth tonal transitions in the dark sky. Use Manual white balance at 4000K to render the night sky with natural cool tones while keeping any warm ambient light on the sand. Sharpness at +2 brings out star detail. Pair this with manual exposure settings: f/2.8, 15-20 seconds, ISO 3200.
Techniques for Better Desert Photos
Chase the Edges of the Day
The desert is at its most photogenic during the first and last hours of sunlight. At sunrise and sunset, the low-angle light rakes across the dunes and creates deep shadows along every ridge and ripple. This sidelight reveals the three-dimensional texture of the sand that is completely invisible at midday when the overhead sun flattens everything.
Plan to be on location 30 minutes before sunrise. The pre-dawn blue hour over desert terrain is hauntingly beautiful, and the transition from cool blue to warm gold as the sun breaks the horizon is one of the most dramatic light changes in all of photography.
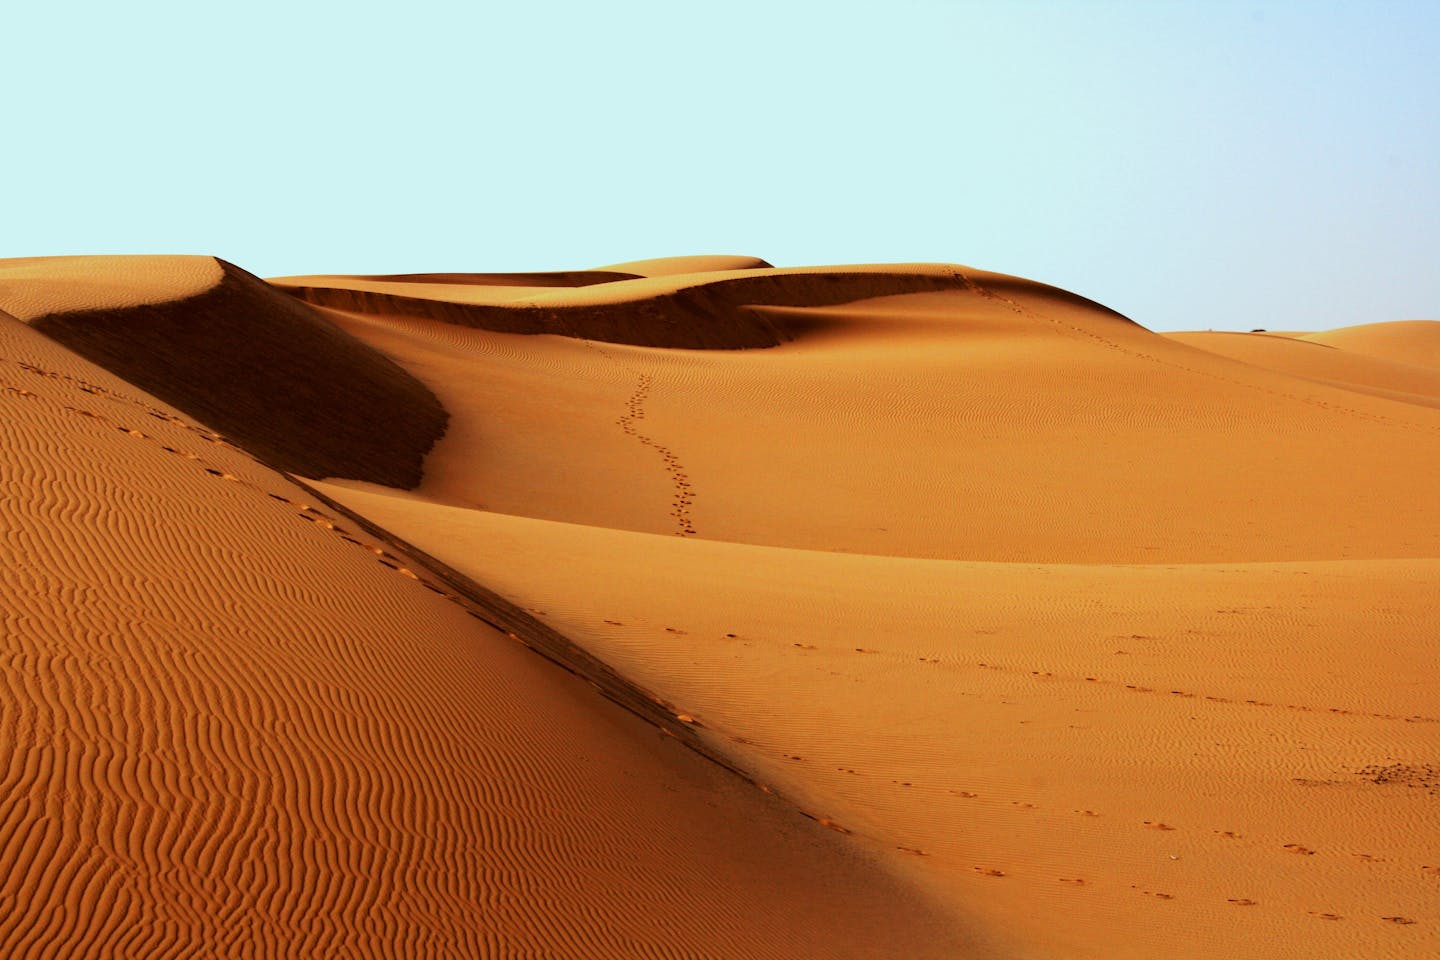
Use Leading Lines in the Sand
Dune ridgelines, footprint trails, tire tracks, and wind-carved ripple patterns all create powerful leading lines. Position these lines so they draw the viewer's eye from the foreground into the depth of the image. The GR III's 28mm field of view is ideal for emphasizing foreground lines while maintaining a sense of scale in the wider landscape.
Get low. Crouching or even lying on the sand puts those ripple patterns front and center, transforming them from subtle texture into dominant compositional elements.
Embrace Negative Space
Deserts are naturally minimalist. A single dune ridge against a clear sky, a lone tree in an expanse of sand, or a set of footprints crossing an otherwise empty frame -- these simple compositions are often the most powerful.
Use the sky as negative space. Position your subject in the lower third of the frame and let the vast desert sky dominate. The GR III's sharp rendering ensures that even small subjects remain readable against the open sand or sky.
Shoot the Details
While sweeping vistas are the obvious subject, the desert rewards close attention to details. Sand ripples form hypnotic patterns at your feet. Cracked dry lake beds create natural mosaics. Desert plants display incredible textures and shapes.
Switch to Macro mode on the GR III for extreme close-ups of sand textures and small desert flora. At f/2.8, the shallow depth of field isolates individual sand grains and creates abstract compositions that viewers rarely associate with the desert.
Work With the Wind
Wind reshaping the sand is one of the desert's most dynamic events. Look for sand streaming off dune crests -- these wisps of airborne sand catch the light beautifully, especially during golden hour. Use a faster shutter speed (1/500s or higher) to freeze individual sand particles mid-flight, or slow down to 1/30s for a motion-blurred, misty effect.
Position yourself so the wind-blown sand is backlit by the sun for maximum drama. The sand particles glow like gold dust against a darker background.
Include a Sense of Scale
Desert landscapes can appear flat and featureless without something to anchor the viewer's sense of scale. A person walking along a dune ridge, a distant building, tire tracks, or even your own shadow can provide the reference point that transforms a pleasant abstract into a jaw-dropping landscape.
Human figures work especially well -- a small silhouette against a massive dune wall instantly communicates the overwhelming scale of the desert environment.
Protecting Your GR III in the Desert
The desert is one of the harshest environments for camera gear. Sand and heat are the two main threats.
Sand protection is critical. Fine desert sand can work its way into every crevice. Keep the GR III in a sealed pouch or ziplock bag when not shooting. Never change settings with sandy fingers -- wipe your hands first. Be especially careful with the lens barrel, which extends when the camera powers on. A single grain of sand in the wrong place can jam the mechanism.
Heat management matters. Direct sun can heat the camera body to uncomfortable levels and may trigger thermal protection shutdowns. Keep the GR III in shade when not actively shooting. A light-colored camera pouch reflects heat better than a dark one.
Clean after every session. Use a rocket blower (not compressed air, which can force sand deeper into gaps) to remove sand from the lens, body seams, and control dial. A soft lens brush removes stubborn particles from the front element.
Battery life in extreme heat. High temperatures can actually improve battery performance slightly, but storing batteries in extreme heat (above 45C/113F) degrades their long-term capacity. Keep spare batteries in an insulated pouch rather than loose in a hot bag.
Best Desert Locations for GR III Photography
The compact, pocketable GR III is perfect for desert destinations where you want to travel light:
- Sand dune fields offer the most classically photogenic desert scenes. The repeating curves, ridgelines, and wind patterns provide endless compositions.
- Slot canyons feature narrow, winding passages with incredible light beams and colorful sandstone walls. The GR III's wide lens captures these tight spaces well.
- Salt flats create surreal, mirror-like reflections after rain and stark white minimalist landscapes in dry conditions.
- Rocky desert terrain with mesas, buttes, and eroded formations provides dramatic foreground and background elements.
- Desert towns and ruins combine human elements with the arid landscape for documentary and travel photography.
Putting It Together
Desert photography with the Ricoh GR III is about working with extreme light and embracing simplicity. Keep your white balance warm, expose for the sand, protect your gear, and focus on the edges of the day when the light transforms the landscape into something extraordinary. The GR III's compact size means it goes everywhere you do -- even into the most remote and challenging terrain.
Explore our landscape and warm-tone presets to find recipes optimized for desert shooting, or grab a complete preset bundle that covers desert alongside every lighting condition you will encounter.