Ricoh GR III Wedding Photography: Settings, Tips, and Best Preset Recipes
The Ricoh GR III is not the first camera most people think of for wedding photography, and that is exactly what makes it so effective. While professional wedding photographers carry full-frame bodies with fast zoom lenses, the GR III occupies a completely different space -- it is the camera you slip into a jacket pocket, the one that captures the real moments happening between the posed shots. Its compact size, silent shutter, and exceptional image quality make it an ideal second camera or a powerful primary tool for intimate elopements and small ceremonies.
In this guide, we cover the best Ricoh GR III settings for every phase of a wedding day and share preset recipes that deliver timeless, film-inspired results straight out of camera.
Why the Ricoh GR III Excels at Weddings
The GR III brings several distinct advantages to wedding photography that larger cameras cannot match:
- Pocket-sized and silent means you can shoot during the ceremony without drawing attention, capturing genuine emotion rather than posed awareness
- 28mm wide-angle perspective includes environmental context -- the venue, the decor, the guests -- telling a richer story than tight telephoto shots alone
- Fast f/2.8 aperture handles low-light receptions and dim churches without pushing ISO to extremes
- Snap focus mode lets you pre-set a focus distance and shoot instantly, perfect for fast-moving reception moments
- Exceptional color science renders skin tones naturally and handles mixed lighting (tungsten chandeliers, candlelight, DJ lights) with surprising accuracy
The GR III will not replace a dedicated wedding kit for formal portraits and ceremony coverage, but it captures the candid, in-between moments that couples treasure most -- the whispered conversation before the walk down the aisle, the tears during the toast, the dance floor chaos at midnight.
Camera Settings by Wedding Phase
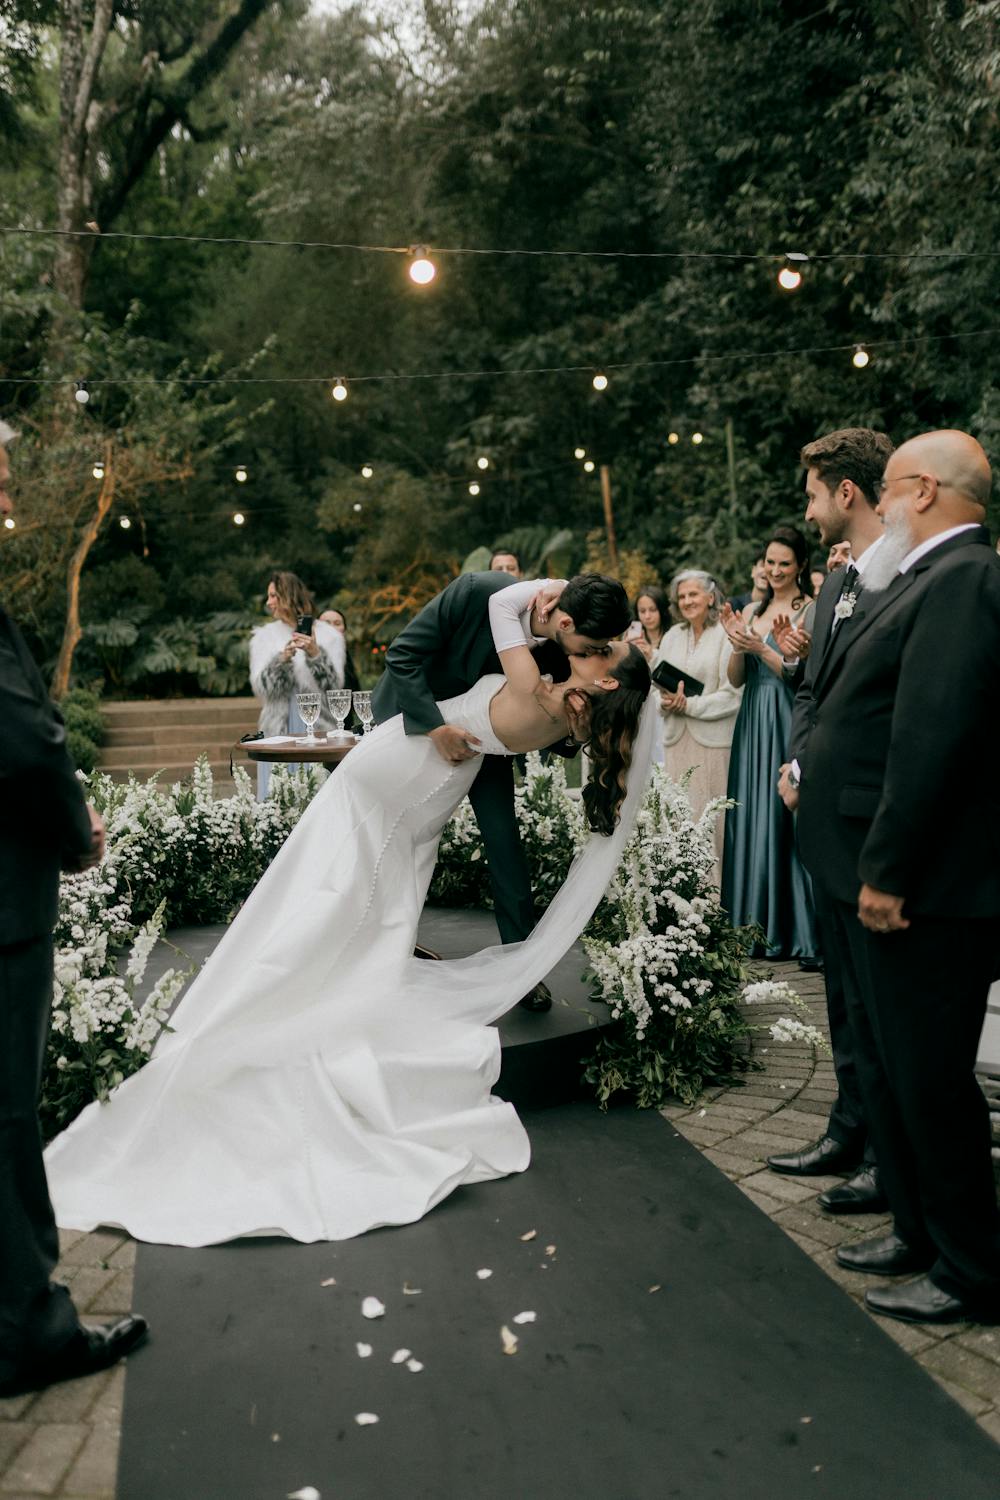
Ceremony: Quiet and Precise
The ceremony demands discretion above all else. You need to shoot silently and get sharp results in what is often a dimly lit venue.
| Setting | Value | Why | |---|---|---| | Shooting Mode | Av (Aperture Priority) | Control depth of field while the camera handles exposure | | Aperture | f/2.8 | Maximum light gathering for dim venues | | ISO | Auto (100–6400) | Let the camera adapt to changing light | | Focus Mode | Snap Focus (2.5m) | Instant shutter response, no AF hunting noise | | Metering | Center-weighted | Expose for the couple, not the bright windows behind them | | White Balance | AWB or CTE | CTE preserves the warm glow of candles and church lighting | | Image Stabilization | On | Essential for handheld shooting in low light |
Set snap focus to 2.5 meters if you are seated in the audience, or 1.5 meters if you have closer access. At f/2.8 with a 28mm lens, the depth of field at 2.5 meters covers roughly 1.8 to 3.8 meters -- enough to keep the couple sharp without needing to autofocus.
Getting Ready: Intimate Details
The preparation phase is where the GR III truly shines. Capture the dress hanging in the window, the rings on a table, hands being held, nervous laughter in the mirror.
| Setting | Value | Why | |---|---|---| | Shooting Mode | Av | Flexibility for varying indoor light | | Aperture | f/2.8 – f/4 | f/2.8 for subject isolation, f/4 for detail shots needing more depth | | Focus Mode | Macro (for details) / AF (for people) | Switch to macro for rings, invitations, and close-up details | | White Balance | Daylight or Shade | Consistent warm tones across the preparation session | | Exposure Compensation | +0.3 to +0.7 | Keeps skin bright and airy, avoids muddy shadows |
For flat-lay detail shots of rings, invitations, and accessories, switch to Macro mode and get within 6–12 centimeters. The 28mm lens at macro distances creates a surprisingly shallow depth of field that isolates small subjects beautifully.
Reception: Fast and Adaptive
Receptions are chaotic. The light changes constantly -- from golden hour cocktails to dark dance floors with colored DJ lights. Speed and adaptability matter more than precision here.
| Setting | Value | Why | |---|---|---| | Shooting Mode | TAv or P | Let the camera manage both aperture and shutter speed in unpredictable light | | ISO | Auto (100–6400) | The GR III handles ISO 3200 and 6400 well with noise reduction | | Focus Mode | Snap Focus (1.2m) | Dance floor distances are close; pre-focus eliminates lag | | Shutter Speed | 1/125 minimum | Freeze movement on the dance floor | | White Balance | AWB | Mixed lighting changes too fast for manual WB | | Continuous Shooting | On | Burst mode catches peak expressions and movement |
For dance floor photography, embrace the grain. Push ISO to 6400 if needed -- a grainy, sharp photo of a genuine moment is infinitely better than a clean, blurry one. The GR III's noise at high ISO has a pleasant, film-like quality that actually suits the mood of reception photography.
Best Preset Recipes for Wedding Photography
Romantic Film Recipe
This recipe emulates the warm, soft tones of classic wedding film stocks like Portra 400. Skin tones glow with gentle warmth, highlights roll off smoothly, and shadows retain detail without going muddy.
| Setting | Value | |---|---| | Image Control | Soft | | Saturation | +1 | | Hue | 0 | | High/Low Key Adjust | +1 | | Contrast | -1 | | Contrast (Highlight) | -2 | | Contrast (Shadow) | -1 | | Sharpness | -1 | | Shading | +1 | | Clarity | -2 | | White Balance | CTE |
The negative highlight contrast prevents blown-out white dresses -- one of the biggest challenges in wedding photography. The CTE white balance preserves the natural warmth of venue lighting, giving images that golden, nostalgic quality couples love.
Elegant Black and White Recipe
Black-and-white wedding photography is timeless. This recipe delivers rich, full-toned monochrome images with smooth skin rendering and deep blacks that print beautifully.
| Setting | Value | |---|---| | Image Control | Monotone | | Filter Effect | Green | | Toning | Warm | | High/Low Key Adjust | 0 | | Contrast | +1 | | Contrast (Highlight) | -1 | | Contrast (Shadow) | +1 | | Sharpness | 0 | | Shading | +1 | | Clarity | +1 | | Grain Effect | Low |
The green filter flatters skin tones in monochrome by lightening them slightly and smoothing blemishes. The warm toning adds a subtle sepia quality that feels classic without being heavy-handed. Low grain adds analog texture that reinforces the timeless look.
Candlelit Ceremony Recipe
For ceremonies lit by candles, warm tungsten, or string lights, this recipe leans into the amber glow rather than correcting it away. The result feels warm, intimate, and atmospheric.
| Setting | Value | |---|---| | Image Control | Standard | | Saturation | 0 | | Hue | 0 | | High/Low Key Adjust | 0 | | Contrast | -1 | | Contrast (Highlight) | -2 | | Contrast (Shadow) | 0 | | Sharpness | 0 | | Shading | 0 | | Clarity | -1 | | White Balance | Tungsten +2 stops warm (Manual K: 3800K) |
Setting the white balance to a manually warm Kelvin temperature tells the camera to keep the amber tones instead of neutralizing them. The reduced contrast and clarity soften the scene, creating a mood that matches the intimacy of a candlelit ceremony.
Bright and Airy Outdoor Recipe
For outdoor ceremonies and golden hour portraits, this recipe produces clean, luminous images with lifted shadows and soft highlights -- the modern editorial wedding look.
| Setting | Value | |---|---| | Image Control | Bright | | Saturation | -1 | | Hue | 0 | | High/Low Key Adjust | +2 | | Contrast | -2 | | Contrast (Highlight) | -2 | | Contrast (Shadow) | -2 | | Sharpness | -1 | | Shading | 0 | | Clarity | -1 | | White Balance | Daylight |
The aggressive negative contrast across highlights and shadows creates the signature flat, airy look popular in modern wedding photography. The positive high/low key adjust brightens the overall image, while the reduced saturation keeps colors from looking oversaturated in warm light.
Wedding Photography Techniques with the GR III
Shoot from the Hip
The GR III's compact size makes it perfect for hip-level shooting. Hold the camera at your waist, point it in the general direction of your subject, and shoot using snap focus. This perspective creates dynamic, candid images with a natural, unguarded quality. The wide 28mm field of view is forgiving -- you can crop and straighten in post without losing too much resolution.
Work the Wide Angle for Context
Resist the urge to crop tight. The 28mm lens naturally includes the venue, the guests, the flowers, and the atmosphere around the couple. These wide, environmental shots become some of the most valued images in a wedding gallery because they transport the viewer back to the moment and the place.
Use Burst Mode for Toasts and First Dance
Speeches, toasts, and the first dance are once-in-a-lifetime moments with unpredictable timing. Switch to continuous shooting and hold the shutter through key moments. The GR III shoots at approximately 4 frames per second -- enough to capture the peak expression during a laugh, the exact moment of a kiss, or the spin during a first dance.
Embrace Available Light
The GR III does not have a powerful built-in flash, and you would not want to fire one during a ceremony anyway. Learn to find and use available light -- window light in the bridal suite, the warm glow of the altar, the colored lights at the reception. Position yourself so the light falls on your subject's face, and let the ambient atmosphere carry the mood.
Shoot Details Early
Arrive before the guests and photograph the details while they are pristine -- the table settings, the flowers, the cake, the place cards, the ceremony arch. Switch to macro mode for rings and small accessories. These shots round out the story and give the couple a complete visual record of the effort that went into their day.
Recommended Workflow for a Wedding Day
- Preparation phase: Switch between macro mode for details and AF mode for candid portraits, use the Romantic Film or Bright and Airy recipe
- Ceremony: Set snap focus to 2.5m, apply the Candlelit Ceremony recipe for indoor venues or Bright and Airy for outdoor, shoot silently and discreetly
- Couple portraits: Switch to AF with face detection, use f/2.8 for shallow depth of field, apply the Romantic Film recipe
- Reception and toasts: Switch to snap focus at 1.2m, enable burst mode, use AWB for mixed lighting
- Dance floor: Push ISO to 3200–6400, embrace the grain, keep shooting through the energy
Pairing Wedding Photos with the Right Presets
Wedding photography benefits enormously from consistent, cohesive color grading across the entire gallery. Our preset collections include recipes specifically tuned for warm ambient light, mixed venue conditions, and natural skin tone rendering -- exactly the challenges you face at a wedding.
Browse our full collection of Ricoh GR III presets to find recipes that match your wedding photography style, or explore our preset bundles for curated sets that cover every phase of the day from preparation to last dance.