Ricoh GR III Flower & Garden Photography: Settings, Recipes, and Seasonal Tips
The Ricoh GR III and flowers are a natural pairing. Its 28mm lens captures everything from sweeping garden beds to tight petal details, and the 6cm macro mode gets you closer than most dedicated camera systems without swapping a single lens. There is no gear bag to carry through the botanical garden, no tripod to set up among the rows — just a pocket-sized camera with an APS-C sensor that renders color and bokeh with surprising richness.
Whether you are shooting spring tulip fields, a backyard rose garden, or wildflowers along a hiking trail, this guide covers the settings, preset recipes, and techniques that will help you get the most out of your GR III in any floral environment.
Why the Ricoh GR III Excels at Flower & Garden Photography
Flower photography rewards cameras that are small, fast, and optically sharp at close distances. The GR III checks every box:
- Macro mode down to 6cm lets you fill the frame with a single bloom, capturing stamen details, pollen texture, and water droplets without any add-on lens
- 28mm f/2.8 lens gives you two perspectives in one — step back for environmental garden shots, step in for isolated bloom portraits
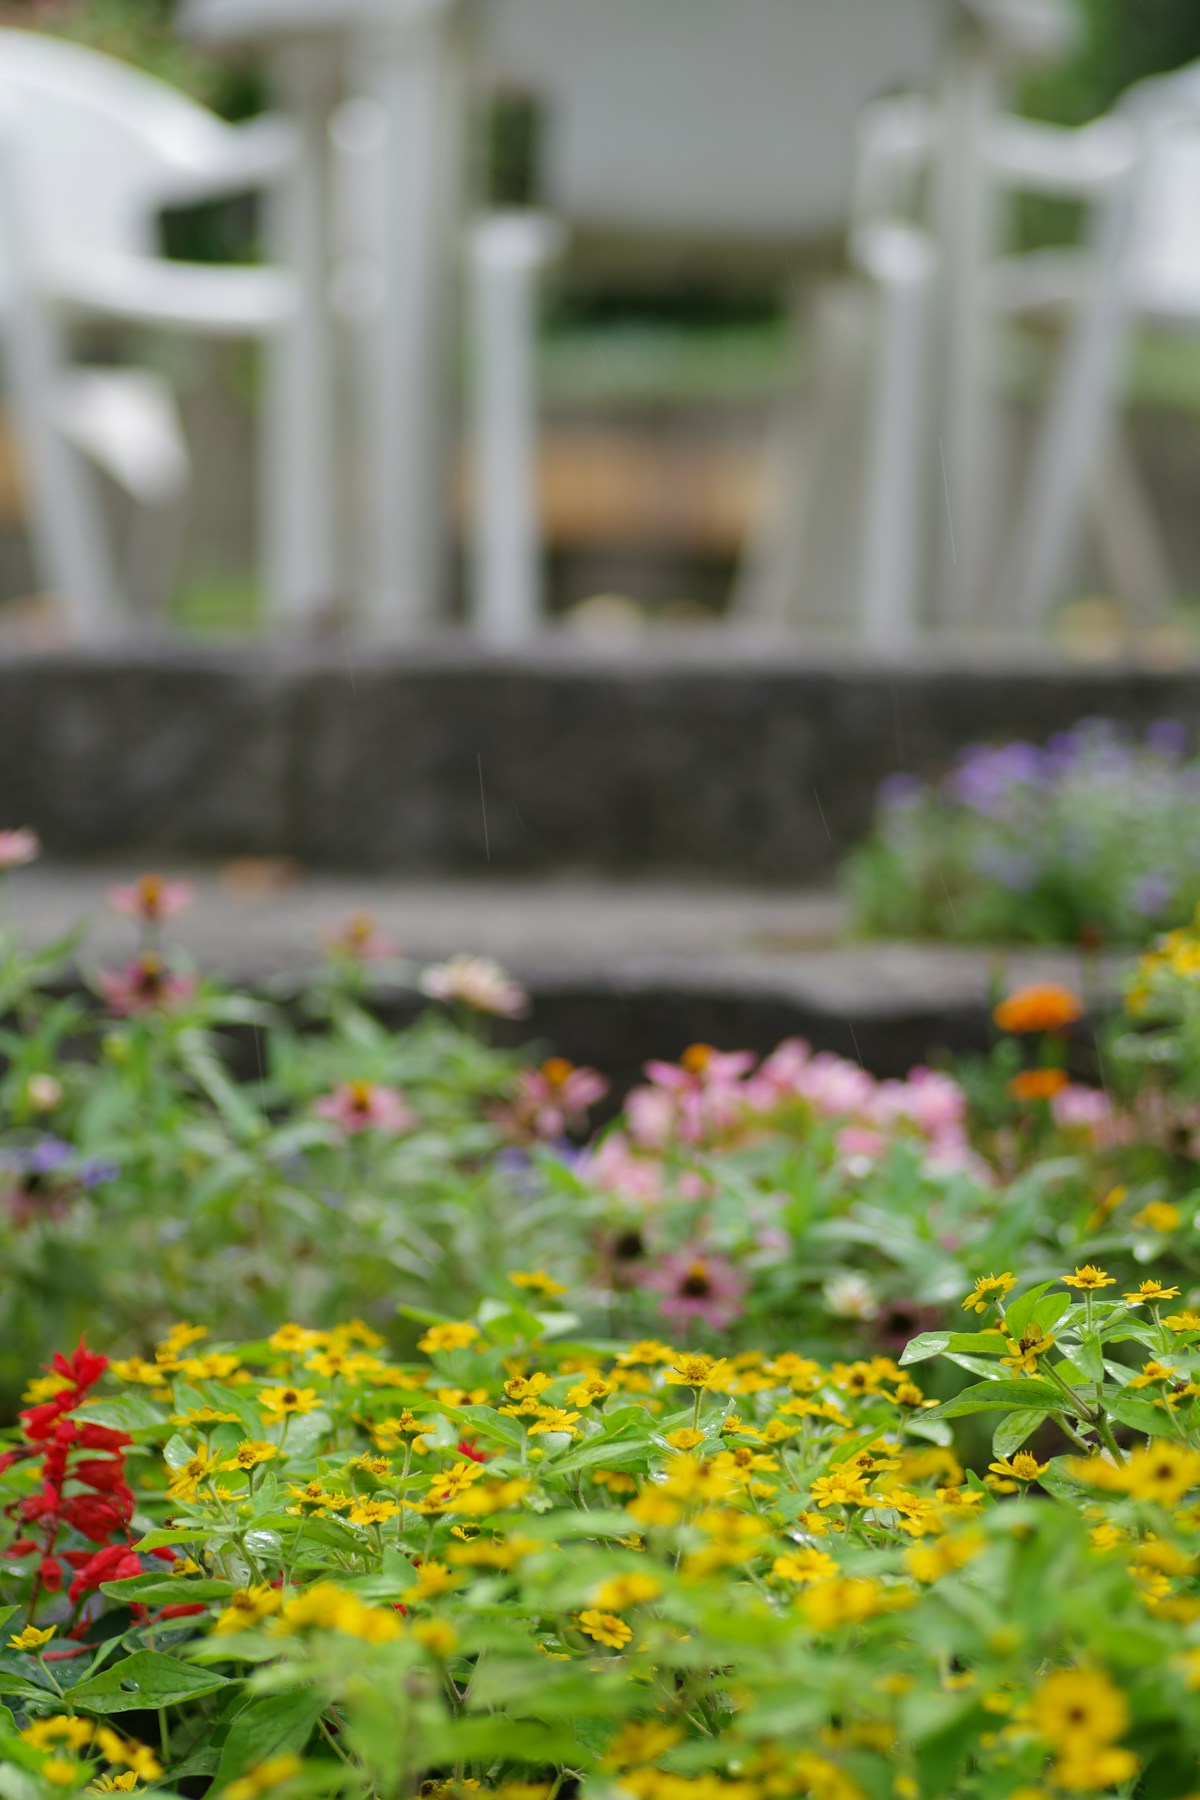
- APS-C sensor produces genuine background blur at f/2.8, turning busy garden backgrounds into smooth, painterly washes of color
- Shake Reduction (SR) provides up to 4 stops of stabilization, critical for handheld macro work where even breathing can shift your focal plane
- Compact size means you can crouch, kneel, and maneuver between garden rows without a heavy rig getting in the way
- Touch AF lets you tap exactly which petal or stamen you want in focus — essential when depth of field is razor-thin at close range
The 28mm focal length is wider than most flower photographers expect, but that is exactly its strength. It lets you include context — the garden path behind a rose bush, the greenhouse glass above an orchid, the morning light filtering through a lavender field. When you want tighter framing, macro mode and cropping from the 24MP sensor give you plenty to work with.
Essential Camera Settings for Flower Photography
Shooting Mode: Aperture Priority (Av)
Depth of field is the single most important variable in flower photography. Aperture Priority gives you direct control over how much of the bloom stays sharp while the camera adjusts exposure automatically as clouds pass or you move between sun and shade.
Set the mode dial to Av and use the rear dial to adjust aperture. This mode adapts instantly to the shifting light conditions you encounter moving through a garden.
Aperture Selection
Your aperture choice completely changes the mood of a flower photo:
- f/2.8 — Maximum blur. Isolates a single petal or stamen against a dreamy, abstract background. Best for single-bloom portraits where you want the subject to float against color.
- f/4 — A good balance. More of the flower head stays sharp while the background still melts away. The go-to setting for most individual flower shots at close range.
- f/5.6 — Use when you want an entire flower head in focus from front to back. Works well at the macro distance range where depth of field is extremely shallow.
- f/8 to f/11 — The garden landscape apertures. When you want a full flower bed, a garden path, or an environmental scene in sharp focus from foreground blooms to background hedges.
For macro work, even f/5.6 may give you only millimeters of sharp focus. Consider focus stacking by taking multiple shots at slightly different focus distances — the GR III's touch focus makes it easy to shift the focus point between frames.
ISO and Exposure
Navigate to MENU > Shooting Settings > ISO Sensitivity:
- ISO Auto with an upper limit of ISO 1600 — flowers are best rendered with the cleanest files possible, and most garden shooting happens in good light
- Minimum shutter speed: 1/125s for general garden shooting, 1/250s if there is any breeze moving the blooms
- In overcast conditions or shade, push to ISO 3200 if needed — a sharp shot with mild noise beats a motion-blurred petal
Exposure Compensation is your best friend in flower photography:
- +0.7 to +1.0 EV for white, yellow, or pastel flowers — prevents the camera from underexposing bright petals
- -0.3 to -0.7 EV for deep red, purple, or dark flowers — prevents blown highlights and preserves rich saturation
- Check the histogram after your first few shots and adjust from there
Focus Settings
Navigate to MENU > Shooting Settings > AF Mode:
- Macro Mode ON (flower icon on the side switch) — essential for any shot within 25cm. This overrides the standard focus range and lets the lens focus down to 6cm
- AF Area: Spot — the smallest AF area gives you precise control over which part of the flower is sharpest
- Touch AF + Shutter: ON — tap the screen on the exact petal or stamen you want in focus and the camera focuses and fires in one motion
- For critical macro shots, switch to MF (Manual Focus) and use the rear dial for fine adjustment. The GR III's focus peaking highlights the in-focus edges in your choice of color
White Balance
Flowers demand accurate color, so white balance matters more here than in most genres:
- AWB (Auto White Balance) works well in mixed outdoor light and preserves natural petal colors
- Daylight (5500K) locks in consistent color when shooting in direct sunlight — avoids the slight shifts AWB can introduce between frames
- Cloudy (6500K) adds a gentle warmth that enhances golden and warm-toned flowers on overcast days
- CTE (Color Temperature Enhancement) amplifies existing warm or cool tones — beautiful for golden hour garden shoots, but can push reds and oranges too far
Preset Recipes for Flower & Garden Photography
Recipe 1: Botanical Vivid
A vibrant, saturated look that makes colors pop without crossing into artificial territory. Designed for bright garden scenes in good light.
| Setting | Value | |---------|-------| | Image Control | Vivid | | Saturation | +2 | | Hue | 0 | | High/Low Key Adjust | +1 | | Contrast | -1 | | Contrast (Highlight) | -2 | | Contrast (Shadow) | +1 | | Sharpness | +2 | | Sharpening | 3 | | Clarity | +2 | | Noise Reduction | 2 | | White Balance | Daylight | | Exposure Comp | +0.3 |
When to use it: Bright, colorful flower beds. Tulip fields, sunflower rows, mixed perennial borders. The boosted saturation and clarity make individual colors distinct, while the pulled-back highlight contrast prevents blown-out whites and yellows.
Recipe 2: Soft Petal
A dreamy, pastel look with reduced contrast and gentle tones. Perfect for roses, peonies, and any soft-colored bloom.
| Setting | Value | |---------|-------| | Image Control | Standard | | Saturation | -1 | | Hue | 0 | | High/Low Key Adjust | +2 | | Contrast | -2 | | Contrast (Highlight) | -3 | | Contrast (Shadow) | -1 | | Sharpness | +1 | | Sharpening | 2 | | Clarity | 0 | | Noise Reduction | 3 | | White Balance | Cloudy | | Exposure Comp | +0.7 |
When to use it: Pastel blooms, white flowers, overcast garden light. The reduced contrast and slight overexposure create an airy, ethereal quality. The Cloudy white balance adds a flattering warmth to pale petals.
Recipe 3: Moody Botanical
Dark, rich tones with deep shadows and saturated color. Designed for dramatic flower portraits and dark-petaled blooms.
| Setting | Value | |---------|-------| | Image Control | Standard | | Saturation | +1 | | Hue | 0 | | High/Low Key Adjust | -2 | | Contrast | +2 | | Contrast (Highlight) | 0 | | Contrast (Shadow) | +3 | | Sharpness | +3 | | Sharpening | 3 | | Clarity | +3 | | Noise Reduction | 2 | | White Balance | Daylight | | Exposure Comp | -0.7 |
When to use it: Deep red roses, dark dahlias, purple irises — any bloom that benefits from a moody, editorial feel. The high clarity and contrast emphasize texture in petals and leaves. The negative exposure compensation keeps the background dark and dramatic.
Recipe 4: Vintage Garden
A film-inspired look with warm tones, gentle grain, and slightly muted highlights. Evokes the feeling of old botanical prints.
| Setting | Value | |---------|-------| | Image Control | Bleach Bypass | | Saturation | +1 | | Hue | +1 | | High/Low Key Adjust | 0 | | Contrast | +1 | | Contrast (Highlight) | -2 | | Contrast (Shadow) | +2 | | Sharpness | +1 | | Sharpening | 2 | | Clarity | +1 | | Noise Reduction | 1 | | White Balance | CTE | | Exposure Comp | 0 |
When to use it: Cottage gardens, wildflower meadows, heritage rose gardens — any scene with a timeless quality. The Bleach Bypass base adds a subtle desaturation that the boosted saturation partially recovers, creating a nuanced, film-like palette. CTE white balance enhances warm golden tones.
Recipe 5: Macro Detail
Optimized for extreme close-up work where texture, sharpness, and accurate color rendition matter most.
| Setting | Value | |---------|-------| | Image Control | Standard | | Saturation | 0 | | Hue | 0 | | High/Low Key Adjust | 0 | | Contrast | 0 | | Contrast (Highlight) | -1 | | Contrast (Shadow) | 0 | | Sharpness | +4 | | Sharpening | 4 | | Clarity | +2 | | Noise Reduction | 2 | | White Balance | AWB | | Exposure Comp | 0 |
When to use it: Extreme close-ups of pollen, water droplets, petal veins, and insect visitors. The high sharpness and clarity bring out fine texture detail that makes macro shots compelling. Neutral color and contrast settings ensure accuracy, letting the subject speak for itself.
Composition Techniques for Flower Photography
Get Low
Most people photograph flowers from standing height — looking down. Crouch, kneel, or lie on the ground to shoot at the flower's level or even from below. This perspective transforms ordinary garden shots into immersive images that place the viewer inside the scene.
Use the Background as a Design Element
With the GR III at f/2.8, background flowers become colored shapes. Use this deliberately:
- Position a red bloom behind a white subject for a warm color accent
- Shoot toward the sky for a clean, bright background
- Find dark shade behind your subject for dramatic contrast
- Look for patterns of light and shadow in the background — dappled sunlight through leaves creates beautiful bokeh
Follow the Light
The quality of light transforms flower photography more than any camera setting:
- Overcast days provide the most even, flattering light for flowers — no harsh shadows, no blown highlights, saturated colors
- Golden hour adds warmth and long shadows that give depth to garden scenes
- Backlight through translucent petals reveals veins and creates a luminous glow — one of the most striking effects in flower photography
- Open shade (shade with a bright sky above) gives soft, directional light with gentle highlights
Isolate Your Subject
A single bloom against a simple background is almost always more compelling than a busy cluster of flowers. Look for:
- Flowers that stand taller than their neighbors
- Blooms at the edge of a group, with open space behind them
- A single flower of a different color in a field of similar ones
- Natural frames: arches, trellises, fences, or overhanging branches
Include Context for Environmental Shots
When you step back from macro mode, the 28mm lens shines for environmental garden photography:
- Include garden paths leading the eye toward flower beds
- Frame blooms against architecture — walls, gates, windows, greenhouses
- Capture the scale of a field by including the horizon
- Show the relationship between flowers and their environment — light, water, soil, insects
Seasonal Tips
Spring
Spring gardens explode with color. Cherry blossoms, tulips, daffodils, and hyacinths all peak in a narrow window.
- Arrive early — morning light is softer and gardens are less crowded
- Shoot after rain — water droplets on petals add instant visual interest (the GR III is not weather-sealed, so protect it between shots)
- Use the Soft Petal recipe for pastel spring blooms
- Watch for bees and butterflies — the GR III's fast AF can capture them mid-visit with a quick tap of the screen
Summer
Summer brings bold, saturated colors and intense light.
- Avoid midday — harsh overhead sun creates unflattering shadows and blown highlights. Shoot before 10am or after 4pm
- Sunflower fields are a summer highlight — use f/8 and include the sky for dramatic environmental shots
- Use the Botanical Vivid recipe to match summer intensity
- Look for lavender, dahlias, and wildflower meadows at their peak
Autumn
Autumn gardens shift toward warm golds, burnt oranges, and deep reds.
- Chrysanthemums, asters, and ornamental grasses are autumn stars
- Use the Vintage Garden recipe — its warm tones complement the season naturally
- Fallen petals, seed heads, and withered leaves create compelling subjects for the Moody Botanical recipe
- Late afternoon light through autumn foliage creates extraordinary backlight opportunities
Winter
Winter gardens are quieter, but not empty.
- Frost on petals is one of the most photogenic subjects you will ever find — shoot early before the sun melts it
- Hellebores, snowdrops, and winter jasmine bloom in the cold months
- Use the Macro Detail recipe for frost crystal close-ups
- Bare branches, seed pods, and dried flower heads make striking minimalist subjects in monochrome
Practical Tips for Garden Photography
- Bring a small spray bottle — misting flowers with water creates the look of morning dew on demand
- Use a piece of card as a wind shield — even a notebook held beside the flower can block enough breeze for a sharp macro shot
- Shoot in bursts — wind is the biggest enemy of flower photography. Take multiple shots and keep the sharpest
- Check your knees — carry a small foam pad if you plan to spend time shooting low. Wet garden soil is not kind to clothing
- Watch the edges of the frame — stray leaves, stems, or bright spots at the edges pull the eye away from your subject. A small shift in position often fixes it
- Protect your GR III — the camera is not weather-sealed. In dewy mornings or after rain, keep it in your pocket between shots and wipe the lens with a microfiber cloth
Making the Most of the GR III's Macro Mode
The GR III's macro mode is its secret weapon for flower photography. Here is how to get the best results:
- Flip the side switch to Macro (flower icon) — this tells the lens to focus in the 6cm to 25cm range
- Use Spot AF or Manual Focus — at macro distances, even small focus errors are visible. Spot AF gives you precision; MF with focus peaking gives you complete control
- Stabilize yourself — rest your elbows on the ground, lean against a wall, or brace the camera on a flat surface. At 6cm, camera shake is magnified enormously
- Stop down to f/4 or f/5.6 — at macro distances, f/2.8 gives you less than a millimeter of sharp focus. Stopping down even one stop dramatically increases your keeper rate
- Use the 2-second self-timer — this eliminates shake from pressing the shutter button. Alternatively, use the Ricoh GR III app on your phone as a remote trigger
- Look for the light — in macro, sidelight and backlight reveal texture and translucency. Front light flattens the image. Move around the flower to find the angle where the light does the most work
The GR III's macro mode puts it in a class of its own among compact cameras. No other pocket camera offers APS-C quality at 6cm — it is genuinely competitive with dedicated macro setups for botanical subjects.
Final Thoughts
Flower and garden photography is one of the most rewarding genres you can practice with the Ricoh GR III. The camera's combination of macro capability, APS-C image quality, and pocketable size means you are always ready to shoot — whether you are visiting a world-class botanical garden or just noticing a perfect bloom on your morning walk.
Start with the Botanical Vivid recipe for your first outing, then experiment with the others as you develop your eye for light, color, and composition. The presets give you a strong starting point; the real magic comes from learning to see flowers the way the camera sees them — as shapes, textures, and light.
Explore our full collection of Ricoh GR III preset recipes to find more looks for your flower photography. Each preset is designed to be loaded directly into your camera and used as-is or as a starting point for your own creative adjustments.