Ricoh GR III Landscape Photography: Settings, Recipes, and Composition Tips
Most photographers don't think "landscape" when they pick up a Ricoh GR III. The 28mm fixed lens and compact body seem built for street work, not sweeping vistas. But that assumption misses what makes this camera genuinely special for landscape photography: the combination of an APS-C sensor, incredible portability, and a lens sharp enough to resolve fine detail across the entire frame.
Whether you're hiking a mountain trail, walking along a coastline, or simply exploring a park at golden hour, the GR III delivers landscape images with depth, color, and clarity that rival cameras twice its size. This guide covers the settings, recipes, and techniques that will help you get the most out of your GR III in the field.
Why the Ricoh GR III Works for Landscape Photography
The GR III wasn't marketed as a landscape camera, but several features make it surprisingly well-suited for the job:
- 24.2MP APS-C sensor captures enough resolution for large prints and aggressive crops
- 28mm f/2.8 lens provides a natural wide-angle perspective without heavy barrel distortion
- Shake Reduction (4 stops) lets you shoot handheld at slower shutter speeds during golden hour and blue hour
- Built-in 2-stop ND filter enables long exposures for silky water and cloud movement without carrying external filters
- RAW + JPEG shooting gives you maximum flexibility for post-processing while still delivering finished images in-camera
- Weighs just 257g -- you'll actually bring it on hikes where a larger kit stays home
The 28mm focal length is often considered the sweet spot for landscape work. It's wide enough to capture expansive scenes but doesn't push subjects so far away that they lose impact. Foreground elements stay prominent, backgrounds retain scale, and the natural perspective avoids the exaggerated look of ultra-wide lenses.
Essential Camera Settings for Landscape Photography
Shooting Mode: Aperture Priority (Av)
For most landscape situations, Aperture Priority gives you the best balance of control and speed. You choose the aperture for your desired depth of field, and the camera handles shutter speed and ISO.
Set the mode dial to Av and use the rear dial to adjust aperture. This lets you react quickly when light changes -- critical during sunrise and sunset shoots where conditions shift minute by minute.
Switch to Manual (M) for long exposures, bracketed shots, or when you want absolute consistency across a series of images.
Aperture Selection
The GR III's lens is sharpest between f/5.6 and f/8. For landscape photography, these apertures also provide excellent depth of field:
- f/5.6 -- Best overall sharpness. Use when your subject is at a medium distance or beyond.
- f/8 -- Maximum depth of field with minimal diffraction. The default choice for front-to-back sharpness in most landscape scenes.
- f/11 -- Use when you need extreme depth of field with very close foreground elements. Slight diffraction softening begins here but is negligible.
- f/2.8 -- Reserved for isolating a single element (a flower, a rock formation) against a soft background. Not typical for landscapes but useful for environmental detail shots.
Avoid f/16 and smaller. Diffraction noticeably reduces sharpness on the GR III's APS-C sensor at these apertures, and you rarely need that much depth of field with a 28mm lens.
ISO Configuration
Navigate to MENU > Shooting Settings > ISO Sensitivity:
- Base ISO 200 for maximum dynamic range and minimum noise. Use this whenever shutter speed permits.
- Auto ISO with range set to ISO 200-1600 and minimum shutter speed of 1/60s for handheld landscape shooting.
- For tripod work, lock ISO at 200 and let the shutter speed extend as needed.
The GR III's sensor delivers clean files up to ISO 800. At ISO 1600, noise is present but well-controlled. Beyond that, you're trading image quality for handheld flexibility -- worth it in fading light, but use a support when possible.
Focus Settings
Autofocus (AF) with the focus point set to center works well for most landscape shots. Half-press to focus on your subject, recompose if needed, then shoot.
For landscapes with important foreground elements, use Touch AF to place the focus point precisely where you need maximum sharpness. The GR III's touchscreen makes this fast and intuitive.
Manual Focus with focus peaking is ideal for tripod work and hyperfocal distance techniques. Enable focus peaking in MENU > Shooting Settings > Focus Assist and set the distance scale to display on screen.
Hyperfocal distance tip: At f/8 on the GR III (28mm equivalent), focusing at approximately 3 meters gives you sharp focus from about 1.5 meters to infinity. This is the landscape photographer's secret to front-to-back sharpness without needing to stop down excessively.
White Balance
For landscape photography, white balance significantly affects mood:
- Daylight (5500K) -- Accurate, neutral rendering. Good baseline for midday shooting.
- Shade (7500K) -- Adds warmth. Excellent for golden hour when you want to enhance warm tones.
- Cloudy (6000K) -- Slight warmth. Natural-looking for overcast conditions.
- CTE (Color Temperature Enhancement) -- The GR III's unique mode that amplifies the existing color temperature. Sunsets become warmer, blue hour becomes cooler. Highly recommended for landscape work.
If shooting RAW, white balance is fully adjustable in post. But getting it right in-camera means your JPEG recipes produce finished images you can share immediately.
Metering and Exposure
- Multi-segment metering handles most landscape scenes well. The GR III's metering is reliable for evenly-lit scenes.
- Center-weighted metering is better for high-contrast scenes where the sky is much brighter than the foreground.
- Exposure compensation: Landscapes often benefit from -0.3 to -0.7 EV to protect highlights, especially when the sky is in frame. You can recover shadows in post, but blown highlights are gone forever.
Best Preset Recipes for Landscape Photography
These recipes are designed to give you finished landscape images straight from the camera. Each is tuned for specific conditions and moods.
Vivid Sunrise
A warm, saturated look that enhances golden hour light without crossing into unrealistic territory.
| Setting | Value | |---|---| | Image Control | Vivid | | Saturation | +2 | | Hue | 0 | | High/Low Key | 0 | | Contrast | +1 | | Contrast (Highlight) | -1 | | Contrast (Shadow) | +1 | | Sharpness | +2 | | Shading | 0 | | Clarity | +2 | | White Balance | CTE |
This recipe brings out the warm tones of sunrise and sunset while the negative highlight contrast preserves detail in bright skies. The added shadow contrast gives foreground elements depth without going muddy. CTE white balance amplifies the natural warmth of the light.
Cool Mountain Air
A clean, slightly cool look for high-altitude and overcast landscape scenes. Think alpine meadows, misty forests, and rugged coastlines.
| Setting | Value | |---|---| | Image Control | Standard | | Saturation | +1 | | Hue | 0 | | High/Low Key | 0 | | Contrast | 0 | | Contrast (Highlight) | -2 | | Contrast (Shadow) | 0 | | Sharpness | +3 | | Shading | 0 | | Clarity | +3 | | White Balance | Daylight (5500K) |
This recipe keeps colors natural but adds punch through sharpness and clarity. The strong negative highlight contrast is key -- it retains detail in overcast skies and misty scenes where other settings blow out the whites. Daylight white balance keeps the cool, honest feel of the light.
Golden Film
An analog-inspired look that mimics the warm, slightly faded quality of Kodak Ektar 100 -- a classic landscape film stock.
| Setting | Value | |---|---| | Image Control | Standard | | Saturation | +1 | | Hue | +1 | | High/Low Key | +1 | | Contrast | -1 | | Contrast (Highlight) | -2 | | Contrast (Shadow) | -1 | | Sharpness | +1 | | Shading | +1 | | Clarity | +1 | | White Balance | Shade (7500K) |
The combination of Shade white balance and positive hue shift pushes greens slightly toward yellow, mimicking the warm rendering of analog film. Reduced contrast and lifted shadows create that gentle, nostalgic feel while the negative highlight contrast keeps skies from washing out. This recipe works beautifully for meadows, forests, and rural landscapes.
Dramatic Monochrome
A high-impact black-and-white recipe for bold landscape compositions -- stormy skies, rocky coastlines, and architectural elements in nature.
| Setting | Value | |---|---| | Image Control | Monochrome | | Filter Effect | Red | | Toning | 0 | | Saturation | N/A | | High/Low Key | -1 | | Contrast | +3 | | Contrast (Highlight) | +1 | | Contrast (Shadow) | +2 | | Sharpness | +3 | | Shading | 0 | | Clarity | +4 |
The red filter effect darkens blue skies dramatically, making white clouds pop against near-black backgrounds. High contrast and clarity create the punchy, graphic quality that makes monochrome landscapes compelling. The slight low-key adjustment prevents midtones from going flat. This recipe turns ordinary skies into dramatic backdrops.
Soft Pastoral
A gentle, low-contrast look for pastoral and countryside scenes -- rolling hills, meadows, quiet streams.
| Setting | Value | |---|---| | Image Control | Standard | | Saturation | 0 | | Hue | 0 | | High/Low Key | +2 | | Contrast | -2 | | Contrast (Highlight) | -2 | | Contrast (Shadow) | -2 | | Sharpness | +1 | | Shading | +2 | | Clarity | 0 | | White Balance | Cloudy (6000K) |
This recipe is intentionally soft and dreamy. Reduced contrast across the board flattens the tonal range into a gentle, painterly quality. The high-key adjustment lifts the overall brightness while shading adds a subtle vignette that draws attention to the center of the frame. Cloudy white balance provides just enough warmth without overpowering the muted feel.
Composition Techniques for 28mm Landscapes
The 28mm focal length requires a different compositional approach than the telephoto compression most landscape photographers rely on. Here's how to make it work:
Use Strong Foreground Elements
At 28mm, empty foregrounds become vast, featureless spaces that drain energy from your images. The solution is to find interesting foreground subjects and get close to them:
- Rocks, wildflowers, fallen leaves, textured sand, or tide pools
- Get low. Shooting from knee or ground level with the GR III placed close to a foreground element creates dramatic depth
- The GR III's close-focus capability (6cm in macro mode) lets you get extremely close to foreground subjects while keeping the background landscape visible
Lead the Eye with Lines
Wide-angle lenses amplify the effect of leading lines. Use paths, rivers, fences, shorelines, and ridgelines to draw the viewer's eye from foreground to background. At 28mm, these lines converge more dramatically than at longer focal lengths, creating a strong sense of depth.
Layer Your Scenes
Build your compositions in layers: foreground, middle ground, background. The 28mm lens naturally separates these planes. A composition might include wildflowers in the foreground, a lake in the middle ground, and mountains in the background. Each layer adds depth and keeps the viewer exploring the image.
Embrace Negative Space
The wide angle of 28mm gives you room to include large areas of sky, water, or open land. Use these deliberately. A vast sky with a single cloud formation above a minimal landscape can be more powerful than a crowded frame. The GR III's excellent metering handles these high-contrast compositions well.
Watch Your Edges
Wide-angle lenses can include distracting elements at the edges of the frame. Before pressing the shutter, scan the corners and edges. A stray branch, a person's elbow, or a trash can at the edge of the frame can pull attention away from your subject. The GR III's screen makes this easy to check.
Field Techniques
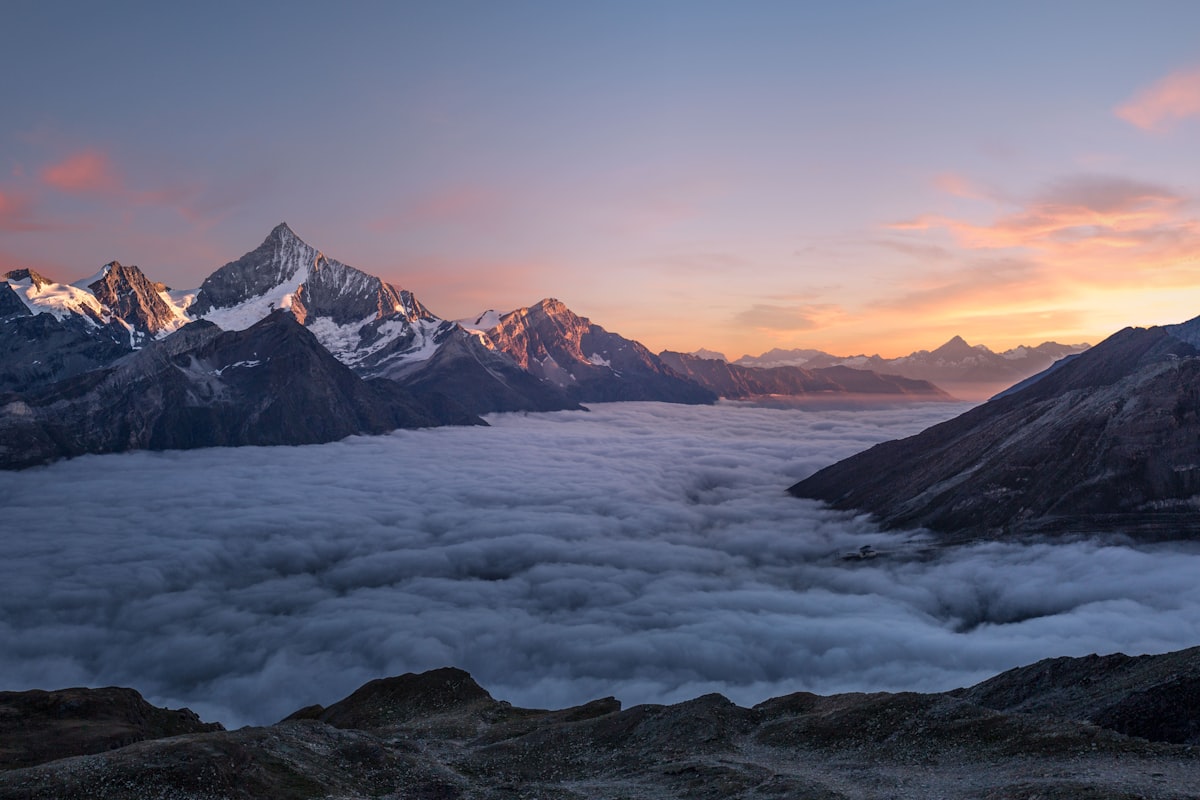
Golden Hour and Blue Hour
The best landscape light happens in the 30-60 minutes around sunrise and sunset (golden hour) and the 20-30 minutes after sunset or before sunrise (blue hour).
Golden hour settings:
- Aperture Priority at f/8
- ISO 200-400
- CTE or Shade white balance
- Exposure compensation -0.3 to -0.7 EV to protect warm highlight tones
Blue hour settings:
- Manual mode at f/5.6 to f/8
- ISO 200 on tripod, ISO 800-1600 handheld
- Daylight white balance to preserve the natural blue tones (or CTE to enhance them)
- The built-in Shake Reduction lets you push handheld shots down to 1/8s in careful conditions
Using the Built-in ND Filter
The GR III's 2-stop ND filter is accessed through MENU > Shooting Settings > ND Filter or assigned to a function button for quick access.
Use it for:
- Waterfalls and streams at 1/4s to 1s for silky water effects
- Ocean waves at 1-2 seconds for smooth, ethereal shorelines
- Cloud movement at 2-4 seconds for streaked skies (combine with a tripod and low ISO)
Without the ND filter, you'd need to stop down to f/16 or beyond to achieve these speeds in daylight -- destroying sharpness through diffraction. The ND filter lets you keep your aperture in the sweet spot while extending exposure times.
Panoramic Stitching
The GR III doesn't have a built-in panorama mode, but its consistent exposure and sharp lens make it excellent for manual panoramic stitching:
- Set the camera to Manual mode with fixed white balance and fixed focus
- Shoot a series of overlapping frames (30-40% overlap) across your scene
- Stitch in Lightroom, Photoshop, or free tools like Hugin
This technique lets you create ultra-wide or ultra-high-resolution images that transcend the 28mm field of view while maintaining the GR III's excellent image quality.
Bracket for Dynamic Range
Landscape scenes often exceed the dynamic range of any single exposure. The GR III handles this well with its exposure bracketing feature:
Navigate to MENU > Shooting Settings > Drive Mode > Exposure Bracket and set a 3-frame bracket at +/- 1 EV or +/- 2 EV. You can merge these in post for HDR images, or simply choose the best single exposure for different parts of the scene.
User Mode Slots for Landscape
Save your favorite landscape configurations to User Mode slots for instant recall in the field:
- U1 -- Golden Hour Landscape: Av mode, f/8, Auto ISO 200-800, CTE white balance, Vivid Sunrise recipe
- U2 -- Long Exposure: M mode, f/8, ISO 200, ND filter on, Daylight white balance, Cool Mountain Air recipe
- U3 -- Quick Handheld: Av mode, f/5.6, Auto ISO 200-1600, Shade white balance, Golden Film recipe
Save these through MENU > Shooting Settings > USER Mode and switch between them instantly using the mode dial. Having these presets ready means you spend less time in menus and more time shooting.
Practical Tips for Landscape Shooting with the GR III
Shoot RAW + JPEG. The JPEG gives you a finished image with your recipe applied. The RAW gives you maximum latitude for post-processing. With a fast SD card, there's no penalty.
Use the 2-second timer. For tripod work, the 2-second self-timer eliminates camera shake from pressing the shutter button without needing a remote release.
Check your histogram. The GR III's histogram display (accessible by pressing the INFO button) shows you exactly where your tones fall. For landscapes, aim to push the histogram as far right as possible without clipping highlights -- this maximizes the signal-to-noise ratio in your shadows.
Clean your lens frequently. The GR III's retractable lens is exposed every time it powers on. In dusty, sandy, or misty conditions, a quick wipe with a microfiber cloth before shooting prevents soft, hazy images.
Carry a small tripod. The GR III's light weight means even a compact travel tripod or a Gorillapod provides rock-solid support. This opens up long exposures, bracketing, and blue hour shooting that handheld work simply can't match.
The Ricoh GR III proves that great landscape photography doesn't require heavy gear. Its combination of image quality, portability, and thoughtful features makes it a legitimate tool for serious landscape work. Load up one of the recipes above, head outside at golden hour, and see what 257 grams of camera can do.
Explore our landscape-ready presets or grab a complete bundle to expand your creative options even further.