Ricoh GR III Museum & Gallery Photography: Settings, Recipes, and Tips for Stunning Art Shots
Ornate gilded frames against rich velvet walls, minimalist white cubes bathed in perfectly angled spotlights, centuries-old sculptures casting long shadows across marble floors -- museums and galleries are among the most visually rewarding environments a photographer can explore. The Ricoh GR III, silent, compact, and inconspicuous, is the ideal camera for this world where discretion matters as much as image quality.
This guide covers everything you need to shoot confidently in museums and galleries. You will learn how to handle challenging artificial lighting, which preset recipes produce the most faithful color reproduction, and how to compose shots that capture both the art and the atmosphere of the spaces that house it.
Why the Ricoh GR III Is Perfect for Museum Photography
Museums present a unique set of challenges that play directly to the GR III's strengths:
- Silent electronic shutter eliminates the mechanical click that draws unwanted attention and violates the quiet atmosphere of exhibition spaces
- Compact pocketable size means you carry a capable APS-C camera without looking like a professional photographer, which matters in venues that restrict professional equipment
- Fast f/2.8 lens gathers enough light for handheld shooting under dim gallery lighting without resorting to flash, which is prohibited in nearly every museum
- 28mm equivalent focal length captures entire room installations and wide architectural details while remaining tight enough to isolate individual works
- Excellent high ISO performance keeps noise under control at ISO 3200 and beyond, essential in the low-light conditions typical of conservation-minded galleries
Essential Camera Settings for Museum and Gallery Photography
Shooting Mode: Aperture Priority or Program with Limits
Aperture Priority (Av) gives you the most control in museum environments. Start at f/2.8 in dimly lit galleries and stop down to f/4 or f/5.6 in well-lit modern spaces where you want sharper corner-to-corner detail.
For fast-moving exhibition walkthrough shooting where you cannot afford to think about settings, use Program (P) mode. The GR III's program line favors wider apertures and higher ISOs, which is exactly what you need indoors.
The critical adjustment is exposure compensation. Brightly lit artwork against dark gallery walls fools metering systems. Dial in -0.3 to -0.7 EV when the artwork is the brightest element in the frame to prevent blown highlights on canvases and prints. Dial in +0.3 to +0.7 EV in predominantly white gallery spaces to prevent the camera from underexposing.
ISO Strategy for Indoor Galleries
Navigate to MENU > Shooting Settings > ISO Sensitivity and configure for museum shooting:
- Auto ISO with a range of ISO 200-6400 and minimum shutter speed of 1/30s is the best general-purpose setup. The 1/30s floor is slow enough to keep ISO down but fast enough to avoid camera shake at 28mm.
- Fixed ISO 1600 works well in consistently lit modern galleries with track lighting. This balances noise and shutter speed for a clean, predictable result.
- Fixed ISO 3200 is necessary in older institutions and natural history museums where ambient lighting is deliberately kept low to protect sensitive artifacts.
Push to ISO 6400 only when necessary. The GR III handles it well, but noise reduction softens fine texture detail in paintings and sculptures, which defeats the purpose of getting close to the art.
White Balance: Matching the Curator's Intent
Museum lighting is carefully designed to present artwork in specific conditions. Your white balance setting should respect that intent rather than fight it.
| White Balance | Kelvin | Effect in Museums | |--------------|--------|-------------------| | AWB | Auto | Generally reliable in modern galleries with LED lighting, may shift in mixed-light rooms | | Daylight | 5200K | Best for galleries with natural skylight or daylight-balanced LEDs, keeps warm and cool tones neutral | | Tungsten | 3000K | Corrects the warm cast from incandescent spotlights common in older museums and classical art galleries | | CTE | Varies | Amplifies the dominant color of the lighting, works beautifully in rooms with intentional warm or cool ambiance | | Manual 4000K | 4000K | A reliable compromise for mixed environments where natural daylight from windows meets tungsten spotlights |
Recommended starting point: Use AWB in modern galleries and Tungsten (3000K) in traditional museums with warm spotlights. Check your first few shots and adjust if colors appear off. When shooting artwork for reference, accurate color matters more than creative effect.
Focus Settings
Gallery subjects are typically stationary, making focus straightforward. Standard AF with single-point focus works for most situations.
For photographing framed artworks straight-on, use Manual Focus to ensure the focal plane is precisely parallel to the artwork surface. Even slight autofocus drift can soften one edge of a painting when shooting wide open at f/2.8.
When shooting architectural details and room overviews, use Snap Focus at 5m with the aperture at f/5.6. This hyperfocal approach keeps everything from roughly 2.5m to infinity in sharp focus, letting you shoot room interiors quickly without waiting for autofocus to acquire.
Shake Reduction
Enable Shake Reduction (SR) via MENU > Shooting Settings > Shake Reduction > On. In dim galleries where shutter speeds drop to 1/15s or 1/8s, the GR III's sensor-shift stabilization can mean the difference between a sharp shot and a blurry one. At 28mm equivalent, SR reliably gives you two to three extra stops of handheld stability.
Best Preset Recipes for Museum Photography
1. Gallery Neutral -- Accurate Color Reproduction
This recipe prioritizes faithful color reproduction, making it ideal for documenting artwork, exhibitions, and installations where the original colors matter.
| Setting | Value | |---------|-------| | Image Control | Standard | | Saturation | 0 | | Contrast | 0 | | Sharpness | +1 | | Key | 0 | | Highlight Adj. | -1 | | Shadow Adj. | 0 | | White Balance | AWB | | ISO | Auto 200-6400 |
When to use: Any time you want a clean, truthful rendering of the artwork and space. The zero saturation and contrast preserve the artist's original palette without editorial emphasis. The slight sharpness boost compensates for the softening effect of high ISO noise reduction. Pulled highlights protect bright white canvases and illuminated surfaces.
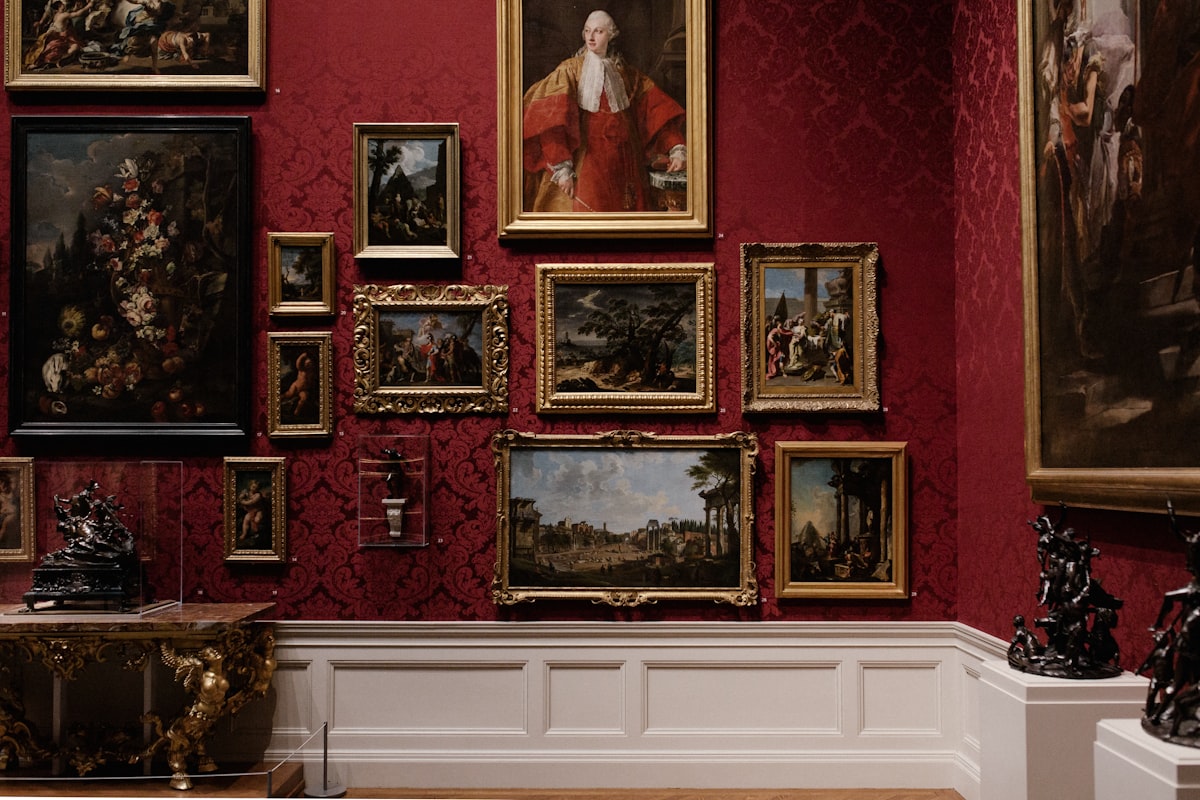
2. Classical Warm -- Old Master Gallery Look
A warm, rich recipe that complements the atmosphere of traditional galleries displaying Renaissance, Baroque, and Romantic-era paintings. Think mahogany frames, deep red walls, and golden spotlights.
| Setting | Value | |---------|-------| | Image Control | Positive Film | | Saturation | +1 | | Contrast | +1 | | Sharpness | +1 | | Key | -1 | | Highlight Adj. | -2 | | Shadow Adj. | +1 | | White Balance | Daylight (5200K) | | ISO | Auto 200-6400 |
When to use: Classical art galleries, historic houses, and museums in older European buildings. The Positive Film profile with mild saturation boost deepens the warm tones of wooden floors, gilded frames, and amber lighting. The negative key and pulled highlights add richness without losing detail on brightly lit canvases.
3. White Cube Minimal -- Modern Gallery Clean
Designed for the stark, geometric beauty of contemporary art spaces with white walls, polished concrete floors, and clinical track lighting.
| Setting | Value | |---------|-------| | Image Control | Standard | | Saturation | -1 | | Contrast | +1 | | Sharpness | +2 | | Key | +1 | | Highlight Adj. | 0 | | Shadow Adj. | -1 | | White Balance | Manual 5000K | | ISO | Auto 200-3200 |
When to use: Contemporary art galleries, photography exhibitions, and minimalist museum spaces. The desaturated look with boosted contrast emphasizes the geometric lines and clean surfaces of modern architecture. Positive key brightens the image to match the airy, open feeling of white cube galleries. Darkened shadows add definition to corners and recesses.
4. Museum Monochrome -- Architectural Drama
A high-contrast black-and-white recipe that transforms museum interiors into dramatic studies of light, shadow, and form. Perfect for capturing the architecture rather than the art.
| Setting | Value | |---------|-------| | Image Control | Hard Monotone | | Saturation | N/A | | Contrast | +3 | | Sharpness | +2 | | Filter Effect | Yellow | | Toning | N/A | | Key | -1 | | Highlight Adj. | -1 | | Shadow Adj. | -2 | | White Balance | Any | | ISO | Auto 200-6400 |
When to use: Grand entrance halls, staircases, domed ceilings, and architectural details where form and light matter more than color. The yellow filter brightens warm-toned stonework and marble while darkening blue-tinted shadows from skylights, creating natural tonal separation. Deep shadows give columns, arches, and vaulted ceilings a powerful three-dimensional quality.
Composition Techniques for Museum Photography
Capture the Space, Not Just the Art
The most common mistake is shooting individual artworks like catalog entries. Instead, capture the relationship between the art and its environment. A painting dwarfed by a massive gallery wall tells a story about scale. A solitary visitor contemplating a sculpture creates narrative. The interplay of natural light from overhead skylights with artificial spotlights on artwork reveals the curator's craft.
Use Leading Lines and Symmetry
Museums are designed with strong architectural geometry that creates natural leading lines:
- Long corridors lined with paintings draw the eye to a focal point at the far end
- Doorways connecting galleries create layered frames-within-frames, each room revealing the next
- Polished floors reflect overhead lighting and artwork, creating a mirror effect similar to wet street photography
- Symmetrical staircases and domed ceilings offer dramatic upward compositions that showcase architectural ambition
Work With the Light, Not Against It
Gallery lighting is specifically designed for visual impact. Observe how spotlights create pools of light and shadow:
- Position yourself so a spotlight illuminates your primary subject while the background falls into shadow, creating natural subject isolation
- Shoot along the axis of track lighting to capture the dramatic directional light falling across sculpture and three-dimensional installations
- In galleries with large windows, use the natural sidelight for portraits of visitors engaged with the art
- Look for light spilling from one gallery into another through doorways, creating graduated illumination
Include People for Scale and Story
An empty gallery is architectural photography. A gallery with people becomes storytelling. Visitors examining artwork, guards standing motionless, children pointing at exhibits -- these human elements add emotion and context. The GR III's silent shutter and small size make candid gallery photography effortless.
Use the Snap Focus at 2.5m setting for candid shots. You can raise the camera and shoot without bringing it to your eye, capturing natural moments without disrupting the quiet gallery atmosphere.
Etiquette and Practical Tips
Know the Rules Before You Shoot
Museum photography policies vary widely:
- Most major museums allow non-flash, non-tripod photography for personal use
- Temporary exhibitions frequently prohibit all photography due to loan agreements
- Private galleries may require permission before shooting
- Always check for signage at the entrance of each gallery, as policies can differ between permanent and temporary collections within the same institution
Shoot Without Flash -- Always
Flash damages artwork over time and is universally prohibited. The GR III has no built-in flash, which is actually an advantage -- you cannot accidentally fire one. This also means staff are less likely to scrutinize your camera.
Brace Yourself for Slow Shutter Speeds
When shutter speeds drop below 1/15s, use your environment for stability:
- Lean against a wall or doorframe
- Rest your elbows on a railing or display case edge
- Use the GR III's 2-second self-timer to eliminate shutter button vibration
- Place the camera on a flat surface for impromptu long exposures
Shoot in RAW + JPEG
Museum lighting is notoriously difficult to white balance correctly, especially in rooms mixing natural skylight with tungsten spots. Shooting RAW + JPEG gives you a processed JPEG using your preset recipe for immediate sharing and a RAW file for fine-tuning white balance later when accuracy matters.
Quick Reference Cheat Sheet
| Scenario | Mode | Aperture | ISO | WB | Key Tip | |----------|------|----------|-----|----|---------| | Dim classical gallery | Av | f/2.8 | Auto 200-6400 | Tungsten | Enable SR, use 1/30s minimum shutter | | Bright modern gallery | Av | f/4-5.6 | Auto 200-3200 | 5000K | Stop down for sharper architectural detail | | Photographing a painting | Av | f/4 | Auto | AWB | Manual focus, shoot parallel to the surface | | Gallery architecture | Av | f/5.6 | Auto 200-6400 | Daylight | Snap Focus 5m for fast room overviews | | Candid visitor shots | P | f/2.8 | Auto 200-6400 | AWB | Snap Focus 2.5m, silent shutter, shoot from hip | | Sculpture close-up | Av | f/2.8 | 1600 | Daylight | Use directional spotlight as your key light |
Final Thoughts
Museum and gallery photography rewards patience and observation. The Ricoh GR III's unobtrusive design lets you become part of the environment rather than a disruption to it. Its APS-C sensor captures the nuance of carefully designed exhibition lighting, and its silent operation means you can shoot freely in spaces where sound carries.
Start with the Gallery Neutral recipe to build your confidence and ensure accurate color. Once you are comfortable with the lighting conditions, switch to the Classical Warm or White Cube Minimal recipe to match the mood of the space. Pay attention to how light, architecture, and visitors interact with the art -- those moments of intersection are where the strongest photographs live.
Browse our museum and gallery preset collection to find recipes optimized for indoor cultural spaces, or grab a complete preset bundle that includes gallery-tuned looks alongside recipes for every shooting scenario.