Ricoh GR III Neon & City Lights Photography: Settings, Recipes, and Tips for Vibrant Night Shots
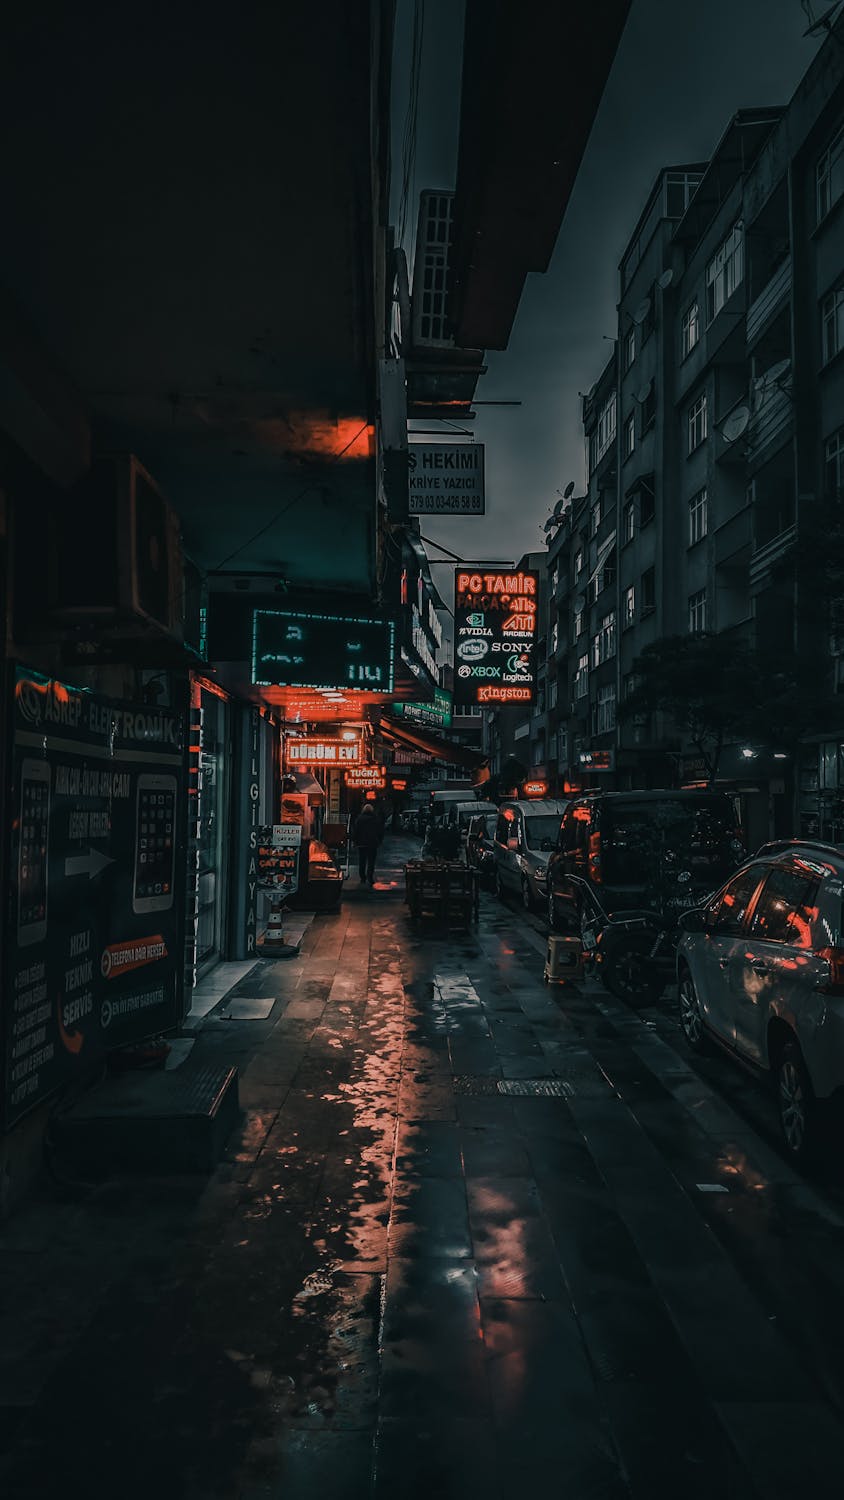
Neon signs, glowing storefronts, and rain-slicked streets reflecting a kaleidoscope of artificial light -- these are the scenes that make urban night photography so compelling. The Ricoh GR III, with its fast f/2.8 lens, APS-C sensor, and pocketable form factor, is one of the best compact cameras for diving into neon-drenched cityscapes without lugging around heavy gear.
This guide focuses specifically on photographing neon signs and city lights -- a distinct discipline from general night photography. You will learn how to expose for challenging mixed lighting, which preset recipes bring out the best in artificial color, and how to compose shots that use light itself as the subject.
Why the Ricoh GR III Excels at Neon and City Lights
The GR III has specific strengths that make it ideal for this type of shooting:
- Fast f/2.8 lens captures enough light for handheld shooting under neon signs without needing a tripod
- 28mm equivalent focal length is wide enough to include context and environment but tight enough to isolate individual signs and storefronts
- APS-C sensor handles mixed artificial lighting with accurate color separation, keeping reds, blues, and greens distinct rather than muddying them together
- Compact size lets you shoot in crowded entertainment districts, narrow alleys, and busy markets without drawing attention
- Positive/Negative Film image controls respond beautifully to saturated artificial color, producing results that rival dedicated film stocks
Essential Camera Settings for Neon Photography
Shooting Mode: Aperture Priority with Exposure Compensation
For neon and city lights, Aperture Priority (Av) is the most practical mode. Neon scenes have constantly shifting brightness as you move between bright signage and dark side streets, and Av mode adapts quickly.
Set your aperture to f/2.8 for most situations. This gives you the fastest possible shutter speed for handheld shooting and produces a shallow depth of field that can beautifully separate a neon sign from its background.
The critical adjustment is exposure compensation. Neon scenes fool metering systems because they contain extreme contrast between bright light sources and dark surroundings. Dial in -0.7 to -1.3 EV to prevent the camera from overexposing. This keeps neon colors saturated and rich rather than washed out, and it deepens the surrounding shadows for a moodier look.
ISO Strategy for City Lights
Navigate to MENU > Shooting Settings > ISO Sensitivity and configure for neon shooting:
- Auto ISO with a range of ISO 200-3200 and minimum shutter speed of 1/60s is the best general-purpose setup. Neon environments are brighter than most night scenes, so you rarely need to push past ISO 3200.
- Fixed ISO 800 works well in dense commercial districts where signage provides abundant illumination. This keeps noise minimal while maintaining fast enough shutter speeds.
- Fixed ISO 1600 is your go-to for side streets and alleys where light spills from distant sources rather than overhead signs.
Avoid ISO 6400 and above for neon work. Unlike black-and-white night photography where grain adds character, high noise degrades the color fidelity that makes neon photography compelling.
White Balance: The Most Important Setting
White balance dramatically changes the mood and color palette of neon photographs more than any other setting. Each option produces a fundamentally different look:
| White Balance | Kelvin | Effect on Neon Scenes | |--------------|--------|----------------------| | Daylight | 5200K | Preserves warm tones, neon reds and oranges glow intensely, blue signs appear vivid | | CTE | Varies | Amplifies the dominant color cast, creates the most dramatic and saturated results | | Tungsten | 3000K | Shifts everything cool, turns warm neon amber into neutral tones, blue and green signs dominate | | Fluorescent | 4000K | Slight green shift that works surprisingly well with certain vintage neon aesthetics | | Manual 4500K | 4500K | A balanced middle ground that keeps warm and cool neon colors both visible |
Recommended starting point: Set white balance to Daylight (5200K) or CTE. These preserve the full spectrum of neon color rather than neutralizing it. The entire point of neon photography is color, so you want a white balance setting that celebrates it.
Focus Settings
Neon signs make excellent autofocus targets because they provide high-contrast edges. Standard AF works reliably in most neon environments.
For street scenes where you are shooting quickly without time to focus each frame, use Snap Focus at 2m. At f/2.8 this gives you a sharp zone from roughly 1.4m to 3.5m, which covers most storefront and street-level compositions.
When shooting reflections on wet pavement, switch to Manual Focus with focus peaking enabled. Autofocus can get confused by reflected light and lock onto the ground surface rather than the reflected image. Set peaking color to white so it remains visible against colorful neon backgrounds.
Best Preset Recipes for Neon Photography
1. Neon Positive -- Saturated Color Film
This recipe emulates the look of Fujichrome Velvia or Kodak Ektachrome pushed through vibrant city lights. It makes every color in the scene punch hard.
| Setting | Value | |---------|-------| | Image Control | Positive Film | | Saturation | +3 | | Contrast | +2 | | Sharpness | +2 | | Key | 0 | | Highlight Adj. | -2 | | Shadow Adj. | +1 | | White Balance | CTE | | ISO | Auto 200-3200 |
When to use: Dense commercial districts with multiple colored signs, entertainment areas, and night markets. The high saturation makes overlapping colors pop without bleeding into each other thanks to the Positive Film profile's tight color separation.
2. Cinematic Neon -- Teal and Orange
A cinematic color grade that splits neon scenes into warm highlights and cool shadows, mimicking the teal-and-orange palette popular in Hollywood films.
| Setting | Value | |---------|-------| | Image Control | Standard | | Saturation | +1 | | Contrast | +2 | | Sharpness | +1 | | Key | -1 | | Highlight Adj. | -1 | | Shadow Adj. | -1 | | White Balance | Manual 3800K | | ISO | Auto 200-3200 |
When to use: Urban streets with a mix of warm neon signage and cooler ambient light from the sky or fluorescent sources. The 3800K white balance cools down the overall scene while letting warm neon highlights burn through, creating natural teal-and-orange separation without any post-processing.
3. Rain-Soaked Neon -- Moody Reflections
Designed for wet weather when neon light reflects off pavement, puddles, and car surfaces. This recipe leans into the moody, atmospheric quality of rain-soaked city nights.
| Setting | Value | |---------|-------| | Image Control | Negative Film | | Saturation | +1 | | Contrast | +1 | | Sharpness | 0 | | Key | -1 | | Highlight Adj. | -2 | | Shadow Adj. | 0 | | White Balance | Daylight (5200K) | | ISO | Auto 200-3200 |
When to use: Rainy or recently rained streets where puddles and wet surfaces multiply the neon light throughout the scene. The Negative Film profile softens the transition between highlights and shadows, giving reflections a smooth, film-like quality. Reduced sharpness prevents harsh edges on water droplets and wet surfaces.
4. Neon Noir -- High Contrast Monochrome
Strip away the color and focus on the raw contrast between neon light and urban darkness. This black-and-white recipe produces dramatic, high-impact images where light becomes the sole subject.
| Setting | Value | |---------|-------| | Image Control | Hard Monotone | | Saturation | N/A | | Contrast | +4 | | Sharpness | +3 | | Filter Effect | Red | | Toning | N/A | | Key | -1 | | Highlight Adj. | 0 | | Shadow Adj. | -2 | | White Balance | Any | | ISO | Auto 200-6400 |
When to use: When a scene has strong geometric shapes -- signs, doorways, corridors -- where the graphic quality of light matters more than color. The red filter effect brightens reds and darkens blues in the monochrome conversion, so red neon signs will glow white while blue and green signs appear darker and more mysterious.
Composition Techniques for Neon Scenes
Use Neon as Your Light Source, Not Just Your Subject
The most common beginner mistake is pointing the camera directly at a neon sign and shooting it head-on. Instead, use the sign's light to illuminate other elements in the scene. A neon sign casting red light across a person's face, a row of glowing kanji reflected in a puddle, or the warm glow of a bar spilling across a dark sidewalk -- these indirect uses of neon create far more compelling images.
Work the Reflections
Wet surfaces are the neon photographer's best friend. After rain, every surface becomes a mirror:
- Puddles create complete reflections of overhead signs, effectively doubling the amount of light and color in your frame
- Wet asphalt produces long, streaky reflections that add leading lines pulling the viewer into the scene
- Car roofs and hoods act as curved mirrors that distort and blend multiple neon sources into abstract color fields
- Shop windows layer the reflected neon over whatever is displayed inside, creating depth and visual complexity
If it has not rained, look for other reflective surfaces: polished marble floors in shopping arcades, metal bollards, or even the screens of parked cars.
Frame Within Frames
Urban environments are full of natural frames that work beautifully with neon light:
- Narrow alleys that create a tunnel of light between buildings
- Doorways and archways that isolate a single glowing sign
- Overhead walkways and bridges that frame a neon-lit street below
- The gap between parked vehicles that reveals a distant sign
These framing devices give structure to what can otherwise be a chaotic visual environment.
Isolate Single Colors
When an entire street is awash in mixed neon color, find compositions that isolate one dominant hue. A single red lantern against a dark wall. One blue pharmacy cross in a row of warm storefronts. Simplifying the color palette makes individual images stronger and creates variety in a series of neon photographs.
Exposure Techniques for Challenging Neon Scenes
Expose for the Neon, Let Shadows Fall
The most effective approach is to meter for the neon light itself and allow surrounding areas to go dark. This preserves the intensity and color saturation of the light source. Overexposing neon turns vivid reds and blues into pale pinks and washed-out whites.
Use spot metering and point at the brightest part of the neon sign, then add +0.3 to +0.7 EV exposure compensation. This gives the sign proper exposure while keeping the ambient environment dark and moody.
Bracket for Safety
In scenes with extreme contrast, use the GR III's exposure bracketing to capture three frames at different exposures. This is especially useful when a very bright sign sits next to a deep shadow area. Even if you do not plan to HDR merge the images, having a darker frame means you can always recover the sign's color detail.
Use the ND Filter for Intentional Motion
Enable the built-in 2-stop ND filter when you want to introduce motion blur to people walking through a neon-lit scene. At f/2.8 with the ND filter at ISO 200, you can achieve shutter speeds around 1/4s to 1/2s in brightly lit areas, enough to blur moving pedestrians into ghostly streaks while keeping the static neon signs sharp.
Best Locations for Neon Photography
While neon photography opportunities exist everywhere, certain types of locations consistently produce strong results:
- Entertainment districts and nightlife areas offer the densest concentration of signage and the most colorful variety
- Traditional market streets in Asian cities feature layers of overlapping signs in narrow alleys
- Vintage commercial districts with original mid-century neon signage offer a retro aesthetic
- Restaurant and bar strips provide warm interior light spilling through windows alongside exterior signs
- Rain-soaked downtown streets after business hours, when crowds thin but lights remain on
Quick Reference Cheat Sheet
| Scenario | Mode | Aperture | ISO | WB | Key Tip | |----------|------|----------|-----|----|---------| | Dense neon district | Av | f/2.8 | Auto 200-3200 | CTE | Underexpose -1 EV for saturated color | | Single neon sign | Av | f/2.8 | 800 | Daylight | Use spot metering on the sign | | Wet street reflections | Av | f/2.8-4 | Auto 200-3200 | Daylight | Manual focus on the reflection | | Neon portraits | Av | f/2.8 | 1600 | Manual 4500K | Position subject close to the sign | | Motion blur + neon | M | f/8 + ND | 200 | CTE | Tripod or stable surface required | | B&W neon abstract | Av | f/2.8 | Auto 200-6400 | Any | Red filter for dramatic tonal contrast |
Final Thoughts
Neon and city lights photography is one of the most rewarding genres you can explore with the Ricoh GR III. The camera's compact size lets you navigate crowded urban environments with ease, its APS-C sensor captures vivid color under artificial light, and its built-in image controls produce results that look like they came from a dedicated film stock.
Start with the Neon Positive recipe in a busy commercial district, underexpose slightly, and pay attention to reflections. Those three simple adjustments will immediately improve your neon photography. As you develop your eye for neon light, experiment with the other recipes and techniques in this guide to find a look that is uniquely yours.
Browse our neon and urban preset collection to find recipes fine-tuned for city lights photography, or grab a complete preset bundle that includes neon-optimized looks alongside recipes for every shooting scenario.