Ricoh GR III Rooftop & Skyline Photography: Settings, Tips, and Best Recipes
There is something about seeing a city from above that changes how you photograph it. Streets that feel chaotic at ground level become ordered geometry from a rooftop. The Ricoh GR III is the perfect companion for this kind of shooting -- it fits in a jacket pocket, draws zero attention, and its 28mm lens captures wide cityscapes without the distortion that makes ultra-wide shots feel gimmicky.
Rooftop photography combines elements of landscape, architecture, and street photography into something unique. You deal with extreme dynamic range between sky and shadow, shifting light throughout the day, and the challenge of making a flat cityscape feel three-dimensional. This guide covers the settings, recipes, and techniques that will help you get the most out of rooftop sessions with your GR III.
Why the Ricoh GR III Works for Rooftop Photography
Most photographers reach for telephoto lenses or ultra-wide zooms for skyline work, but the GR III holds its own for several reasons:
- 28mm focal length is wide enough to capture a generous slice of skyline without warping buildings at the edges of the frame
- APS-C sensor with 24.2MP resolves distant buildings with enough detail for large prints and heavy crops
- Compact size is critical -- many rooftop locations involve tight access, ladders, or security checks where a small camera is a practical advantage
- Snap Focus at infinity lets you preset focus for distant skylines and shoot without any autofocus delay
- Built-in ND filter is invaluable for long exposures during golden hour or daylight, smoothing clouds and traffic without carrying external filters
- Image Stabilization (SR) provides up to 4 stops of shake reduction when you cannot use a tripod on a rooftop railing or ledge
The compact form factor is not just a convenience. On rooftops, wind is constant and strong. A lightweight camera on a small tripod or resting on a ledge is less susceptible to vibration than a heavy DSLR rig catching wind like a sail.
Essential Camera Settings for Rooftop Skylines
Shooting Mode
Aperture Priority (Av) is your default. You need consistent depth of field across the cityscape, and the camera can handle exposure shifts as clouds move or the sun changes position.
Switch to Manual (M) for:
- Long exposure work where you want to control shutter speed precisely
- Sunset and sunrise sequences where you need consistent exposure across multiple frames
- Night skyline shots with city lights where the meter can be fooled by large dark areas
Aperture Selection
Skyline photography rewards smaller apertures for deep focus across the entire frame:
- f/8 -- The sweet spot. Maximum sharpness from the GR III lens with deep depth of field from foreground railings to distant skyscrapers.
- f/5.6 -- Use when you want slightly faster shutter speeds in dimmer conditions. Still sharp across the frame at infinity focus.
- f/11 -- When you need absolute front-to-back sharpness, such as including a foreground element close to the camera with the skyline behind.
- f/2.8 -- Reserved for night skyline shots where you need maximum light gathering, or for intentionally isolating a single building detail with bokeh.
Avoid f/16 and smaller. Diffraction softens the fine building detail that makes skyline photos compelling.
ISO Configuration
Navigate to MENU > Shooting Settings > ISO Sensitivity:
- ISO 100-200 for all daylight rooftop shooting. This is where the GR III sensor delivers its cleanest files with maximum dynamic range.
- Auto ISO 100-1600 for golden hour sessions where light changes rapidly. Set your minimum shutter speed to 1/125s to prevent motion blur from wind shake.
- ISO 100 locked for tripod-based long exposures and night work. Let the shutter speed do the work.
- ISO 3200-6400 acceptable for handheld night skyline shots. The GR III handles noise well at these levels, and city lights provide enough contrast to mask grain.
Focus Settings
Snap Focus set to Infinity is the best approach for most rooftop skyline work. Everything beyond approximately 5 meters will be sharp at f/8, and you eliminate any autofocus delay.
Set it via MENU > Shooting Settings > Focus > Snap Focus Distance > Infinity (∞).
For compositions that include close foreground elements (railings, rooftop structures, plants), switch to Touch AF and tap on the foreground subject. At f/8 or f/11, you will typically get both the foreground and distant skyline in acceptable focus.
Manual Focus with peaking is ideal for night skylines. Autofocus can hunt in low light, and Snap Focus at infinity may not be precise enough for pinpoint stars or distant lights. Use focus peaking and manually set focus to infinity while checking live view at maximum zoom.
White Balance
White balance is a creative decision for rooftop photography, not just a technical one:
- Daylight (5500K) -- Neutral and accurate for midday cityscapes. Shows buildings and sky as they appear to the eye.
- Cloudy (6500K) -- Adds warmth that flatters golden hour rooftop shots. A good default for late afternoon sessions.
- Kelvin Manual (3500-4500K) -- The photographer's choice for blue hour. Cooling the white balance deepens the blue sky while keeping city lights warm, creating the classic warm-cool contrast.
- Tungsten (3200K) -- Dramatic cooling effect for night skylines. Makes the sky deep blue-black while artificial lights glow warm amber.
Using the Built-in ND Filter
The GR III's 2-stop built-in ND filter is a genuine advantage for rooftop work. Enable it via MENU > Shooting Settings > ND Filter or assign it to a function button for quick access.
Use the ND filter for:
- Smoothing clouds in long exposures during golden hour (1-4 second exposures at f/8, ISO 100)
- Blurring traffic on streets below to create light trails during twilight
- Shooting wide open at f/2.8 during bright conditions for selective focus effects
Preset Recipes for Rooftop & Skyline Photography
Recipe 1: Clean Cityscape
A neutral, high-detail recipe that maximizes clarity for daytime skyline shots.
| Setting | Value | |---------|-------| | Image Control | Standard | | Saturation | 0 | | Hue | 0 | | High/Low Key | 0 | | Contrast | +1 | | Contrast (Highlight) | -1 | | Contrast (Shadow) | +1 | | Sharpness | +3 | | Shading | 0 | | Clarity | +2 | | White Balance | Daylight |
This recipe pushes sharpness and clarity to render building detail crisply while the contrast adjustments protect highlights (sky) and add depth to shadows (building faces in shade). Use this for clear-day skyline panoramas where you want maximum architectural detail.
Recipe 2: Golden Hour Warmth
Optimized for the warm, directional light of late afternoon rooftop sessions.
| Setting | Value | |---------|-------| | Image Control | Vivid | | Saturation | +2 | | Hue | 0 | | High/Low Key | +1 | | Contrast | +1 | | Contrast (Highlight) | -2 | | Contrast (Shadow) | +1 | | Sharpness | +2 | | Shading | 0 | | Clarity | +1 | | White Balance | CTE |
CTE (Color Temperature Enhancement) white balance amplifies the natural warmth of golden hour light, pushing sunlit buildings into rich amber and gold tones. The lifted highlights prevent the bright sky from clipping completely, while added saturation makes the warm tones pop without looking artificial.
Recipe 3: Blue Hour Cinematic
For the 20-30 minutes after sunset when the sky turns deep blue and city lights come alive.
| Setting | Value | |---------|-------| | Image Control | Positive Film | | Saturation | +1 | | Hue | 0 | | High/Low Key | 0 | | Contrast | +2 | | Contrast (Highlight) | 0 | | Contrast (Shadow) | +2 | | Sharpness | +2 | | Shading | 0 | | Clarity | +2 | | White Balance | 4000K |
The 4000K white balance cools the overall tone to emphasize the blue sky while warm city lights create beautiful color contrast. Positive Film adds subtle richness to the color palette. The strong contrast and shadow settings give the image a cinematic, editorial quality with deep blacks between buildings.
Recipe 4: Noir Night Skyline
A high-contrast black and white recipe for dramatic nighttime skylines.
| Setting | Value | |---------|-------| | Image Control | Hard Monotone | | Filter Effect | Red | | Toning | 0 | | High/Low Key | -1 | | Contrast | +4 | | Contrast (Highlight) | +1 | | Contrast (Shadow) | +4 | | Sharpness | +3 | | Shading | 0 | | Clarity | +3 | | White Balance | Auto |
Hard Monotone with maximum contrast and deep shadows creates a dramatic noir aesthetic. The red filter darkens the blue sky and makes artificial lights stand out more intensely. Window lights become bright geometric patterns against pure black building silhouettes. This recipe works best when there is a strong mix of lit and unlit areas in the skyline.
Techniques for Better Rooftop Photography
Timing Your Shoot
The light changes dramatically from a rooftop because you have an unobstructed view of the entire sky. Plan your timing carefully:
- Midday (11am-2pm) -- Harsh but useful for graphic, high-contrast compositions. Building shadows create strong geometric patterns. Best for black and white.
- Late afternoon (3-5pm) -- Warm sidelight rakes across building facades, revealing texture and creating depth. The best time for detail-rich color work.
- Golden hour (30 min before sunset) -- The classic. Warm light, long shadows, and a sky that changes by the minute. Arrive early and shoot continuously.
- Blue hour (15-30 min after sunset) -- The most dramatic window. Sky glows deep blue, city lights turn on, and the balance between natural and artificial light creates rich color contrast. This is when rooftop photography peaks.
- Night (1+ hour after sunset) -- Pure artificial light. Requires longer exposures or higher ISO. The sky goes black and buildings become patterns of light.
Composition from Elevated Positions
Shooting from above changes the usual composition rules:
Use leading lines aggressively. Streets, bridges, rivers, and train tracks all create strong leading lines that are only visible from elevation. Follow them from your foreground into the distant skyline.
Find layers. Rooftop views naturally create layers -- a foreground rooftop, a mid-ground row of buildings, and a distant skyline. Compress these layers at f/8 for a sense of depth that flat skyline shots lack.
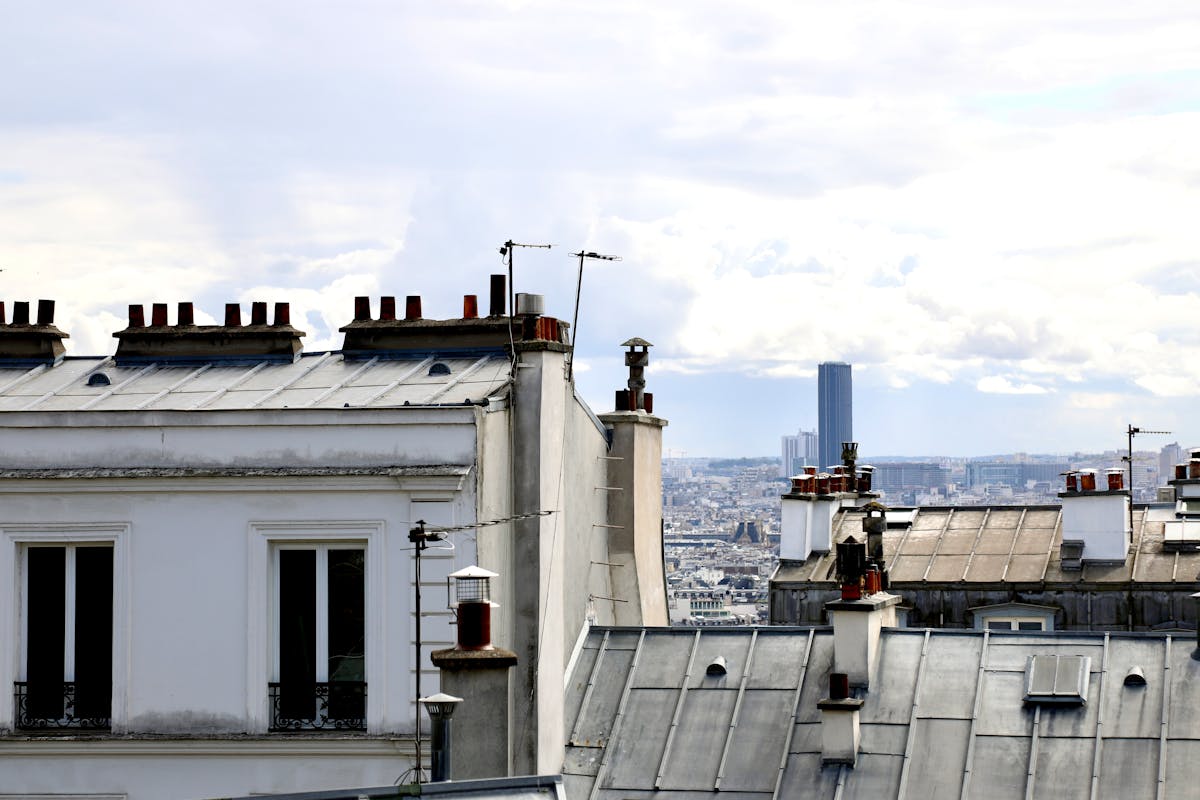
Include foreground interest. A bare skyline with sky above and buildings below can feel empty. Include rooftop elements -- railings, antennas, water towers, plants, ventilation units -- to anchor the viewer and add scale.
Frame within frames. Doorways, window frames, architectural arches, and gaps between buildings on your rooftop can frame the distant cityscape, creating depth and directing the eye.
Go vertical. Skylines are naturally horizontal subjects, but vertical compositions that include foreground rooftop detail and sweeping sky can be more dynamic and work better for social media.
Dealing with Wind
Wind is the biggest practical challenge on rooftops. It affects both camera stability and your comfort:
- Brace the GR III against solid structures -- ledges, railings, concrete walls. The camera's flat bottom makes it stable on flat surfaces.
- Use a weighted or low-profile tripod. Hang your bag from the center column for added stability.
- Increase your shutter speed. Even with image stabilization, wind vibration can cause subtle softness. Aim for 1/250s or faster for handheld shots.
- Shoot in bursts. Take 3-5 frames of the same composition and choose the sharpest one.
- Shield the camera with your body. Stand upwind and create a windbreak with your torso.
Managing Dynamic Range
Rooftop scenes often have extreme dynamic range -- bright sky above, dark shadows between buildings below. The GR III handles this well, but you need to work with it:
Expose for the highlights. Use exposure compensation at -0.7 to -1.0 EV to protect the sky and brightest building faces. You can recover shadow detail from the APS-C sensor's raw files, but blown highlights are gone forever.
Use the Highlight/Shadow adjustment. Set Contrast (Highlight) to -1 or -2 and Contrast (Shadow) to +1 or +2 in your image control settings. This compresses the dynamic range in-camera for better JPEG results.
Bracket your exposures. For critical shots, use the GR III's exposure bracketing to capture three frames at different exposures. This gives you options in post-processing or material for HDR blending.
Shoot during transitions. The dynamic range problem is worst at midday and in direct sun. During golden hour and blue hour, the sky and buildings are closer in brightness, making single exposures more viable.
Safety and Access Tips
- Check access rules before climbing. Many buildings require permission, and some rooftops have specific hours. A camera in a pocket is less likely to raise concerns than a full kit bag.
- Watch your footing. Rooftops often have uneven surfaces, cables, pipes, and edges. Stay aware of your surroundings, especially while looking through the viewfinder or screen.
- Protect your gear from the elements. Wind carries dust and moisture. The GR III is not weather-sealed, so avoid shooting in rain and wipe the lens frequently.
- Bring minimal gear. The GR III's biggest advantage here is that it is all the camera you need. A small tripod or GorillaPod, an extra battery, and a microfiber cloth are sufficient.
- Charge fully before you go. The GR III's battery life is modest, and cold rooftop wind drains batteries faster. Consider carrying a second battery or a small USB power bank.
Post-Processing Tips for Rooftop Shots
If you shoot RAW alongside your recipe JPEGs, a few adjustments can elevate your rooftop images:
- Correct perspective distortion. Even slight tilting shows in skyline shots. Use vertical perspective correction to straighten leaning buildings.
- Boost clarity and dehaze. Rooftop shots often include atmospheric haze, especially in humid cities. A moderate dehaze adjustment (30-50%) and clarity boost cuts through the haze and adds definition to distant buildings.
- Dodge and burn selectively. Brighten key buildings or landmarks and darken less interesting areas to guide the viewer's eye through the cityscape.
- Straighten the horizon. With so many horizontal building lines and the actual horizon often visible, even a 0.5-degree tilt is noticeable. Be precise.
- Crop for aspect ratio. Panoramic crops (16:9 or 2.35:1) naturally suit skyline compositions and eliminate empty sky or uninteresting foreground.
Final Thoughts
Rooftop photography rewards patience and timing more than expensive gear. The Ricoh GR III is proof of that -- a pocketable camera that captures skylines with the detail and dynamic range that this genre demands. Its compact size gets you into places larger cameras cannot go, and its preset recipes let you dial in a look for each lighting condition without touching a computer.
Start with the Clean Cityscape recipe during the day, switch to Golden Hour Warmth as the sun drops, move to Blue Hour Cinematic in that magical post-sunset window, and finish with Noir Night Skyline after dark. Each recipe is built for the specific challenges of that lighting condition, so you spend less time adjusting settings and more time finding the composition that makes the view feel as dramatic as it does in person.
The best rooftop shots come from returning to the same location in different light and weather. A skyline you know well becomes a canvas for seasonal changes, weather events, and the slow transformation of a city's architecture over time. Keep the GR III in your pocket and take every opportunity to get above the streets.