Ricoh GR III Beach & Ocean Photography: Settings, Tips, and Best Recipes
The beach is one of the most rewarding environments for the Ricoh GR III. Bright natural light, powerful textures, and constantly shifting compositions make coastal shooting endlessly engaging. The GR III's compact, pocketable body means it travels effortlessly to any shoreline, and its 28mm equivalent field of view captures the sweeping scale of ocean landscapes without losing foreground detail.
This guide covers the camera settings, preset recipes, and field techniques that will help you get consistently strong results when shooting at the coast.
Why the GR III Excels at Beach Photography
The beach presents a unique mix of challenges and opportunities that play directly to the GR III's strengths:
- Bright, high-contrast light rewards the GR III's wide dynamic range and responsive exposure controls
- Expansive scenes are perfectly suited to the 28mm equivalent focal length, which captures wide horizons with natural perspective
- Fast-moving subjects like waves, birds, and people benefit from the GR III's quick autofocus and burst mode
- Sand and salt spray are less threatening to the GR III's small, sealed body than to a bulky interchangeable-lens setup
- Spontaneous moments are easy to capture because the camera fits in a pocket and powers on in under a second
The compact size also means you are more likely to actually bring it. The best camera for beach photography is the one you have with you when the light is right.
Essential Camera Settings for Beach and Ocean Scenes
Shooting Mode: Aperture Priority
Aperture Priority (Av) is the most versatile mode for beach photography. Coastal light changes as clouds pass, the sun moves, and you shift between shooting toward and away from the water. Av mode handles these exposure shifts automatically while you focus on composition.
Recommended apertures for common beach situations:
- f/8 to f/11 for sweeping coastline landscapes with front-to-back sharpness
- f/5.6 for general beach scenes balancing sharpness with slightly faster shutter speeds
- f/2.8 for isolating details like shells, driftwood, or footprints in sand with shallow depth of field
ISO Configuration
Beach environments are typically flooded with light, so you can keep ISO low for maximum image quality. Set ISO 100 or 200 as your base.
For Auto ISO, configure through MENU > Shooting Settings > ISO Sensitivity:
- ISO range: 100-800
- Minimum shutter speed: 1/500s for freezing waves and splashing water, or 1/125s for calmer scenes
You rarely need high ISO at the beach during the day. If you are shooting at dawn or dusk, widen the range to 100-1600 and lower the minimum shutter speed to 1/60s, relying on Shake Reduction for stability.
White Balance: Reading Coastal Light
Coastal light has a character of its own. The combination of open sky, reflective water, and sometimes hazy atmosphere creates a light that can swing from cool blue to warm gold depending on the time of day and weather.
Choose your white balance based on the mood you want:
- Daylight (5200K) is the safest starting point. It renders midday beach scenes accurately with natural-looking blues and warm sand tones.
- Shade (7500K) adds warmth that works beautifully during the golden hours at the beach, enriching sand tones and giving skin a healthy glow.
- CTE (Color Temperature Enhancement) intensifies the dominant color cast. Use this at sunrise or sunset for dramatically warm coastal light, or on overcast days to enhance cool, moody tones.
- Manual Kelvin at 5000-5500K gives you a slightly cooler, crisper rendering that enhances the blue of ocean water and sky. This works especially well for clean, modern-looking seascapes.
Avoid Auto White Balance if you want to preserve the specific color mood of the coast. AWB tends to neutralize the cool blues of overcast beach days and the warm glow of sunset over water.
Metering and Exposure Compensation
Beaches are exposure nightmares for camera meters. Bright sand, reflective water, and dark foreground subjects create extreme contrast that confuses multi-segment metering.
Center-weighted metering is more predictable at the beach. It bases exposure primarily on the center of the frame, reducing the influence of bright sand and sky at the edges.
Exposure compensation is essential:
- +0.7 to +1.3 EV to keep sand looking naturally bright. Without positive compensation, the camera will underexpose to average out all that brightness, turning white sand into dull gray.
- +0.3 to +0.7 EV for general beach scenes with a mix of sand, water, and sky
- -0.3 to -0.7 EV when you want to saturate the sky and ocean colors, especially at sunrise or sunset
- -1.0 EV or more for dramatic silhouettes of people or objects against a bright ocean horizon
Check your histogram frequently. At the beach, the right side of the histogram should push close to the edge without clipping -- this ensures sand reads as bright rather than muddy.
Focus Settings
Snap Focus at 2.5m is excellent for candid beach shooting. Set it and shoot without waiting for autofocus to hunt. At f/8, everything from about 1.5m to infinity will be acceptably sharp.
AF with continuous mode works well for tracking waves rolling toward you or people moving along the shoreline.
Manual Focus with focus peaking is ideal for precise landscape compositions where you want to set your focal point on a specific element like a rock formation or breaking wave.
Best Preset Recipes for Beach Photography
Coastal Clean
A bright, clean look that captures the crisp clarity of a perfect beach day. Set Image Control to Standard, push Saturation to +1 to make ocean blues pop, and keep Contrast at 0 for balanced tonal range. Use Daylight white balance and set Sharpness to +1 to bring out texture in sand and water. This is your go-to recipe for sunny beach conditions.
Ocean Film
An analog-inspired look with slightly muted tones and gentle warmth, reminiscent of beach snapshots on color negative film. Set Image Control to Soft, Contrast to -1, and Saturation to -1 for restrained, film-like colors. Set Shadow Adjustment to +1 to open up darker areas. Use Shade white balance for warmth. The result has a nostalgic, sun-bleached quality.
Deep Blue Seascape
For dramatic ocean landscapes with rich, saturated blues and greens. Switch Image Control to Vivid and keep Saturation at 0 since Vivid already intensifies colors. Set Contrast to +1 and Key Adjustment to -1 for deeper, moodier tones. Use Manual Kelvin at 5000K for cooler rendering that maximizes the blue in water and sky. Best used during overcast conditions or blue hour.
Beach Golden Hour
Optimized for sunrise and sunset at the coast, when warm light meets cool water. Set Image Control to Standard, Saturation to +1, and Contrast to 0. Use CTE white balance to amplify the warm-cool interplay. Set Highlight Adjustment to -1 to protect sky detail. This recipe makes the most of that magical window when the sun is low over the water.
Coastal Monotone
Black and white beach photography has a timeless, fine-art quality. Set Image Control to Monotone with a red filter effect to darken blue skies and water dramatically while brightening sand. Push Contrast to +2 and enable Grain Effect at Low for subtle film texture. The result is bold, graphic images with strong separation between land, sea, and sky.
Techniques for Better Beach Photos
Use the Rule of Thirds with the Horizon
Place the horizon on the upper or lower third line rather than dead center. If the sky is dramatic with clouds, give it two-thirds of the frame. If the foreground has interesting patterns in the sand or surf, let it dominate. The GR III's 28mm lens captures enough of the scene to make this framing feel natural and expansive.
Get Low for Dramatic Foreground
Some of the best beach images come from getting the camera close to ground level. Crouch down or set the GR III on the sand (carefully) to shoot across the surface. Wet sand, shells, pebbles, and foam become powerful foreground elements that lead the eye toward the ocean and horizon. The 28mm focal length exaggerates this near-far relationship beautifully.
Time Your Wave Shots
Waves have rhythm. Watch several cycles before shooting so you can anticipate when the water will reach its furthest point up the sand, when it will create the best foam patterns, and when the retreating water will leave reflective sheets on wet sand. The moment just after a wave breaks and the water fans out across the beach often produces the most photogenic results.
Shoot the Details
The beach is not only about wide landscapes. Get close to capture textures and small scenes: the grain pattern of wet sand, a single shell caught in foam, footprints disappearing into the distance, sun-bleached driftwood, water droplets on a rock. The GR III focuses as close as 6cm in macro mode, revealing a world of coastal detail invisible to the casual observer.
Use Reflections in Wet Sand
When a thin layer of water sits on hard-packed sand, it becomes a natural mirror. Position yourself where this wet sand catches reflections of the sky, clouds, or nearby subjects. These reflections add depth and symmetry to images, and the 28mm lens can include both the reflection and the reflected subject in a single frame.
Embrace Overcast Days
Cloudy skies at the beach create soft, even light that reduces harsh shadows and contrast. This is ideal for detail shots, portraits, and moody seascapes. The diffused light also makes colors appear more saturated without the blown-out highlights that midday sun creates. Some of the most atmospheric beach photography happens under grey skies.
Common Beach Photography Mistakes to Avoid
Underexposing the sand. Bright sand fools camera meters into underexposing. Always use positive exposure compensation at the beach. If your sand looks grey instead of white or golden, dial in more positive compensation.
Ignoring the foreground. A wide shot of ocean and sky with nothing in the foreground is often flat and uninteresting. Always look for foreground elements -- rocks, driftwood, surf patterns, footprints -- to anchor the composition and create depth.
Shooting only at eye level. Varying your shooting height transforms beach images. Get low for dramatic perspectives, or find an elevated position like a cliff or dune for a bird's eye view of wave patterns and shoreline curves.
Forgetting to protect your gear. Sand and salt spray are the enemies of cameras. While the GR III is more resilient than most, avoid changing settings with sandy fingers and wipe the lens frequently with a clean microfiber cloth. Never set the camera directly on dry sand without protection. After a beach session, wipe down the entire camera body with a slightly damp cloth to remove salt residue.
Centering everything. The horizon centered in the middle of the frame, the subject dead center -- these default compositions feel static. Use off-center placement, leading lines in the sand, and diagonal wave patterns to create dynamic, engaging images.
Best Times to Shoot at the Beach
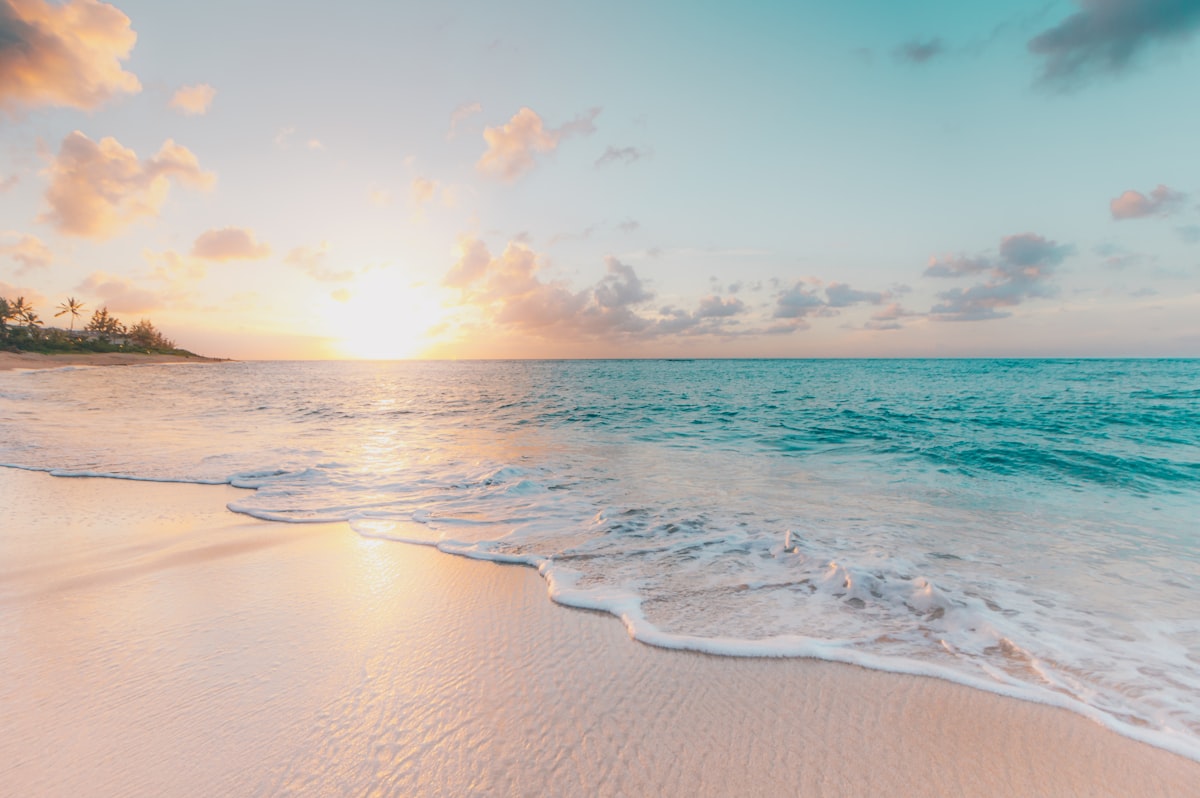
Sunrise offers clean, warm light and empty beaches. The low angle creates long shadows across sand and catches the texture of every ripple and footprint. Morning light at the coast often has a subtle pink quality that is impossible to replicate.
Late afternoon brings golden light that rakes across the water surface and warms up sand tones. This is the most popular time for beach photography, and for good reason -- the light is consistently beautiful.
Blue hour at the coast is extraordinary. The cool twilight sky reflects off the ocean and wet sand, creating a monochromatic blue world that feels serene and otherworldly. Long exposures during blue hour (use a mini tripod or rest the camera on a stable surface) smooth the water into silk.
Stormy weather creates the most dramatic coastal images. Dark clouds, crashing surf, and moody light produce powerful photographs. Shoot from a safe distance and protect the camera from direct spray.
Putting It Together
Beach and ocean photography with the Ricoh GR III is about working with the light, the water, and the endless textures of the coast. Dial in positive exposure compensation to keep your sand bright, choose a white balance that matches the mood of the moment, and explore different perspectives from ground level to standing height. The GR III's portability means it will not slow you down whether you are hiking a rocky coastline or strolling along a sandy shore.
Explore our beach and coastal presets to find recipes tuned for seaside shooting, or grab a complete preset bundle that covers every lighting condition from bright midday sun to moody overcast skies.