Ricoh GR III Golden Hour Photography: Settings, Tips, and Best Recipes
Golden hour -- the soft, warm light that appears shortly after sunrise and before sunset -- is widely considered the most flattering light for photography. The Ricoh GR III, with its sharp 18.3mm lens and flexible image controls, is an ideal companion for making the most of this brief window. Its compact size means you always have it ready when the light turns magical.
This guide covers the camera settings, preset recipes, and practical techniques you need to consistently nail golden hour shots with the GR III.
Why Golden Hour Light Is Special
Golden hour light has qualities that are difficult to replicate at any other time of day:
- Low angle creates long shadows and dramatic depth in scenes that look flat at midday
- Warm color temperature (around 3000-4000K) bathes everything in rich amber and orange tones
- Soft, diffused quality reduces harsh contrast and wraps around subjects more evenly
- Natural backlight opportunities let you shoot into the sun for silhouettes and lens flare effects
- Rapidly changing conditions reward photographers who are prepared and can work quickly
The GR III's fast startup time and responsive controls make it especially suited to golden hour shooting, where conditions can shift dramatically in just a few minutes.
Essential Camera Settings for Golden Hour
Shooting Mode: Aperture Priority
Aperture Priority (Av) is the best default mode for golden hour photography. The light changes constantly as the sun moves toward the horizon, and Av mode lets the camera adjust shutter speed automatically while you maintain control over depth of field.
Set your aperture based on the scene:
- f/2.8 for subject isolation with creamy bokeh in the warm backlight
- f/5.6 for general shooting with a good balance of sharpness and background separation
- f/8 to f/11 for landscapes and scenes where you want front-to-back sharpness
ISO Configuration
Golden hour typically provides plenty of light, especially in the early stages. Start at ISO 200 for maximum image quality and let it rise only as the light fades.
For Auto ISO, configure it through MENU > Shooting Settings > ISO Sensitivity:
- ISO range: 200-1600
- Minimum shutter speed: 1/60s for general shooting, 1/125s if you are photographing moving subjects
As the sun drops below the horizon and you transition into blue hour, you may need to push ISO higher or accept slower shutter speeds. The GR III's Shake Reduction system gives you several stops of leeway for handheld shooting in fading light.
White Balance: The Most Important Setting
White balance is where golden hour photography lives or dies on the GR III. The wrong white balance setting can neutralize the very warmth that makes golden hour special.
Avoid Auto White Balance. AWB is designed to produce neutral colors, which means it actively removes the warm cast that defines golden hour. The result is technically correct but emotionally flat.
Instead, use one of these approaches:
- Daylight (5200K) preserves the natural warmth of golden hour light as your eyes see it. This is the best starting point for most situations.
- Shade (7500K) pushes the warmth even further, exaggerating the golden tones for a more dramatic, sun-drenched look.
- CTE (Color Temperature Enhancement) amplifies whatever color cast exists in the scene. During golden hour, this means intensified warm tones that glow with rich amber light.
- Manual Kelvin at 5800-6500K gives you precise control. Start at 5800K for subtle warmth and push toward 6500K for stronger golden tones.
Metering and Exposure Compensation
Golden hour light can fool the camera's meter, especially when shooting toward the sun.
Center-weighted metering is more predictable than multi-segment metering in backlit golden hour scenes. It meters primarily from the center of the frame, giving you consistent results that are easier to adjust with exposure compensation.
Use exposure compensation liberally:
- +0.7 to +1.0 EV when shooting into the light for an airy, luminous feel
- -0.3 to -0.7 EV to deepen colors and create richer, more saturated golden tones
- -1.0 to -1.5 EV for dramatic silhouettes against a glowing sky
Focus Settings
Golden hour shooting rarely demands special focus techniques, but a few adjustments help:
AF with face detection works well for portraits in golden light. The GR III can lock onto faces even when they are partially backlit.
Snap Focus at 1.5m or 2.5m is ideal for golden hour street photography where you want to capture candid moments quickly without waiting for autofocus.
Manual Focus is best for landscape compositions where you want to set focus precisely on your chosen focal point and recompose freely.
Best Preset Recipes for Golden Hour
Warm Film Classic
This recipe emulates the look of warm-toned color negative film, perfect for the natural warmth of golden hour. Set Image Control to Standard, push Saturation to +1, and set Contrast to -1 for smooth tonal transitions. Use Daylight white balance to preserve the ambient warmth. Lower Sharpness to -1 for a softer, more analog rendering that suits the dreamy quality of golden light.
Rich Sunset Tones
For intensely warm, saturated golden hour images, switch Image Control to Vivid and keep Saturation at 0 (Vivid already boosts it). Set Contrast to +1 to make the warm tones pop against shadows. Use Shade white balance or CTE to push the warmth further. Set Key Adjustment to -1 to slightly underexpose for deeper, richer colors.
Golden Hour Fade
A trendy, slightly faded look that works beautifully in backlit golden hour scenes. Set Image Control to Soft, Contrast to -2, and Shadow Adjustment to +2 to lift the blacks for a matte, film-like fade. Keep Saturation at 0 and use Daylight white balance. The result is a warm, low-contrast image with an editorial, magazine-like quality.
Silhouette Drama
When shooting directly into the setting sun, this recipe maximizes the dramatic potential of golden hour backlighting. Set Image Control to Standard, push Contrast to +3, and set Saturation to +1. Use exposure compensation at -1.0 to -1.5 EV to render your foreground subjects as dark silhouettes against a blazing sky. CTE white balance intensifies the warm sky tones for maximum impact.
Golden Monotone
Golden hour is not just for color photography. Set Image Control to Monotone with a yellow filter effect to brighten warm tones and darken blue skies. Push Contrast to +2 and enable Grain Effect at Low for a classic film look. The yellow filter translates golden hour warmth into luminous, glowing highlights in black and white, creating images with a timeless quality.
Techniques for Better Golden Hour Photos
Arrive Early, Stay Late
Golden hour is brief -- typically 30 to 60 minutes depending on your latitude and the time of year. Arrive at your location at least 15 minutes before the golden hour begins so you can scout compositions and dial in your settings. The best light often comes in the final 10 minutes before sunset, so do not pack up too early.
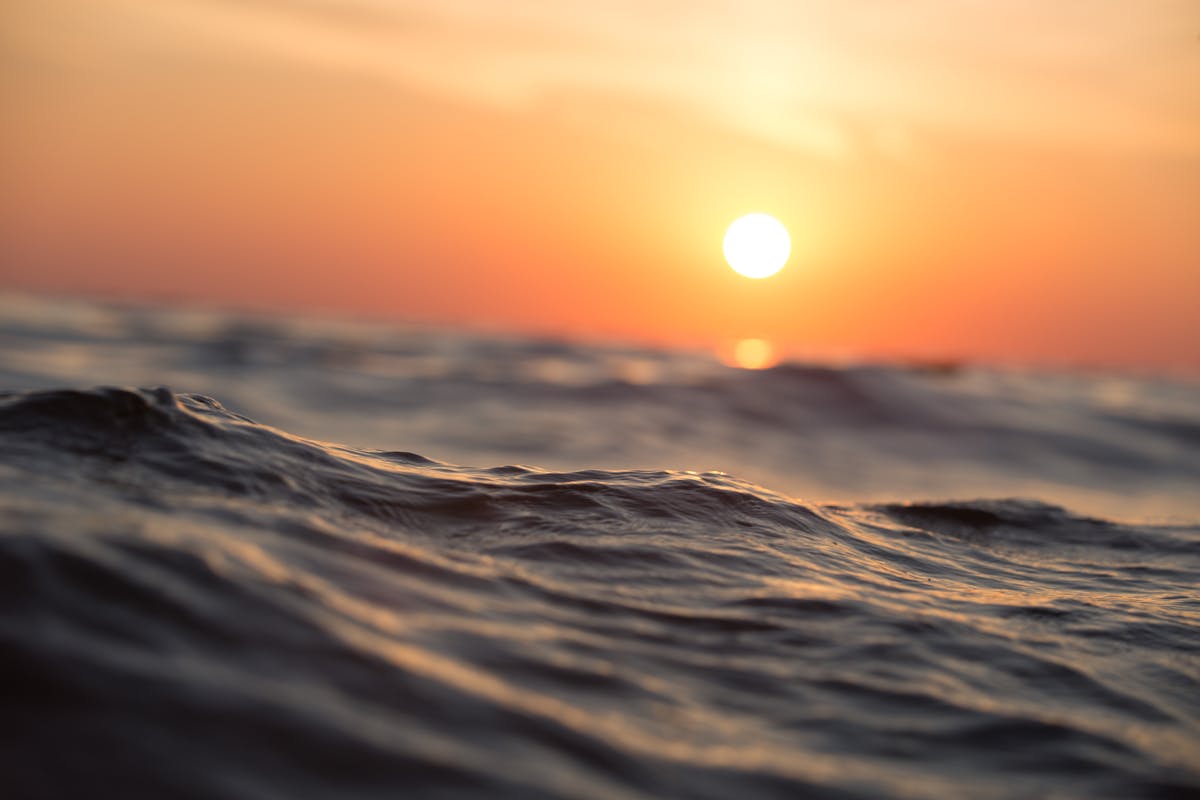
Shoot Into the Light
The most dramatic golden hour images come from shooting toward the sun rather than with it behind you. This creates rim lighting on subjects, long shadows stretching toward the camera, lens flare, and glowing backlit scenes. The GR III handles backlit scenes well, and the 18.3mm lens produces pleasant, controllable flare when the sun enters the frame.
Use Subjects as Silhouettes
When the sky is on fire with golden and orange tones, place subjects between the camera and the sun. Expose for the sky (use spot metering on a bright area or dial in negative exposure compensation) and let your subjects go dark. The GR III's wide 28mm equivalent field of view captures both the dramatic sky and strong foreground silhouettes in a single frame.
Look for Reflective Surfaces
Water, glass, wet pavement, and metallic surfaces all amplify golden hour light by bouncing it into shadow areas and creating secondary light sources. Puddles after rain, building windows, and calm water bodies become mirrors of warm light. Position yourself so reflective surfaces catch the low sun and redirect it into your composition.
Work the Shadows
The long shadows cast during golden hour are compositional elements in their own right. Look for interesting shadow patterns from trees, fences, architecture, and people. These elongated shadows add depth and visual interest, especially when they stretch across textured surfaces like cobblestones, sand, or grass.
Shoot Burst Mode for Moving Subjects
If you are photographing people, cyclists, or other moving subjects during golden hour, switch to burst mode. The light changes so quickly and the best backlit moments are fleeting -- a subject stepping into a beam of light, hair catching the sun's edge, a shadow at just the right angle. Burst mode ensures you capture the peak moment.
Common Golden Hour Mistakes to Avoid
Letting Auto White Balance steal the warmth. This is the single most common mistake. AWB will neutralize the golden tones that make these images special. Always set white balance manually or use a warm preset like Daylight or Shade.
Overexposing the sky. When the sky is the star of the show, protect those highlights. Check your histogram regularly and use negative exposure compensation if the bright tones are clipping. You can always lift shadows in post, but blown-out skies cannot be recovered.
Only shooting at sunset. Sunrise golden hour produces equally beautiful light and is far less crowded. Morning golden light has a slightly cooler, crisper quality that can be even more photogenic, especially for landscapes and architecture.
Ignoring the transition to blue hour. The 20 minutes after sunset (or before sunrise) produce gorgeous cool-toned twilight that contrasts beautifully with any remaining warm tones on the horizon. Keep shooting as golden hour fades -- some of the best images come from this transitional period.
Spending too much time adjusting settings. Golden hour waits for no one. Get your basic settings dialed in before the light arrives, then focus on finding great compositions and moments rather than fiddling with menus. The GR III's user-customizable function buttons and preset memory slots are invaluable for quick adjustments.
Planning Your Golden Hour Sessions
The exact timing of golden hour varies by location, season, and weather. Use a sun-tracking app to know precisely when golden hour starts and ends at your location. Cloud cover can enhance golden hour dramatically -- partial clouds catch and scatter the warm light, creating painterly skies that clear days cannot match.
The GR III's pocketable size means you can always have it with you for unexpected golden hour opportunities. Keep a favorite golden hour preset saved to one of your custom image profiles so you can switch to it instantly when the light turns warm.
Putting It Together
Golden hour photography with the Ricoh GR III is about preparation and responsiveness. Set your white balance to preserve the warmth, choose a preset recipe that enhances the mood you want, and focus on being present in the moment rather than buried in menus. The GR III's compact form factor and fast operation make it one of the best cameras for capturing this fleeting, magical light.
Explore our golden hour and warm-tone presets to find recipes optimized for sunset shooting, or grab a complete preset bundle that covers golden hour alongside every other lighting condition you will encounter.