Ricoh GR III Pet & Animal Photography: Settings, Techniques, and Preset Recipes
The Ricoh GR III is an underrated companion for pet and animal photography. Its compact size means no intimidating lens pointed at a skittish cat, no heavy rig swinging around a playful dog. You get an APS-C sensor with genuine depth of field, a fast f/2.8 lens for low-light indoor shots, and a startup time quick enough to catch the moment before it disappears — which, with animals, is always about to happen.
This guide covers everything from camera settings to preset recipes to real-world techniques for photographing pets at home, dogs at the park, and street cats in their element.
Why the Ricoh GR III Works for Pet Photography
Pet photography presents unique challenges that the GR III handles better than most cameras in its class:
- Compact and non-threatening — animals react to large cameras and long lenses. The GR III is small enough to go unnoticed, letting you photograph cats, dogs, and wildlife without triggering a flight response
- 0.8-second startup — animals don't wait. Power on and shoot before the moment passes
- 28mm f/2.8 lens — wide enough to include environment and context, fast enough for indoor natural light and pleasing background blur
- Macro mode (6cm minimum focus) — get close enough to capture whisker details, paw textures, and eye reflections
- Silent shutter mode — eliminates the mechanical click that startles noise-sensitive animals
- Snap Focus — pre-set a focus distance and shoot instantly without waiting for autofocus to hunt, perfect for fast-moving subjects
The 28mm focal length forces you to get close to your subject, which produces intimate, engaging pet portraits rather than detached telephoto shots. This closeness is what gives GR III pet photos their distinctive character.
Essential Camera Settings for Pet Photography
Shooting Mode: Shutter Priority (Tv) or Aperture Priority (Av)
The best mode depends on the situation:
- Shutter Priority (Tv) — use when photographing active, moving animals. You lock in a fast shutter speed and let the camera adjust everything else. This is your go-to for dogs running, cats pouncing, or birds in motion.
- Aperture Priority (Av) — use for calmer moments: a sleeping cat, a dog posing, a pet portrait session. You control depth of field while the camera handles exposure.
For most pet photography, start with Tv mode and switch to Av when the animal settles down.
Shutter Speed Guidelines
Animals move unpredictably. These minimums will keep your shots sharp:
| Situation | Minimum Shutter Speed | |---|---| | Sleeping or resting pet | 1/60s | | Sitting, calm pet | 1/125s | | Walking pet | 1/250s | | Running dog or playing cat | 1/500s | | Fast action (jumping, catching) | 1/1000s |
In Tv mode, set your shutter speed based on the animal's energy level. When in doubt, go faster — a slightly noisier photo from higher ISO is better than a blurry one.
Aperture Selection
When using Av mode for pet portraits:
- f/2.8 — maximum background blur. Isolates your pet against a soft, creamy background. Beautiful for head-and-shoulders portraits where you focus on the eyes. Be precise with focus — depth of field is very thin at this distance.
- f/4 — a safer choice for pet portraits. Keeps the full face sharp while still blurring the background. The best all-around setting for most pet photography.
- f/5.6 to f/8 — use when you want more of the animal in focus, or when photographing multiple pets together.
For single-pet portraits, f/2.8 to f/4 delivers the most visually compelling results. Always focus on the nearest eye.
ISO Configuration
Navigate to MENU > Shooting Settings > ISO Sensitivity:
- Set ISO Auto with an upper limit of ISO 6400 — pet photography often happens in less-than-ideal light (indoors, under trees, at dusk), and the GR III handles noise acceptably up to this point
- For outdoor daytime shooting, you can lower the limit to ISO 3200 for cleaner files
- Indoor pet photography regularly pushes ISO 1600–3200, which is perfectly usable
Autofocus Settings
Pet photography is where AF configuration matters most:
- AF Mode: Continuous (AF-C) — tracks moving subjects. Essential for active animals. Navigate to MENU > Shooting Settings > Focus > AF Mode and select AF-C
- AF Area: Tracking — if available in your firmware, use subject tracking. Otherwise, use Spot AF and keep the focus point on the animal's eye
- Snap Focus alternative — for fast street cat photography, set Snap Focus to 1.5m or 2.5m and pre-focus. Press the shutter fully without waiting for AF. This technique is borrowed from street photography and works brilliantly for capturing fleeting animal encounters
To configure Snap Focus: MENU > Shooting Settings > Focus > Snap Focus Distance — set to your typical shooting distance.
Drive Mode: Continuous Shooting
Animals are unpredictable. Use continuous shooting to capture multiple frames and pick the best expression or pose:
- Set Drive Mode to Continuous (H) for fast sequences
- Hold the shutter for 2-3 frame bursts rather than long sprays
- This is especially useful for action shots — a dog catching a ball, a cat mid-leap
Preset Recipes for Pet Photography
Warm Indoor Pet Portrait
This recipe produces warm, inviting tones perfect for photographing pets at home in natural window light.
| Setting | Value | |---|---| | Image Control | Standard | | Saturation | +1 | | Hue | 0 | | High/Low Key Adjust | +1 | | Contrast | -1 | | Sharpness | +2 | | Shading | 0 | | White Balance | CTE (preserves warm indoor light) | | Clarity | 0 |
The slight contrast reduction retains detail in fur (especially dark-coated animals), while the saturation and CTE white balance enhance the warm, cozy feel of indoor pet photos.
Street Cat Film Recipe
A gritty, film-inspired look for photographing street cats and urban animals. Slightly desaturated with lifted blacks for a documentary feel.
| Setting | Value | |---|---| | Image Control | Monotone | | Filter Effect | Green | | Toning | Warm | | Contrast | +1 | | Sharpness | +3 | | Clarity | +2 | | High/Low Key Adjust | 0 |
This black-and-white recipe with warm toning gives street animal photography a timeless, photojournalistic quality. The green filter lightens foliage and skin tones while darkening skies, adding drama to outdoor scenes.
Vivid Outdoor Pet Action
Bright, punchy colors for outdoor pet photography — parks, beaches, gardens.
| Setting | Value | |---|---| | Image Control | Vivid | | Saturation | +2 | | Hue | 0 | | High/Low Key Adjust | 0 | | Contrast | +1 | | Sharpness | +3 | | Shading | 0 | | White Balance | Auto | | Clarity | +1 |
The Vivid image control with boosted saturation makes green grass, blue skies, and colorful collars pop. Increased sharpness and clarity help define fur texture, especially on longer-haired breeds.
Composition Techniques for Pet Photography
Get Down to Their Level
The single most impactful improvement you can make to pet photography is shooting at the animal's eye level. This means crouching, kneeling, or lying on the ground. Eye-level shots create an intimate connection between viewer and subject that downward angles never achieve.
With the GR III, tilt the rear screen upward and shoot from a low position without needing to flatten yourself on the floor.
Focus on the Eyes
Sharp eyes are non-negotiable in pet photography. The viewer's gaze goes straight to the animal's eyes — if they're soft, the photo feels wrong regardless of everything else. Use Spot AF positioned directly on the nearest eye, or tap the touchscreen to place focus precisely.
Use the Environment
The 28mm lens naturally includes environment, so use it intentionally:
- A dog framed by a park path draws the viewer in
- A cat in a window creates a natural frame within the frame
- A pet on a textured surface (wooden floor, stone steps, grass) adds visual interest
Wait for Expression
Animals cycle through expressions quickly — curious, alert, relaxed, playful. Pre-focus, compose your shot, and wait. The right expression transforms a snapshot into a portrait. Continuous shooting mode helps you catch the peak moment.
Embrace Negative Space
Don't fill every frame with the animal. Leaving space around your subject, especially in the direction they're looking, creates a sense of environment and story. A small cat in a large room tells a different story than a tight crop.
Practical Tips for Different Animals
Dogs
- Bring treats. Hold a treat near the lens to direct the dog's gaze toward the camera
- Photograph after exercise when the dog is calmer but still alert
- Shoot during the golden hour — warm light enhances nearly every coat color
- Use Tv mode at 1/500s minimum for active play sessions
- Wet noses and tongues catch light beautifully — don't avoid them
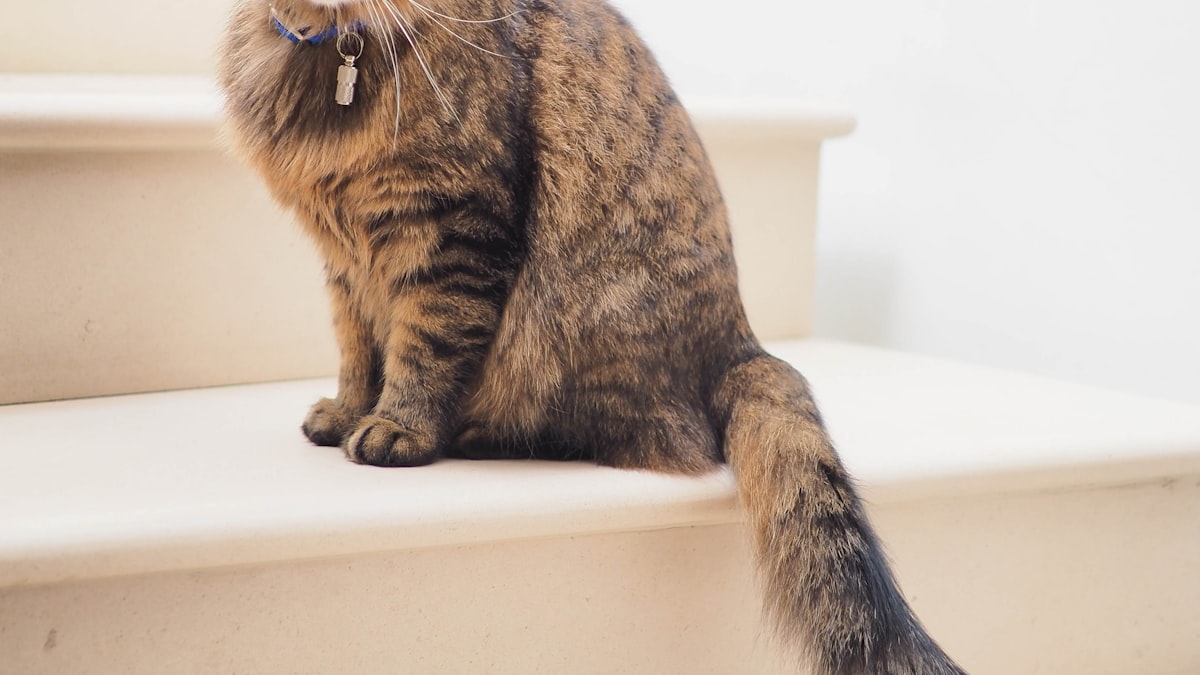
Cats
- Patience is everything. Cats don't take direction. Set up your composition and wait for the cat to move into position
- Window light is your best friend for indoor cat photography — position yourself opposite a window with the cat between you
- Use silent shutter mode — cats startle easily at mechanical sounds
- Snap Focus at 1m works perfectly for indoor cat distances
- Catch the slow blink — it's the cat equivalent of a smile
Street Animals
- Move slowly and avoid direct eye contact initially — it's perceived as threatening
- Photograph from a distance first, then gradually move closer as the animal becomes comfortable
- Snap Focus is essential — street animals don't wait for autofocus
- Shoot in bursts to capture natural behavior rather than posed moments
- Early morning and late afternoon are the best times — street cats are most active during these hours
Common Mistakes and How to Avoid Them
Blurry shots from slow shutter speed — this is the number one pet photography problem. Always check your shutter speed. If it drops below 1/125s with a moving animal, increase ISO or switch to Tv mode.
Focusing on the nose instead of the eyes — at f/2.8, the depth of field is so shallow that focusing on the nose leaves the eyes soft. Always place your AF point on the eye.
Shooting from standing height — photos of pets from above look like surveillance footage. Get low. Every time.
Over-processing dark fur — black dogs and cats lose detail quickly with heavy contrast or shadow adjustments. Use the Warm Indoor preset recipe above, which reduces contrast to preserve fur detail.
Missing the moment because of chimping — stop reviewing every shot on screen. Trust your settings, shoot in bursts, and review later. Animals don't pause for your editing sessions.
Post-Processing Tips
If you shoot RAW + JPEG on the GR III, you have flexibility in post:
- Fur detail recovery — use the highlights slider to bring back texture in white fur, shadows slider for black fur
- Eye enhancement — a small increase in local clarity on the eyes makes them sparkle without looking artificial
- Background cleanup — a subtle vignette draws attention toward the center and your subject
- Noise reduction — apply minimal luminance noise reduction to preserve fur texture. Over-smoothing makes fur look plastic
- White balance adjustment — indoor mixed lighting can produce color casts on fur. Correct in post by sampling a neutral area
Final Thoughts
The Ricoh GR III turns pet photography into something spontaneous and natural. No gear anxiety, no intimidating setup — just a small camera that produces genuinely beautiful images of animals. The key is understanding its strengths (speed, discretion, close focus, depth of field) and working with them rather than fighting the 28mm focal length.
Start with the preset recipes above, practice Snap Focus for unpredictable moments, and always — always — get down to eye level. Your pet photography will improve immediately.