Ricoh GR III Rainy Day Photography: Settings, Tips, and Best Recipes
Rain transforms ordinary scenes into something cinematic. Reflections stretch across wet pavement, colors saturate under overcast skies, and city streets take on a moody atmosphere that dry weather simply cannot replicate. The Ricoh GR III -- compact, discreet, and quick to shoot -- is one of the best cameras you can carry when the weather turns.
This guide covers everything you need to confidently shoot with your Ricoh GR III in the rain: how to protect your gear, the best camera settings for wet conditions, preset recipes that enhance rainy day mood, and composition techniques that make the most of puddles, reflections, and diffused light.
Why the Ricoh GR III Excels in Rainy Conditions
The GR III has several characteristics that make it a natural fit for rainy day shooting:
- Compact size means you can shoot one-handed while holding an umbrella, or pull it from a jacket pocket for a quick shot before ducking back under cover
- Fast startup time (under 1 second) lets you capture fleeting moments -- a splash, a reflection, a figure silhouetted against wet neon
- APS-C sensor handles the lower light levels of overcast and rainy days with clean results at higher ISOs
- Snap Focus eliminates autofocus hunting in low-contrast rainy scenes where AF systems often struggle
- 28mm focal length captures wide environmental context, pulling in reflections, wet streets, and atmospheric depth all in one frame
Protecting Your Ricoh GR III in the Rain
The Ricoh GR III is not weather-sealed, so you need a strategy to keep it safe while shooting in wet conditions.
Practical Protection Methods
Use a clear plastic bag as the simplest protection. Cut a hole for the lens, secure it with a rubber band, and you have a functional rain cover that costs nothing. You can still access the rear LCD through the plastic.
Carry a microfiber cloth at all times. Wipe the lens element frequently -- even a single water droplet will create a soft, blurry spot in your images. Check the lens before every shot until it becomes second nature.
Shoot under cover when possible. Awnings, doorways, bus shelters, and covered walkways give you dry shooting positions while keeping the rain in your frame. This also creates natural leading lines and framing elements.
Use a small umbrella in one hand while shooting with the other. The GR III's compact body and light weight make one-handed shooting entirely practical, especially with Snap Focus enabled so you don't need to worry about focus.
Bring a ziplock bag for storage between shooting sessions. When you're walking between locations, seal the camera inside to prevent moisture accumulation.
Post-Shoot Care
After shooting in the rain, wipe down the entire camera body with a dry microfiber cloth. Pay special attention to the lens barrel area, the battery/card door, and the control dial. Let the camera air dry completely before putting it in a bag or case. If you notice any moisture near the lens element, leave the camera in a dry environment with good airflow for several hours.
Essential Camera Settings for Rainy Day Photography
Shooting Mode: Aperture Priority
Aperture Priority (Av) is the ideal mode for rainy day shooting. Light levels change constantly as clouds shift and rain intensity varies, and Av mode handles these fluctuations automatically while giving you control over depth of field.
Set your aperture based on what you're shooting:
- f/2.8 for isolating subjects against blurred rainy backgrounds, bokeh from raindrops, and low-light situations under heavy overcast
- f/5.6 for a good balance of sharpness and depth when shooting street scenes with rain
- f/8 for maximum sharpness in wider compositions where you want everything from the wet foreground to the background buildings in focus
ISO Configuration
Rainy days mean less light, but not as little as nighttime. Navigate to MENU > Shooting Settings > ISO Sensitivity and configure:
- Auto ISO with a range of ISO 200-3200 and minimum shutter speed of 1/125s. This keeps your shutter fast enough to freeze raindrops and walking pedestrians while allowing the camera to bump ISO as needed.
- For freezing rain in mid-air: Increase minimum shutter speed to 1/500s and allow ISO up to 6400. Fast shutter speeds turn individual raindrops into frozen streaks that add energy to the image.
- For silky rain streaks: Drop the minimum shutter speed to 1/30s or slower. Combined with the camera's Shake Reduction, you can create a soft, painterly rain effect while keeping static elements sharp.
Focus Settings for Wet Weather
Rain reduces contrast in scenes, which can cause autofocus to hunt. Configure your focus approach:
Snap Focus at 2m is the most reliable option for rainy street photography. At f/5.6, your depth of field covers roughly 1.3 to 4 meters -- more than enough for most street scenes. This eliminates any AF hesitation and lets you shoot instantly.
Snap Focus at 1.5m works better for closer subjects -- people under umbrellas, puddle reflections at your feet, or raindrops on surfaces.
Continuous AF can work in lighter rain if the scene has enough contrast. Use it for tracking moving subjects like cyclists or pedestrians crossing intersections.
Metering for Rainy Scenes
Wet surfaces, bright reflections, and dark skies can confuse your meter. Use Center-Weighted metering for the most predictable results, as it prioritizes the middle of the frame where your subject typically is while accounting for the overall scene.
Apply +0.3 to +0.7 exposure compensation as a starting point. Rainy scenes tend to have a lot of dark tones (wet pavement, dark umbrellas, overcast skies), and the meter will try to brighten them toward middle gray, which can overexpose highlights and wash out the moody atmosphere. Slight positive compensation preserves bright reflections without losing shadow detail.
White Balance for Mood
The color of light changes dramatically in the rain. Overcast skies shift toward blue, while artificial lights appear warmer by contrast. Your white balance choice sets the entire mood of the image:
- Auto White Balance produces neutral, clean results but can feel flat in rainy conditions
- Cloudy (6000K) adds warmth that counteracts the cool, blue cast of overcast skies -- good for a cozy, inviting mood
- Daylight (5200K) preserves the natural cool tones of rain, keeping the blue-gray atmosphere intact
- Tungsten (3000K) pushes everything dramatically cool and blue, creating a cold, melancholy look that works beautifully for urban rain scenes
- Manual Kelvin at 4200K provides a subtle cool shift that feels cinematic without being overtly blue
Best Preset Recipes for Rainy Day Photography
Rain Noir
A high-contrast black-and-white recipe that turns rainy streets into cinematic frames. Strip away color to focus purely on the interplay of light, shadow, and reflection. Set contrast to +2 for deep blacks in wet pavement and bright whites in reflections. Push sharpness to +2 to emphasize rain texture and wet surface detail. Use the Yellow filter effect to darken overcast skies and brighten skin tones of passing pedestrians.
| Parameter | Value | |-----------|-------| | Image Control | Monotone | | Saturation | N/A | | Hue | N/A | | High/Low Key | -1 | | Contrast | +2 | | Contrast (Highlight) | +1 | | Contrast (Shadow) | +2 | | Sharpness | +2 | | Shading | 0 | | Filter Effect | Yellow | | Toning | N/A |
This recipe is available in our Ricoh GR III Presets Collection for one-click application.
Wet City Fade
A desaturated color recipe with lifted blacks that evokes the look of urban photography in overcast weather. Reduce saturation moderately so colors feel muted and rain-washed, then lift the shadows to create a faded, editorial look. This recipe works especially well for street scenes, cafe windows, and reflections in puddles.
| Parameter | Value | |-----------|-------| | Image Control | Standard | | Saturation | -2 | | Hue | 0 | | High/Low Key | 0 | | Contrast | -1 | | Contrast (Highlight) | 0 | | Contrast (Shadow) | -2 | | Sharpness | +1 | | Shading | 0 | | White Balance | 4200K |
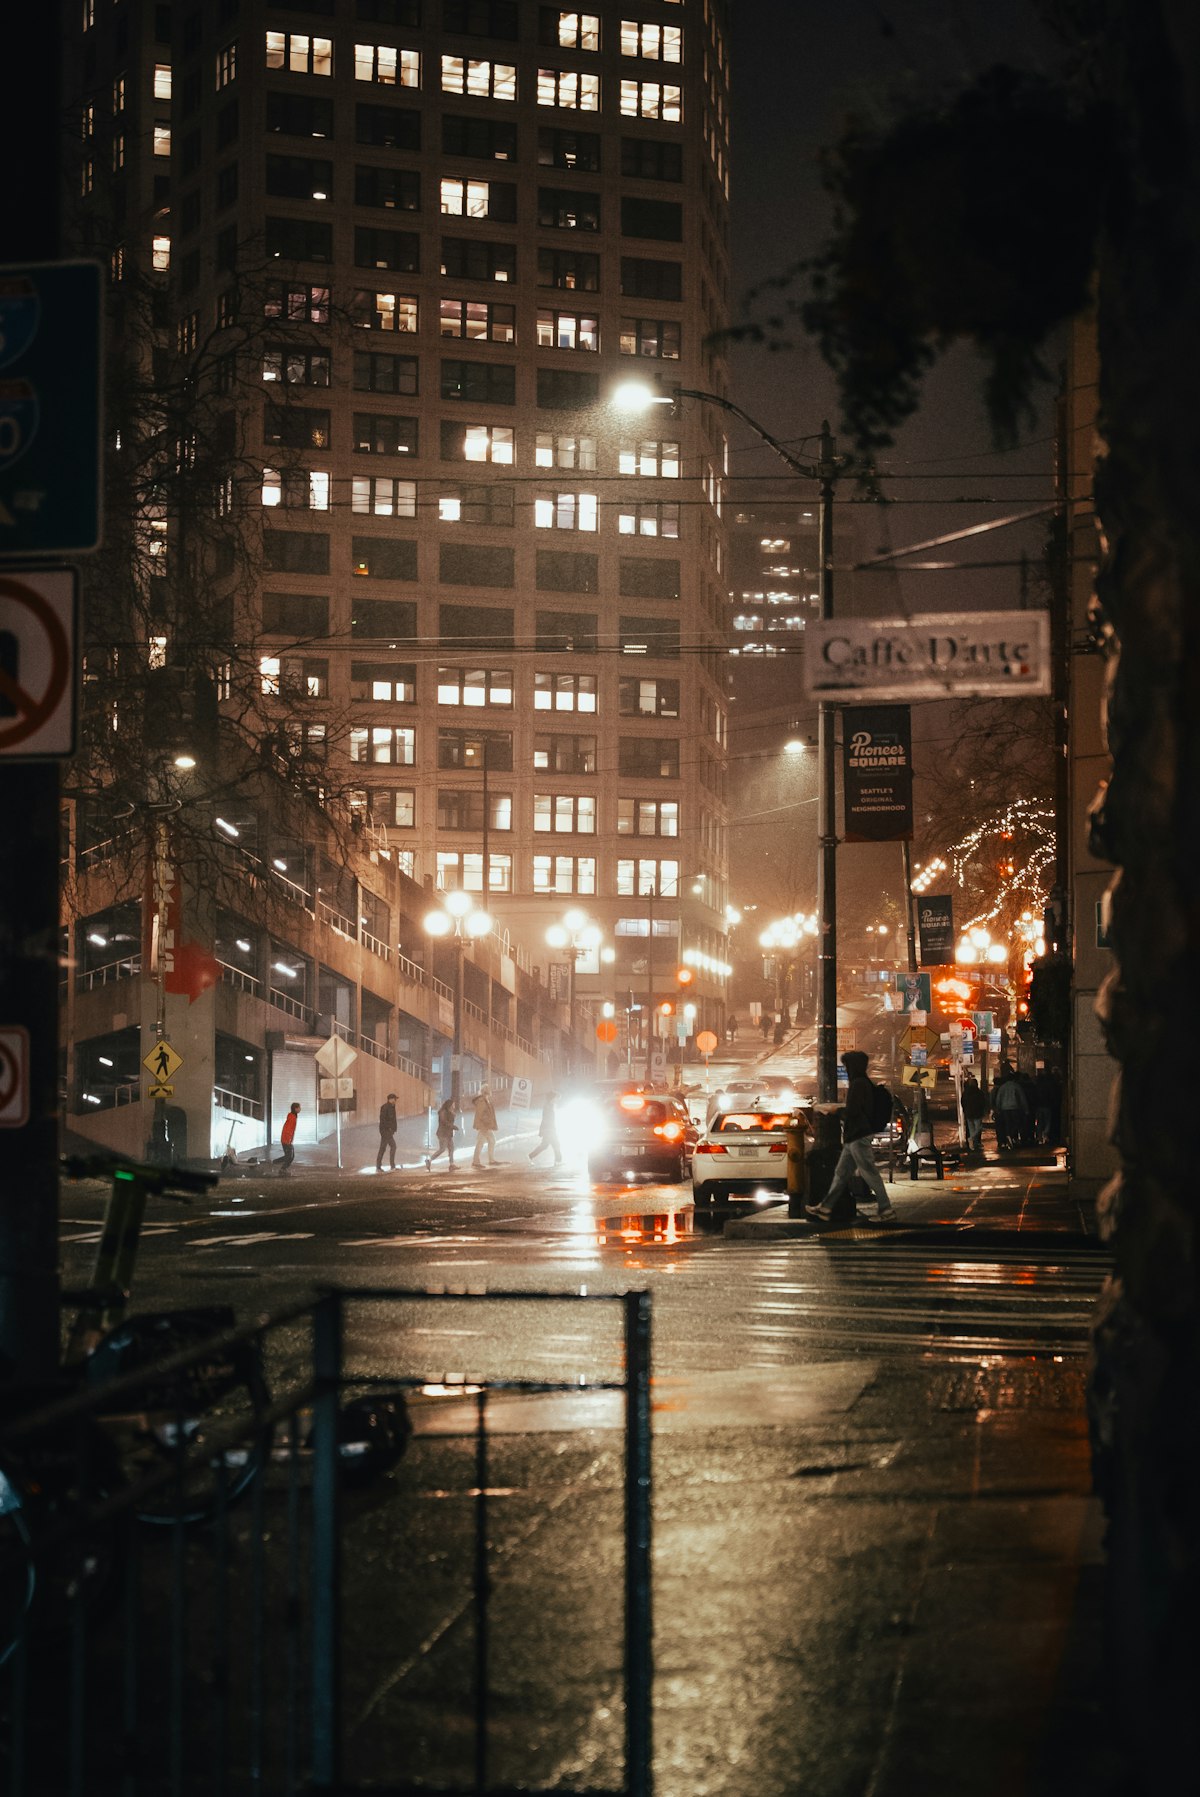
Neon Rain
For shooting rainy streets at night when neon signs, headlights, and streetlamps scatter light through water droplets. Push saturation to +2 to make colored reflections pop against dark wet surfaces. Increase contrast so that the dark portions of the scene go fully black while lit areas glow. Set white balance to Daylight to preserve the warm amber of artificial lighting.
| Parameter | Value | |-----------|-------| | Image Control | Vivid | | Saturation | +2 | | Hue | 0 | | High/Low Key | 0 | | Contrast | +2 | | Contrast (Highlight) | 0 | | Contrast (Shadow) | +1 | | Sharpness | +2 | | Shading | 0 | | White Balance | Daylight (5200K) |
Soft Overcast
A gentle, low-contrast recipe for the quieter moments of a rainy day -- fog, mist, light drizzle. Reduce contrast and sharpness to create a soft, dreamy look that emphasizes the diffused quality of overcast light. Keep saturation slightly negative for a pastel palette.
| Parameter | Value | |-----------|-------| | Image Control | Standard | | Saturation | -1 | | Hue | 0 | | High/Low Key | +1 | | Contrast | -2 | | Contrast (Highlight) | -1 | | Contrast (Shadow) | -1 | | Sharpness | -1 | | Shading | 0 | | White Balance | Cloudy (6000K) |
Explore all of our rainy day and weather-specific presets in the complete preset bundles.
Composition Techniques for Rainy Day Photography
Use Reflections as Your Primary Tool
Wet surfaces transform every sidewalk, road, and plaza into a mirror. Reflections double your composition -- buildings, signs, and figures appear both right-side up and inverted. Shoot low to the ground to maximize the reflection area in your frame. At 28mm, you can get very close to a puddle and still capture a wide scene reflected in it.
Shoot Through Glass
Windows streaked with rain create a natural soft-focus foreground element. Shoot from inside a cafe looking out at the street, focusing either on the raindrops on the glass or the scene beyond. At f/2.8, you can render rain droplets on the glass as beautiful bokeh while keeping the street scene sharp, or vice versa.
Look for Umbrellas and Color
Umbrellas add splashes of color to otherwise gray, muted rainy scenes. A single red umbrella in a sea of dark coats becomes a natural focal point. Position yourself at intersections or crosswalks where groups of umbrella-carrying pedestrians converge. The 28mm lens captures multiple figures and their umbrellas within the frame.
Embrace Leading Lines in Wet Pavement
Rain accentuates lines that are invisible in dry conditions. Curbs become bright reflective strips. Crosswalk markings glow. Tram tracks gleam. Use these rain-enhanced lines to guide the viewer's eye through your composition.
Capture Splashes and Motion
Position yourself near puddles at crosswalks and wait for pedestrians or cyclists to pass through. Use a fast shutter speed (1/500s or faster) to freeze the splash, or a slower speed (1/30s) to render it as a dynamic blur. Either approach adds energy and a sense of the moment to your image.
Use the Overcast Sky as a Softbox
Overcast skies act as a giant diffuser, creating soft, even light with minimal harsh shadows. This is ideal for portraits and close-ups of details -- raindrops on leaves, wet textures on walls, reflections in shop windows. The even lighting means your entire frame has consistent exposure, making it easier to capture detail in both highlights and shadows.
Advanced Techniques
Interval Shooting in the Rain
The GR III's interval shooting function can capture a time-lapse sequence of a rainy street scene. Set the interval to 5 or 10 seconds and let the camera capture the changing mood as rain intensifies, people come and go, and reflections shift. Configure exposure to Aperture Priority so the camera adjusts automatically as light levels change.
Using the Built-In ND Filter
The GR III's 2-stop ND filter is useful for rainy day photography when you want longer exposures to blur rain into atmospheric streaks. Activate it via MENU > Shooting Settings > ND Filter > On. Combined with f/8 and ISO 200, you can achieve shutter speeds around 1/8s to 1/2s even in daylight rain, which is long enough to turn falling rain into soft, directional lines.
High ISO Black and White
Don't be afraid of pushing ISO to 6400 or even 12800 when shooting black-and-white in heavy rain and dark conditions. The grain at high ISOs adds a gritty, film-like texture that complements rainy street photography perfectly. It evokes the look of classic photojournalism shot on pushed Tri-X film. Combine this with the Rain Noir preset recipe above for the full effect.
Focus Stacking with Puddle Reflections
For deliberate, tripod-based compositions of puddle reflections, shoot two frames: one focused on the surface detail of the puddle (water texture, floating leaves) and one focused on the reflected scene. Blend them later in post-processing for an image that's sharp from the immediate foreground through to the reflected background.
Common Mistakes to Avoid
Forgetting to check the lens for water droplets. This is the single most common mistake in rain photography. A droplet on the lens creates a smeared, out-of-focus area that can ruin an otherwise great shot. Wipe the lens before every shot.
Overexposing reflections. Wet surfaces reflect bright light sources, and these reflections can easily blow out. Use the histogram display (MENU > Display > Histogram) to monitor highlights, and dial in negative exposure compensation if you see clipping.
Shooting only at eye level. The best rainy day images often come from unusual angles -- low to the ground to capture reflections, or from above to capture umbrella patterns. Move your body and your camera to find compositions that take advantage of what rain adds to the scene.
Avoiding rain entirely. Light drizzle and the moments just before and after heavy rain are the most photogenic. Thick downpours reduce visibility and make it harder to compose, but light rain adds atmosphere without obscuring your subject. Time your shooting for the edges of rain showers.
Using flash. Flash illuminates individual raindrops in front of the lens, creating distracting bright spots throughout the image. Keep the flash off and work with available light for natural-looking rain photography.
Recommended Shooting Workflow
- Check the weather and head out when light rain or drizzle is expected, or immediately after a heavy shower when surfaces are still wet but the rain has eased
- Prepare your gear: microfiber cloth in your pocket, plastic bag for the camera, umbrella if needed
- Set up your camera: Aperture Priority, f/5.6, Auto ISO 200-3200, Snap Focus at 2m, Center-Weighted metering, +0.3 exposure compensation
- Load a preset recipe -- start with Wet City Fade for daytime or Neon Rain for evening
- Wipe the lens before your first shot and after any exposure to direct rain
- Shoot prolifically -- rainy conditions change rapidly, and the best moments are fleeting
- Review and adjust exposure compensation based on the histogram after your first few shots
- Dry your camera thoroughly after each session
Rain photography rewards those who show up when others stay home. The Ricoh GR III's portability means you can always have it with you when the weather turns, and its fast, intuitive controls let you capture scenes that disappear as quickly as they form. Load up one of the preset recipes above, grab an umbrella, and head out the next time it rains -- you'll come back with images unlike anything you've shot on a sunny day.
Browse our complete collection of Ricoh GR III presets optimized for every lighting condition, including rainy day and low-light scenarios. For the best value, check out our preset bundles that include weather-specific recipes alongside our most popular film emulation looks.