Ricoh GR III Spring & Cherry Blossom Photography: Settings, Recipes, and Seasonal Tips
Cherry blossom season lasts barely two weeks. One strong gust of wind, one rainy afternoon, and the petals are gone. The Ricoh GR III -- pocketable, silent, and razor-sharp -- is built for exactly this kind of fleeting beauty. You can walk through a tunnel of pink blossoms and shoot without breaking stride.
This guide covers everything you need to photograph spring with your Ricoh GR III: the best settings for cherry blossoms and spring flowers, preset recipes that enhance soft pastels and warm greens, composition techniques for seasonal scenes, and practical tips for getting the most out of the short blooming window.
Why the Ricoh GR III Excels in Spring
Spring photography rewards cameras that disappear into the moment. The GR III delivers:
- 28mm wide angle captures sweeping canopies of blossoms overhead, flower-lined paths, and layered spring streetscapes in a single frame
- f/2.8 maximum aperture creates soft, dreamy bokeh behind individual blossoms -- isolating one perfect branch against a wash of pink
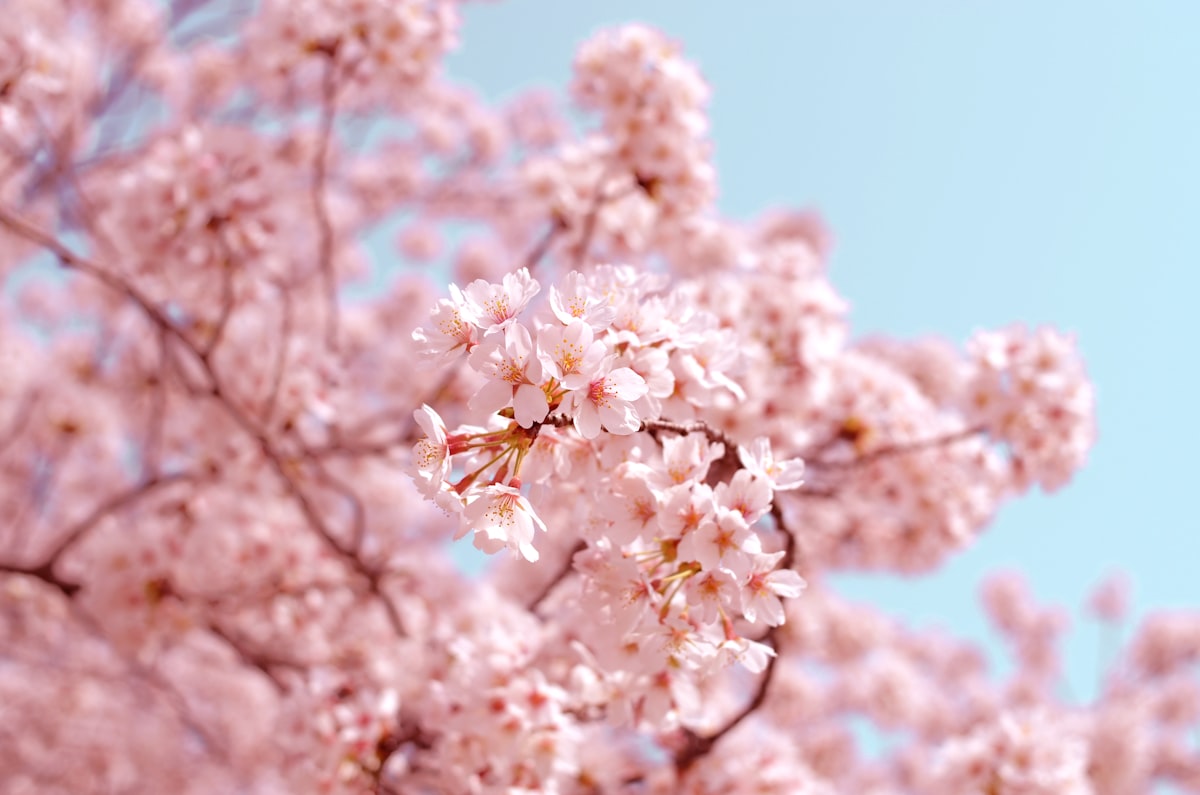
- Macro mode focuses down to 6cm, letting you fill the frame with a single flower cluster, dewdrops on petals, or pollen-dusted stamens
- Silent shooting keeps you unobtrusive in crowded parks and gardens during peak bloom
- Compact size means you carry it every day during the short blossom window -- the best camera for cherry blossoms is the one you have when the petals start falling
Best Camera Settings for Cherry Blossom Photography
Exposure: Keeping Blossoms Bright Without Blowing Out
Cherry blossoms are similar to snow in one critical way: they fool your meter. A frame full of pale pink petals causes the camera to underexpose, turning delicate blossoms into dull gray-pink. The fix is the same as for snow -- positive exposure compensation.
Recommended exposure compensation:
- +0.3 to +0.7 EV for most cherry blossom scenes. This keeps petals bright and luminous without losing detail in the highlights.
- +1.0 EV when blossoms fill nearly the entire frame against a bright sky.
- 0 EV when blossoms are a smaller element in a larger scene with mixed tones (people, buildings, dark branches).
Check your histogram after the first few shots. Blossom tones should sit in the right half of the histogram without hard-clipping on the far edge.
Shooting Mode: Aperture Priority
Aperture Priority (Av) is the most practical mode for spring shooting. Light changes constantly as clouds pass and you move between sun-dappled paths and shaded groves.
- f/2.8 for single-branch portraits and bokeh-heavy compositions. Wide open isolates blossoms against a creamy blur of background color.
- f/4 to f/5.6 for street scenes with blossoms. Balances subject sharpness with enough depth of field to keep surrounding context recognizable.
- f/8 for landscape compositions where you want an entire row of blooming trees sharp from foreground to background.
ISO and Shutter Speed
Navigate to MENU > Shooting Settings > ISO Sensitivity and configure:
- Auto ISO 200-1600 for daylight shooting. Spring light is generally abundant, so ISO will stay low.
- Minimum shutter speed: 1/250s to freeze petals that are gently moving in the breeze. Wind is the constant enemy of sharp blossom photography.
- For falling petals: Increase minimum shutter speed to 1/500s to freeze individual petals mid-air. These "petal rain" shots are among the most iconic spring images.
- For intentional motion blur: Drop to 1/30s and let swirling petals streak across the frame. Works best on windy days with a steady hand or camera support.
Focus Settings
- Single-point AF with a small focus area gives you precise control over which blossom cluster is sharp. Move the focus point to your subject rather than recomposing.
- Macro mode (flower icon) for close-up shots within 12cm. The GR III's macro capability is exceptional -- you can capture individual petals with stunning detail.
- Snap Focus at 2.5m for quick walk-by shots of blossom-covered streets. Set and shoot without waiting for autofocus to hunt through overlapping branches.
White Balance for Cherry Blossoms
Auto White Balance often neutralizes the warm pink tones that make cherry blossoms special. Consider these alternatives:
- Daylight (5500K) preserves the natural warm pink of blossoms in direct sunlight.
- Shade (7000K) adds warmth that intensifies pink and coral tones -- especially effective on overcast days when blossoms can look washed out.
- CTE (Color Temperature Enhancement) is a GR III-specific option that amplifies the dominant color cast. Under pink blossoms, it pushes the pink further, creating vivid, saturated results.
- Manual Kelvin at 6000-6500K gives a reliable warm-but-natural look across varied lighting.
Preset Recipes for Spring Photography
1. Soft Sakura -- Pastel Film Look
This recipe produces the soft, slightly faded aesthetic that defines Japanese cherry blossom photography.
| Setting | Value | |---------|-------| | Image Control | Positive Film | | Saturation | -1 | | Hue | 0 | | High/Low Key Adjust | +1 | | Contrast | -1 | | Contrast (Highlight) | -1 | | Contrast (Shadow) | 0 | | Sharpness | 0 | | Shading | 0 | | Clarity | -1 | | White Balance | Shade (7000K) |
Why it works: Positive Film provides a warm base. Reducing saturation and contrast softens the image without losing color entirely. The slight high-key adjustment lifts the overall brightness, mimicking the airy feel of expired film stock. Shade white balance adds the golden-pink warmth that makes sakura glow.
2. Vivid Spring -- Punchy Color Pop
For bold, saturated spring imagery where you want blossoms and fresh green leaves to leap off the screen.
| Setting | Value | |---------|-------| | Image Control | Vivid | | Saturation | +2 | | Hue | 0 | | High/Low Key Adjust | 0 | | Contrast | +1 | | Contrast (Highlight) | 0 | | Contrast (Shadow) | +1 | | Sharpness | +2 | | Shading | 0 | | Clarity | +1 | | White Balance | Daylight (5500K) |
Why it works: Vivid mode plus boosted saturation makes pinks pop and greens glow. Added contrast and clarity give the image a crisp, modern look that works well for social media and web use. Daylight white balance keeps colors accurate and punchy.
3. Nostalgic Bloom -- Warm Vintage
A warm, slightly desaturated look reminiscent of 1970s color film. Perfect for evening golden hour blossom shoots.
| Setting | Value | |---------|-------| | Image Control | Retro | | Saturation | -1 | | Hue | +1 | | High/Low Key Adjust | 0 | | Contrast | -1 | | Contrast (Highlight) | -2 | | Contrast (Shadow) | +1 | | Sharpness | -1 | | Shading | +2 | | Clarity | 0 | | White Balance | CTE |
Why it works: Retro image control provides a warm, amber-shifted base. Pulling highlights down prevents the sky from blowing out while lifting shadows reveals detail in dark branches. The hue shift pushes pinks toward coral. CTE white balance amplifies the warm tones already present in golden hour blossom scenes.
Composition Techniques for Spring Scenes
Frame with Branches
Use overhanging cherry blossom branches as a natural frame around your main subject -- a temple, a bridge, a person walking. Position blossoms in the top third of the frame and shoot at f/2.8 to f/4 so the framing branches are slightly soft while the subject stays sharp.
Look Down
Not every blossom shot needs to point upward. Some of the strongest spring images look down: fallen petals collecting on wet pavement, blossoms floating in a puddle or stream, a carpet of pink on stone steps. The GR III's 28mm lens captures these ground-level scenes with enough context to tell the full story.
Shoot the Canopy
Stand directly under a cherry tree and point the GR III straight up. Use f/5.6 to f/8 for sharpness across the entire frame. The result is an immersive, kaleidoscopic pattern of pink against blue sky. This works especially well when petals are backlit by afternoon sun, creating a luminous glow through translucent petals.
Include People
Spring photography comes alive with human elements. A person under an umbrella of blossoms, a couple on a bench beneath a flowering tree, children reaching for low-hanging branches. Use Snap Focus at 2.5m to shoot quickly without disrupting the moment.
Isolate Single Branches
Switch to macro mode or shoot wide open at f/2.8 and fill the frame with a single flowering branch. Choose a branch with blossoms at different stages -- buds, open flowers, and a few fallen petals -- to tell the story of the bloom cycle in one image.
Use Reflections
After rain, puddles become mirrors for blossom-covered trees overhead. Get low, switch to macro mode if needed, and compose so the reflection fills the lower half of the frame. The real trees anchor the top while their inverted reflection creates visual depth.
Best Times to Shoot Cherry Blossoms
Early Morning (6:00-8:00 AM)
The golden hour light at dawn paints blossoms in warm amber and coral tones. Parks and gardens are empty, giving you clean compositions without crowds. Dew on petals adds sparkle and dimension to close-up shots.
Overcast Midday
Contrary to instinct, overcast days are excellent for blossom photography. The soft, diffused light eliminates harsh shadows and reduces contrast, letting you capture the full tonal range of pale pink petals. Colors appear more saturated under flat light, and you avoid the blown-out sky problem that plagues backlit blossom shots on sunny days.
Golden Hour (5:00-7:00 PM)
Late afternoon light streaming horizontally through blossom branches creates dramatic backlit compositions. Petals glow like stained glass when the sun shines through them. This is the ideal time for the Nostalgic Bloom preset recipe.
After Rain
Some of the most atmospheric spring images happen right after rain. Wet pavement reflects blossom colors. Petals stick to every surface -- railings, car hoods, bench slats -- creating found still-life compositions. The air is often misty, adding mood and separating visual layers.
Night with City Lights
Cherry blossoms illuminated by streetlights and lanterns are a staple of Japanese photography. Set ISO to 1600-3200, shoot at f/2.8, and use the warm artificial light to add atmosphere. The GR III handles these conditions well -- its APS-C sensor keeps noise manageable at higher ISOs.
Common Mistakes and How to Avoid Them
Overexposing the Sky
When shooting upward into blossoms against a bright sky, the sky often blows out completely. Solutions:
- Expose for the sky and lift shadows in post-processing
- Use negative highlight contrast (-2) in your preset to tame bright areas
- Shoot on overcast days when the sky is naturally close in brightness to the blossoms
Missing the Peak
Cherry blossoms move from first buds to full bloom to petal fall in roughly 10-14 days. Track local bloom forecasts and prioritize shooting during days 4-10 of the bloom cycle, when trees are at or near full bloom.
Fighting the Crowds
Popular blossom spots attract crowds. Instead of competing for the classic viewpoints:
- Arrive at dawn when parks open
- Find secondary trees on side streets away from the main viewing areas
- Incorporate crowds as part of the scene rather than trying to exclude them -- the GR III's 28mm lens is wide enough to show the festive atmosphere
Ignoring the Ground
The most overlooked compositions are at your feet. Fallen petals create stunning patterns, especially on dark surfaces like wet asphalt, wooden decks, or stone paths. Train yourself to look down as often as you look up during blossom season.
Quick Reference: Spring Settings Cheat Sheet
| Scenario | Mode | Aperture | ISO | Exp Comp | Focus | WB | |----------|------|----------|-----|----------|-------|----| | Blossom canopy | Av | f/5.6-f/8 | Auto 200-800 | +0.7 | Single AF | Daylight | | Single branch bokeh | Av | f/2.8 | Auto 200-800 | +0.3 | Single AF / Macro | Shade | | Street with blossoms | Av | f/4-f/5.6 | Auto 200-1600 | +0.3 | Snap 2.5m | Daylight | | Falling petals | Av | f/4 | Auto 200-3200 | +0.3 | Snap 2.5m | Daylight | | Close-up petals | Av | f/2.8-f/4 | Auto 200-800 | +0.3 | Macro | Shade | | Night blossoms | Av | f/2.8 | 1600-3200 | 0 | Single AF | CTE | | Petal reflections | Av | f/5.6 | Auto 200-800 | 0 | Macro / AF | Daylight |
Final Thoughts
Spring is short. Cherry blossoms are shorter. The Ricoh GR III's greatest advantage during blossom season is not its sensor or its lens -- it's that you will actually carry it. Every day, in your jacket pocket, ready to pull out when you turn a corner and find a tree exploding with pink. The best blossom photo is the one you take because your camera was with you.
Load one of the preset recipes above, set Aperture Priority with +0.3 to +0.7 EV compensation, and go walk. The blossoms will do the rest.