Ricoh GR III Urban Architecture Photography: Settings, Recipes, and Composition Tips
Cities are full of visual drama -- towering glass facades, brutalist concrete, repeating geometric patterns, and light carving between buildings in ways that change by the hour. The Ricoh GR III is one of the best compact cameras for capturing urban architecture, and most photographers underestimate just how capable it is for this kind of work.
The 28mm lens gives you enough width to frame entire buildings from street level without the extreme distortion of ultra-wide lenses. The APS-C sensor resolves fine architectural detail with precision. And the compact size means you can shoot all day in a city without fatigue or drawing attention. This guide covers the settings, preset recipes, and techniques that will sharpen your urban architecture photography with the GR III.
Why the Ricoh GR III Excels at Urban Architecture
The GR III has specific strengths that make it a natural fit for shooting buildings and city structures:
- 28mm f/2.8 lens captures wide perspectives on buildings without extreme barrel distortion common in ultra-wide lenses
- 24.2MP APS-C sensor resolves fine texture in brick, stone, glass, and steel -- the materials that define urban environments
- Sharp corner-to-corner performance is critical for architecture where straight lines extend to the edges of the frame
- Snap Focus mode lets you preset a focus distance and shoot instantly -- ideal for walking through cities and reacting to compositions quickly
- Built-in level gauge helps you keep verticals straight, which is non-negotiable in architectural photography
- Silent, discreet operation lets you shoot freely inside lobbies, atriums, and public spaces without disruption
The 28mm focal length is a classic choice for architectural photography. It provides enough coverage to capture a full building facade from across the street, while keeping perspective distortion manageable. Unlike 16mm or 21mm lenses, it doesn't warp straight lines into curves unless you deliberately tilt the camera.
Essential Camera Settings for Urban Architecture
Shooting Mode: Aperture Priority (Av)
Aperture Priority is your default mode for architecture. You control depth of field and sharpness, and the camera manages exposure. Set the mode dial to Av and adjust aperture with the rear dial.
Switch to Manual (M) when shooting interiors with mixed lighting, long exposures of buildings at night, or when you need consistent exposure across a series of images for stitching.
Aperture Selection
Architecture demands sharpness across the entire frame. Choose your aperture accordingly:
- f/5.6 -- Peak sharpness from the GR III's lens. Use this when your subject is at medium to far distance and you don't need extreme depth of field.
- f/8 -- The architecture default. Excellent sharpness with deep depth of field from foreground details to distant skylines.
- f/11 -- Use when you need maximum depth of field, such as shooting through a foreground element toward a building. Minor diffraction softening is acceptable for the added depth.
- f/2.8 -- Reserved for isolating architectural details (a doorknob, a window pattern, a texture) with shallow depth of field.
Avoid f/16 and smaller. Diffraction reduces the fine detail that makes architectural photos compelling.
ISO Configuration
Navigate to MENU > Shooting Settings > ISO Sensitivity:
- ISO 200 for all daylight architecture work. Maximum detail, zero noise.
- Auto ISO 200-800 for walking and shooting when light varies between sun and shadow.
- ISO 200 locked for tripod work, night architecture, and long exposures.
- ISO 1600-3200 only as a last resort for handheld interior shots in dim spaces.
Clean files matter more in architecture than in most genres. Noise obscures the fine textures and clean lines that define architectural subjects.
Focus Settings
Snap Focus is the secret weapon for urban architecture. Set it to 2.5m or 5m and everything from that distance to infinity will be sharp at f/8. You never wait for autofocus to hunt -- just compose and shoot.
Access Snap Focus through MENU > Shooting Settings > Focus > Snap Focus Distance and set your preferred distance.
For precision work on specific details, use Touch AF to place your focus point exactly where you need it. The GR III's touchscreen makes this fast and accurate.
Manual Focus with focus peaking is ideal when you're on a tripod shooting details or interiors. Enable focus peaking in MENU > Shooting Settings > Focus Assist.
White Balance
Urban architecture involves a wide range of materials and lighting conditions. White balance choices have a major impact:
- Daylight (5500K) -- Neutral and accurate. The default for exterior architecture in sunlight.
- Auto White Balance (AWB) -- Works well for interiors and mixed lighting where you want the camera to compensate.
- Tungsten (3200K) -- Use for a cool, blue-toned look on exterior night shots where warm artificial light dominates.
- Kelvin Manual (4000-4500K) -- A popular choice for twilight architecture that balances the warm artificial lights of buildings against the cool blue sky.
Shooting RAW gives you full white balance flexibility in post-processing, but getting it close in-camera means better JPEG results from your recipes.
Perspective and the Level Gauge
Converging verticals are the biggest technical issue in architectural photography. When you tilt the camera up to include the top of a building, vertical lines lean inward.
Enable the electronic level through MENU > Display Settings > Electronic Level and keep it visible while shooting. For the most accurate verticals:
- Stand back and use the full 28mm width rather than tilting up
- Hold the camera perfectly level and crop in post if needed
- Accept some convergence for dramatic low-angle shots -- just make it look intentional
Best Preset Recipes for Urban Architecture
These recipes are designed for architectural subjects and urban environments. Each delivers a finished look straight from the camera.
Clean Modern
A neutral, high-clarity look that emphasizes the precision and materials of contemporary architecture. Glass, steel, and concrete look their best with this recipe.
| Setting | Value | |---|---| | Image Control | Standard | | Saturation | -1 | | Hue | 0 | | High/Low Key | 0 | | Contrast | +1 | | Contrast (Highlight) | -1 | | Contrast (Shadow) | +1 | | Sharpness | +4 | | Shading | 0 | | Clarity | +4 | | White Balance | Daylight (5500K) |
Desaturated tones keep the focus on form and texture rather than color. Maximum sharpness and clarity bring out every surface detail in glass and steel. The shadow contrast adds depth to recessed areas and window frames without losing detail.
Warm Brutalist
A warm, slightly gritty look that suits concrete, brick, and older urban structures. Think mid-century modernism, parking garages, and raw industrial spaces.
| Setting | Value | |---|---| | Image Control | Standard | | Saturation | 0 | | Hue | +1 | | High/Low Key | -1 | | Contrast | +2 | | Contrast (Highlight) | 0 | | Contrast (Shadow) | +2 | | Sharpness | +3 | | Shading | +1 | | Clarity | +3 | | White Balance | Shade (7500K) |
The warm white balance brings out the golden and ochre tones in concrete and brick. High contrast and shadow contrast create bold, graphic images with deep blacks. The slight vignette from shading draws the eye toward the center of the frame.
Urban Monochrome
A high-contrast black-and-white recipe that strips architecture down to pure form, line, and shadow.
| Setting | Value | |---|---| | Image Control | Monochrome | | Filter Effect | Yellow | | Toning | 0 | | High/Low Key | -1 | | Contrast | +3 | | Contrast (Highlight) | +1 | | Contrast (Shadow) | +2 | | Sharpness | +4 | | Shading | 0 | | Clarity | +4 |
The yellow filter slightly darkens blue skies while keeping building surfaces bright -- a more subtle effect than a red filter but effective for urban scenes. Maximum sharpness and clarity give surfaces a tactile quality. High contrast creates the graphic, bold look that makes monochrome architecture images stand out.
Blue Hour Glass
A cool, contemporary look designed specifically for twilight and blue hour when buildings are lit from within and the sky turns deep blue.
| Setting | Value | |---|---| | Image Control | Vivid | | Saturation | +1 | | Hue | 0 | | High/Low Key | 0 | | Contrast | +1 | | Contrast (Highlight) | -2 | | Contrast (Shadow) | 0 | | Sharpness | +3 | | Shading | 0 | | Clarity | +2 | | White Balance | Kelvin 4200K |
The slightly cool Kelvin white balance preserves the blue sky tones while keeping interior lighting warm -- creating the classic blue-and-gold color contrast of twilight architecture photography. Vivid image control and boosted saturation make the colors pop. Negative highlight contrast preserves detail in lit windows.
Faded Urban Film
An analog-inspired look that gives urban scenes a timeless, slightly nostalgic quality. Works well for older buildings, street-level views, and mixed residential-commercial neighborhoods.
| Setting | Value | |---|---| | Image Control | Standard | | Saturation | -1 | | Hue | +1 | | High/Low Key | +2 | | Contrast | -2 | | Contrast (Highlight) | -2 | | Contrast (Shadow) | -2 | | Sharpness | +1 | | Shading | +2 | | Clarity | 0 | | White Balance | CTE |
Reduced contrast and lifted shadows create a faded, film-like quality. The desaturation and warm hue shift give colors a muted, vintage feel. CTE white balance adapts to the ambient light, enhancing whatever mood the scene already has. This recipe works especially well in overcast conditions.
Composition Techniques for Urban Architecture
Look Up
The most underused angle in architecture photography is straight up. Stand at the base of a building, point the GR III directly overhead, and capture the converging lines as they reach toward the sky. This creates powerful geometric abstractions -- especially with glass towers, circular atriums, and buildings with symmetrical features.
Find Repetition and Pattern
Cities are built on repetition. Rows of windows, identical balconies, stacked floors, repeating structural elements -- these patterns create visual rhythm. The GR III's sharp lens renders these details crisply. Look for breaks in the pattern (an open window among closed ones, a light on in one apartment) to add a focal point.
Use Light and Shadow
Harsh midday sun that ruins portrait photography creates dramatic opportunities for architecture. Hard shadows cast by one building onto another, strips of light cutting through alleyways, and the interplay of sun and shade on a textured facade all make compelling images. Walk through a city between 10am and 2pm and you'll find shadow patterns everywhere.
Frame Within Frames
Use archways, doorways, windows, tunnels, and gaps between buildings to frame your subject. This creates depth and draws the viewer's eye through the image. The 28mm lens is wide enough to include the framing element while still showing the subject clearly.
Isolate Details
Not every architecture shot needs to show the whole building. Move close and fill the frame with a single detail -- a decorative bracket, a pattern of rivets, the texture of weathered stone, a reflection in a glass panel. The GR III focuses as close as 6cm in macro mode, letting you capture these intimate architectural moments.
Embrace Symmetry
Buildings are often designed with symmetry, and your compositions can leverage this. Position yourself on the center axis of a facade, corridor, or bridge and align the camera carefully. The electronic level helps here. Perfect symmetry creates a sense of order and intention that resonates with viewers.
Time of Day Guide
Different times of day completely transform the same building:
Early Morning (6-8am): Warm, low-angle light rakes across facades and reveals surface texture. Long shadows add drama. Streets are empty, giving you clean compositions without people or vehicles.
Midday (11am-2pm): Harsh overhead light creates strong geometric shadows. Best for high-contrast black-and-white work and pattern photography. Not flattering for most color work, but excellent for graphic compositions.
Golden Hour (1 hour before sunset): Warm light turns stone and concrete golden. Glass buildings become mirrors reflecting warm sky tones. The best time for color architecture photography.
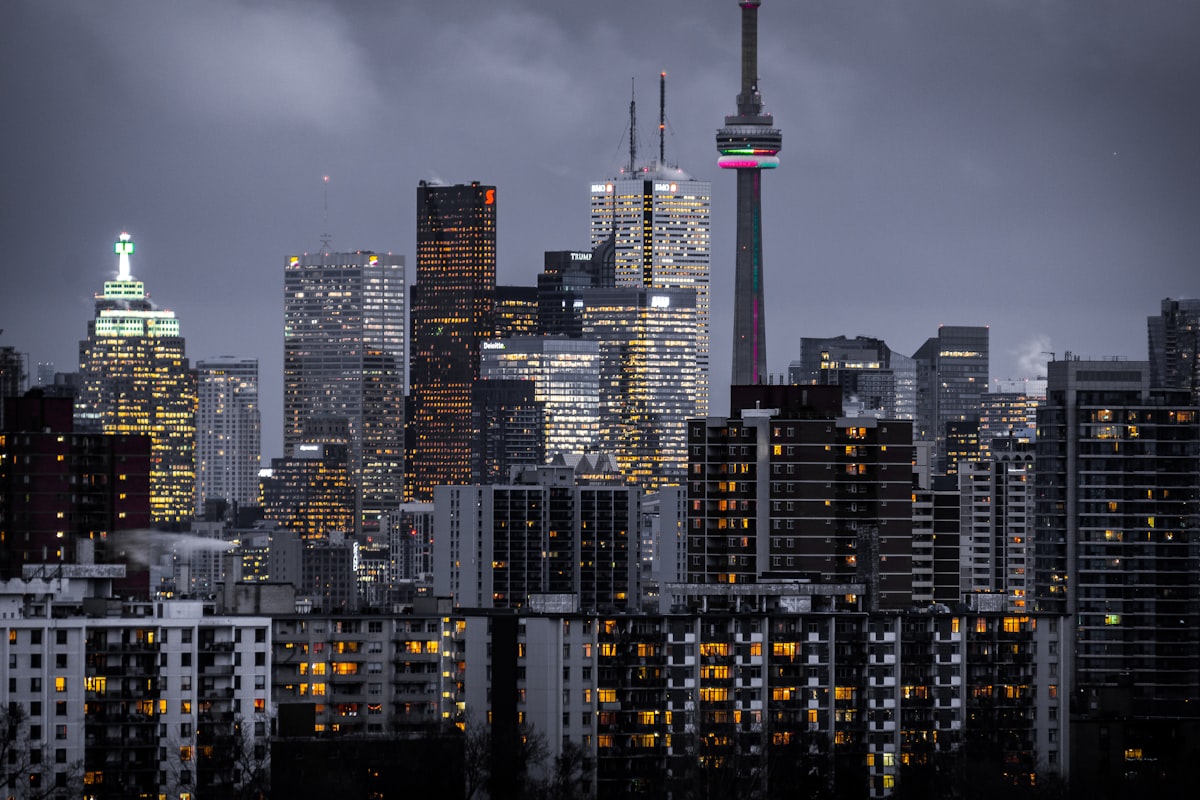
Blue Hour (20-30 minutes after sunset): Interior lights come on while the sky retains deep blue color. The combination of warm artificial light and cool ambient light is the signature look of professional architectural photography. Use a tripod and ISO 200 for maximum quality.
Night: Fully dark skies with illuminated buildings. Use Manual mode, ISO 200, f/8, and long exposures (2-15 seconds) on a tripod. The ND filter is not needed -- you want all the light you can get.
Practical Tips for Urban Architecture Photography
Keep your sensor clean. Architecture images show dust spots clearly against smooth surfaces like sky and glass. Check your sensor regularly and use a blower.
Shoot RAW + JPEG. The JPEG gives you a finished image with your recipe applied. The RAW gives you the ability to correct perspective distortion, adjust white balance, and recover highlights in post.
Use Snap Focus liberally. Set it to 5m at f/8 and everything from about 2.5 meters to infinity is sharp. You can walk through a city reacting to compositions instantly without waiting for autofocus.
Scout locations on Google Maps. Use Street View to preview buildings, identify interesting facades, and plan your visit for the right time of day and direction of light.
Respect private property. Shooting the exterior of buildings from public spaces is generally permitted, but interiors, private lobbies, and some commercial properties may require permission. When in doubt, ask.
Revisit in different weather. A building that looks ordinary on a clear day can become extraordinary in fog, rain, or dramatic cloud conditions. The GR III's weather resistance handles light rain, and wet surfaces add reflections that double your visual interest.
The Ricoh GR III's combination of a sharp 28mm lens, compact size, and powerful image processing makes it an ideal companion for urban architecture photography. Load one of the recipes above, head to your nearest city center, and start looking up.
Explore our architecture-ready presets or grab a complete bundle to expand your creative options for city shooting.