Ricoh GR III Winter Snow Photography: Settings, Recipes, and Cold Weather Tips
Snow changes everything. Familiar streets become hushed and luminous, rooftops and branches carry soft white edges, and light behaves differently when it bounces off a million frozen surfaces. The Ricoh GR III -- compact enough to operate with gloves and fast enough to catch fleeting winter moments -- is an outstanding companion for cold weather photography.
This guide covers everything you need to shoot confidently with your Ricoh GR III in winter: how to handle the camera in freezing temperatures, the best settings for snow scenes, preset recipes that bring out the beauty of cold light, and composition techniques that make winter images compelling.
Why the Ricoh GR III Is Perfect for Winter Photography
Winter shooting demands a camera you can operate quickly in uncomfortable conditions. The GR III delivers:
- Compact body fits inside jacket pockets, keeping it warm between shots and always accessible without fumbling with a camera bag in the cold
- Fast startup (under 1 second) means you can pull it out, shoot a snow flurry or a frost-covered window, and pocket it again before your fingers go numb
- APS-C sensor handles the tricky dynamic range of snow scenes -- bright whites against deep shadows -- with room to recover detail in post-processing
- Snap Focus lets you shoot instantly without waiting for autofocus to struggle against low-contrast white backgrounds
- 28mm focal length captures the expansive feel of snow-covered environments, pulling in wide winter landscapes and atmospheric street scenes
Protecting Your Ricoh GR III in Cold Weather
Cold temperatures introduce specific risks for electronics and optics. A few precautions keep your GR III safe and functional.
Battery Life in the Cold
Cold weather drains batteries significantly faster. Lithium-ion batteries lose capacity as temperatures drop, and you can expect roughly 30-50% less battery life in freezing conditions.
Carry at least two spare batteries and keep them in an inner pocket close to your body. Body heat keeps them warm and near full capacity. When your active battery starts draining quickly, swap it with a warm spare and pocket the cold one to recover.
Turn off the camera between shots rather than leaving it on standby. The GR III starts up in under a second, so there's almost no delay penalty.
Condensation Prevention
The biggest risk to your camera in winter is not the cold itself -- it's the transition from cold to warm. When you bring a cold camera into a heated room, condensation forms instantly on and inside the lens, sensor, and electronics.
Before going indoors, seal the camera in a ziplock bag while it's still cold. Let it warm up gradually inside the sealed bag for 20-30 minutes. The condensation will form on the outside of the bag instead of on the camera.
Carry a silica gel packet inside your camera bag to absorb any residual moisture.
Handling with Gloves
The GR III's minimal controls actually become an advantage in winter. You only need to access the shutter button, rear dial, and a few key buttons -- all manageable with thin liner gloves. Thick winter gloves make precise control difficult, so invest in a pair of photography-specific touchscreen gloves or thin merino wool liners that let you feel the controls.
Essential Camera Settings for Snow Photography
The Exposure Challenge: Why Snow Fools Your Meter
Snow is the single most common cause of underexposure in winter photography. Your camera's meter assumes every scene averages out to middle gray (18% gray). A scene dominated by white snow tricks the meter into thinking everything is too bright, and it compensates by darkening the exposure -- turning your brilliant white snow into muddy gray.
The fix is straightforward: dial in positive exposure compensation.
Exposure Compensation Settings
- +0.7 to +1.0 EV for scenes where snow fills most of the frame (open fields, rooftops, snowy streets). This is your starting point for keeping snow white without blowing out highlights.
- +0.3 to +0.7 EV for mixed scenes where snow shares the frame with darker elements like buildings, trees, or people.
- 0 EV for scenes where snow is a background element and your subject occupies most of the frame (a person in a dark coat against snow, for example).
Check your histogram frequently. The histogram should be pushed toward the right side without clipping. A small spike at the far right is acceptable for specular highlights on ice, but the main snow tones should sit in the upper-mid range.
Shooting Mode: Aperture Priority
Aperture Priority (Av) handles winter shooting well because light levels shift as clouds move and snow intensity changes. Set your aperture based on the scene:
- f/2.8 for isolating subjects against soft, blurred snowy backgrounds. Works beautifully for portraits, ice crystals on branches, and detail shots.
- f/5.6 for general winter street photography with a good balance of sharpness and bokeh.
- f/8 to f/11 for expansive snow landscapes where you want front-to-back sharpness across the entire frame.
ISO Configuration
Navigate to MENU > Shooting Settings > ISO Sensitivity and configure:
- Auto ISO with a range of ISO 200-1600 for daytime snow scenes. Snow reflects so much light that you rarely need high ISOs during the day, even under heavy overcast.
- For falling snow: Set minimum shutter speed to 1/500s to freeze individual snowflakes as white dots against the background. Allow ISO up to 3200 if needed.
- For snow streaks: Drop minimum shutter speed to 1/60s to let snowflakes blur into elegant diagonal lines. This requires steady hands or a support surface.
Focus Settings for Snowy Scenes
White-on-white scenes with minimal contrast can confuse autofocus systems. Configure your focus approach:
Snap Focus at 2.5m is ideal for winter landscapes and street scenes. At f/5.6, your depth of field is generous enough to cover most compositions without any AF hunting.
Snap Focus at 1m for close-up frost and ice details -- frozen puddles, icicles, frost patterns on windows and metal surfaces.
Manual Focus is worth using for macro-style shots of snowflakes and ice crystals. The GR III's focus peaking feature (set to White for visibility against snowy scenes) makes manual focus precise and fast.
White Balance for Winter Tones
White balance dramatically affects the mood of winter images. Snow is highly reflective and takes on the color of the ambient light, so your WB choice shapes the entire feel of the image.
- Daylight (5500K) renders snow with a cool, natural blue tint under overcast skies. This looks authentic and clean.
- Shade (7000K) warms up the cool tones, giving snow a faint golden quality. Works well for late afternoon winter light or when you want a cozier feel.
- CTE (Color Temperature Enhancement) amplifies the existing color temperature. In winter, this deepens blue shadows and warms golden hour tones, creating dramatic color contrast.
- Manual 4500K creates an intentionally cool, blue-toned winter atmosphere. Popular for moody, cinematic winter street photography.
Preset Recipes for Winter Snow Photography
Recipe 1: Clean Winter Light
A versatile recipe for bright, clear winter days with snow on the ground.
| Setting | Value | |---|---| | Image Control | Standard | | Saturation | -1 | | Hue | 0 | | High/Low Key Adj. | +1 | | Contrast | -1 | | Sharpness | +2 | | Shading | 0 | | White Balance | Daylight |
This recipe slightly desaturates colors so the snow stays clean and white without color casts, while boosting highlights to keep snow luminous. Reduced contrast preserves shadow detail in the darker areas of the scene.
Recipe 2: Moody Blue Winter
A cooler, more atmospheric recipe for overcast days, falling snow, and twilight scenes.
| Setting | Value | |---|---| | Image Control | Standard | | Saturation | -2 | | Hue | +1 | | High/Low Key Adj. | 0 | | Contrast | +1 | | Sharpness | +1 | | Shading | -1 | | White Balance | Manual 4500K |
The lower color temperature pushes everything toward a steel-blue tone that feels authentically cold. Increased contrast and deeper shadows create moodier images with a cinematic quality.
Recipe 3: Warm Winter Golden Hour
For the brief golden hour light that hits snow-covered scenes during early morning or late afternoon.
| Setting | Value | |---|---| | Image Control | Vivid | | Saturation | +1 | | Hue | -1 | | High/Low Key Adj. | +1 | | Contrast | 0 | | Sharpness | +2 | | Shading | 0 | | White Balance | Shade |
This recipe leans into the warm tones of low winter sun. The Shade white balance adds warmth, Vivid image control enriches the golden light, and the hue shift pushes oranges slightly warmer. Snow in shadow areas retains a cool blue cast that contrasts beautifully with the warm highlights.
Recipe 4: Black and White Snow
Snow scenes are natural candidates for black and white -- the high contrast between white snow and dark elements creates graphic, striking compositions.
| Setting | Value | |---|---| | Image Control | Monotone | | Filter Effect | Green | | Toning | 0 | | Contrast | +2 | | Sharpness | +3 | | Shading | 0 | | White Balance | Auto |
High contrast makes the most of the natural tonal separation in snow scenes. The green filter effect slightly darkens skies while keeping snow bright, adding drama. Increased sharpness defines textures in ice, bark, and frozen surfaces.
Composition Techniques for Winter Photography
Use Contrast Between Snow and Dark Elements
Snow simplifies backgrounds into clean white space. Use this to isolate dark subjects -- a lone figure walking, bare tree branches, footprints leading into the distance, a red door against a white wall. The high tonal contrast makes compositions feel bold and graphic.
Capture Tracks and Traces
Fresh snow records movement. Footprints, tire tracks, animal prints, and ski trails all create leading lines and tell stories about who or what passed through the scene. Shoot these from a low angle or from above for the most impact.
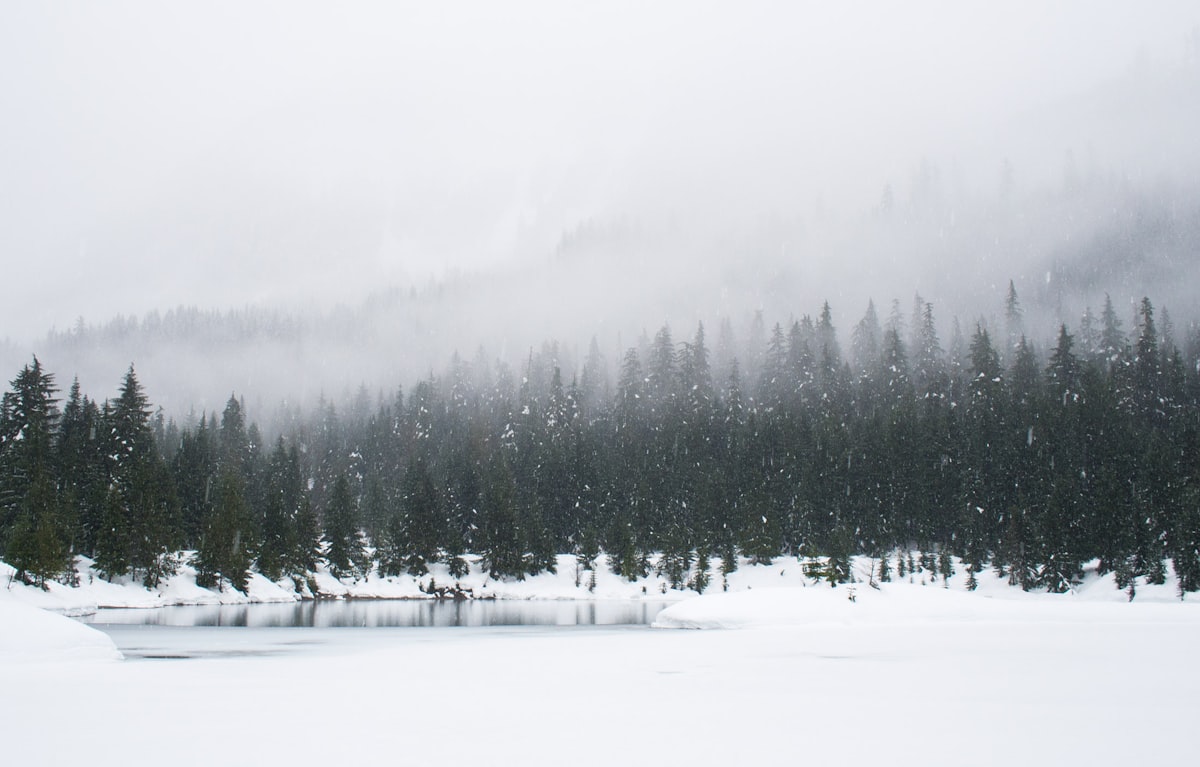
Shoot During Snowfall
Actively falling snow adds depth and atmosphere. Snowflakes create a layered curtain effect -- sharp in the foreground, progressively softer in the background -- that gives images a sense of three-dimensionality. A faster shutter speed (1/500s+) freezes individual flakes; a slower speed (1/60s) blurs them into streaks.
Look for Color Against White
Winter reduces the color palette of most environments, which makes any remaining color pop dramatically. A red scarf, yellow taxi, green storefront awning, or blue-painted bench against white snow creates a powerful focal point. Train yourself to scan for these color contrasts.
Embrace Blue Hour and Twilight
Winter days are short, and the blue hour -- the period just before sunrise and just after sunset -- lasts longer in cold months. During this time, snow takes on a deep blue color while artificial lights glow warm orange and yellow. This color contrast between cool natural light and warm artificial light is one of winter photography's greatest gifts.
Shoot Reflections in Ice
Frozen puddles, iced-over ponds, and thin ice layers on surfaces create partial reflections and distortions that add visual interest. Get low and close to use these as foreground elements.
Common Mistakes in Winter Snow Photography
Underexposing snow is the most common error. If your snow looks gray in review, add more exposure compensation. It's better to slightly overexpose and pull back in post than to try to brighten muddy gray snow.
Forgetting to check the lens for condensation or snowflakes that land on the front element. A single melted snowflake creates a soft, blurry spot that ruins an otherwise sharp image. Wipe the lens between shots.
Staying out too long without warming batteries. When the camera starts behaving sluggishly or the battery indicator drops suddenly, swap to a warm battery immediately rather than trying to squeeze out a few more shots.
Shooting only wide. While the 28mm lens captures beautiful wide winter scenes, don't forget to move in close for details: ice crystal patterns, frost on metal, snow piled on a mailbox, frozen berries on a branch. These intimate shots add variety to your winter portfolio.
Post-Processing Tips for Snow Images
If you shoot RAW alongside your preset recipes, a few adjustments can enhance winter images:
- Lift the whites slightly to ensure snow reads as truly white, not off-white
- Add a touch of clarity to enhance texture in ice and frost
- Cool the shadows slightly (add blue) while keeping highlights neutral or warm for natural color separation
- Reduce noise in shadow areas, since lifting shadows in snow scenes can reveal noise from the sensor
- Use a slight S-curve in the tone curve to add punch without losing the soft quality of diffused winter light
Final Thoughts
Winter is one of the most rewarding seasons for photography. The Ricoh GR III's combination of pocket-sized portability, fast operation, and excellent image quality makes it ideal for cold weather shooting where you need a camera that works as fast as you do. Apply the exposure compensation, protect your gear from condensation, and let the snow transform your familiar surroundings into something new.
Load one of the preset recipes above, step outside, and start shooting. The best winter images often come from the simplest scenes -- a quiet street after fresh snowfall, a single set of footprints leading away, warm light spilling from a window onto fresh powder. The Ricoh GR III is ready whenever winter calls.