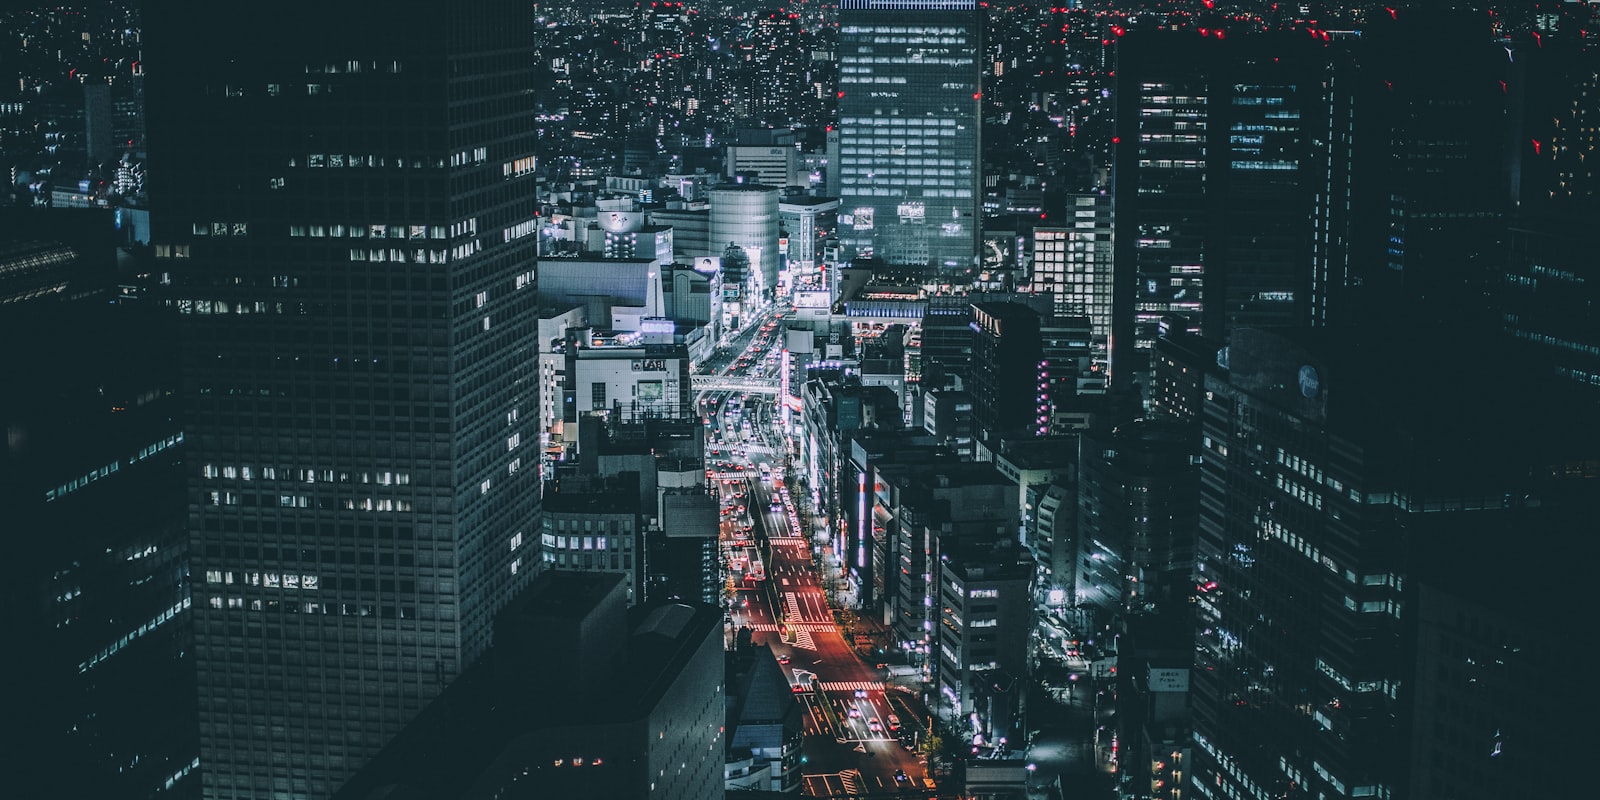
Kodak Vision3 500T Recipe for the Ricoh GR III: The Cinematic Tungsten Movie Look
Kodak Vision3 500T isn't a stills film at all — it's the tungsten-balanced motion picture stock that Hollywood actually shoots on, the emulsion behind countless feature films, music videos, and moody night scenes. Its magic is a high-speed (ISO 500), tungsten-balanced negative built for artificial light: warm streetlamps and neon render naturally, while any daylight or shade in the frame drifts toward that unmistakable cool, cinematic teal. It's the same base film that gets re-spooled into CineStill 800T — but shot straight, without the remjet layer removed, you get the tungsten cine look without the glowing red halation. The result is pure cinema: teal shadows, amber highlights, and a soft, filmic restraint that makes ordinary night streets look like a movie still.
The best part? You can get remarkably close to that look in-camera on your Ricoh GR III. In this guide we'll dial in a complete Kodak Vision3 500T film recipe, explain why each setting matters, and cover the light, subjects, and shooting style that make this cinematic movie look truly sing.
What Makes the Kodak Vision3 500T Look
Before touching the menu, it helps to know exactly what you're chasing. Vision3 500T has a signature that's distinct from consumer color-negative films:
- A tungsten-balanced foundation — the film is engineered for 3200K artificial light, so warm sources render neutral while cooler ambient light turns teal-blue
- The classic "teal and orange" cinema palette — cool shadows and mid-tones against warm highlights and skin
- Excellent highlight latitude — Kodak's signature ability to hold detail in bright neon, headlights, and windows without harsh clipping
- Muted, restrained saturation — colors are rich but never garish, with a soft, film-like rolloff
- Fine-to-moderate grain for a 500-speed film, giving texture without grit
Where a warm consumer film like Kodak Gold 200 makes daylight glow golden, Vision3 500T does the opposite: it cools the ambient world into cinematic teal and lets only the artificial warm light punch through. The GR III's white balance and Image Control tools are perfectly suited to recreating this — the key is deliberately shifting white balance cooler while keeping color depth rich and contrast gentle.
The Kodak Vision3 500T Recipe for Ricoh GR III
Navigate to MENU > Still Image Settings > Image Control and select Positive Film as your base. Then dial in the following:
- Image Control: Positive Film
- Saturation: -1 (muted, cinematic color — never oversaturated)
- Hue: 0
- High/Low Key Adjustment: -1 (slightly moodier, protects the cinematic shadows)
- Contrast: -1
- Contrast (Highlight): -1 (preserves neon and headlight detail)
- Contrast (Shadow): +1 (keeps shadows deep but not crushed)
- Sharpness: +1
- Shading: +1 (a touch of vignette for the cinematic frame)
- Clarity: 0
- White Balance: Manual — around 3800–4200K (this is the heart of the recipe)
- WB Fine-Tune: shift slightly toward Blue/Green (roughly B2, G1)
- ISO: Auto 500–6400 (this is a fast film — embrace higher ISO)
- Exposure Compensation: -0.3 as a starting point
Save this as one of your User custom modes (U1–U3) so you can recall it instantly when the light turns tungsten.
Why these settings work
Positive Film as the base gives you the rich color depth and smooth tonality that reads as "cinema." It's more restrained than Vivid and holds highlights more gracefully than the standard profile — exactly what you want for a movie-still aesthetic.
Manual white balance around 3800–4200K is the single most important setting. This is what makes the look tungsten. A daylight white balance (~5500K) would neutralize everything; by setting the camera cooler than the actual mixed lighting, you let warm tungsten streetlamps stay warm while pushing all the ambient light, shade, and shadow toward that signature cinematic teal-blue. Nudge the Kelvin value down toward 3800K for a cooler, more dramatic cast, or up toward 4200K when you want the warmth to dominate.
The WB fine-tune shift toward blue/green reinforces the teal-and-orange separation that defines motion picture color. It's subtle but it's the difference between "cool photo" and "looks like a film frame."
Lowered contrast (-1) with a highlight pullback (-1) recreates Vision3's famous highlight latitude. Motion picture negative is designed to hold enormous dynamic range so colorists have room to grade — flattening contrast and protecting highlights mimics that gentle, graded rolloff instead of blowing out bright light sources.
Muted saturation (-1) is essential. Cinematic color is never loud. Vision3 renders rich but restrained tones, and pulling saturation back keeps neon and skin believable rather than cartoonish.
Shading at +1 adds a light vignette that draws the eye inward — a classic cinematographic framing cue that instantly makes a still feel like a movie frame.
Embracing high ISO (500–6400) honors the film's identity. Vision3 500T is a fast tungsten stock made for low light; a little noise reads as grain and adds to the authenticity. Don't fight the dark — lean into it.
A "Neon & Rain" Variation
Vision3 500T lives for wet streets and glowing signs. When you're shooting rain-slicked pavement, neon storefronts, or a moody bar district, push the cinematic mood further:
- Image Control: Positive Film
- Saturation: 0 (let the neon carry the color)
- High/Low Key Adjustment: -2
- Contrast: -1
- Contrast (Highlight): -2
- Contrast (Shadow): +2
- Sharpness: +1
- Shading: +2
- White Balance: Manual ~3800K
- WB Fine-Tune: B3, G1
- ISO: Auto 800–12800
- Exposure Compensation: -0.7
Deliberately underexposing (-0.7) and going cooler (~3800K) deepens the shadows into rich teal-black while the neon and reflections glow amber and magenta against them. This is the closest you'll get to the CineStill 800T mood — minus the red halation glow, which Vision3 doesn't produce when shot with its remjet intact. For everything about shooting after dark on the GR III, pair this with our night photography settings guide and neon city lights guide.
A "Cinematic Daylight" Variation
Because Vision3 500T is tungsten-balanced, shooting it in daylight (as filmmakers do with an 85 correction filter, or in post) creates a distinctly cool, muted, overcast-movie look. To get that graded daylight feel:
- Image Control: Positive Film
- Saturation: -1
- High/Low Key Adjustment: -1
- Contrast: -2
- Contrast (Highlight): -1
- Contrast (Shadow): +1
- Sharpness: +1
- Shading: +1
- White Balance: Manual ~4500K (cool, but not as extreme as night)
- WB Fine-Tune: B1, G1
- ISO: Auto 500–1600
- Exposure Compensation: 0
This gives daytime scenes that flat, cool, filmic quality you see in indie films and moody music videos — perfect for overcast streets, blue-hour exteriors, and urban wandering. It pairs naturally with our cinematic photography settings guide and blue hour guide.
Vision3 500T vs. CineStill 800T on the GR III
These two are intimately related — CineStill 800T is literally Vision3 motion picture film with the anti-halation remjet backing removed and re-spooled for still cameras. Understanding the difference tells you which recipe to reach for:
- Halation: CineStill 800T's removed remjet layer creates the famous red-orange glow (halation) around bright lights; true Vision3 500T does not halate, giving cleaner, more controlled highlights.
- Speed: 800T is pushed/rated faster; 500T is the native ISO 500 base — slightly finer grain and cleaner shadows.
- Mood: 800T is dreamier and glowing; 500T is crisper, more "straight cinema."
Think of it this way: shoot the CineStill 800T recipe when you want that romantic, glowing-neon halation; shoot this Vision3 500T recipe when you want the clean, graded, movie-still tungsten look without the glow. Many GR III shooters keep both saved to separate User modes and switch based on how dreamy or how sharp they want the night to feel. For the daylight cousin, our CineStill 50D recipe and CineStill 400D recipe round out the cine-film family.
Best Subjects and Light for the Vision3 Look
Vision3 500T's tungsten balance rewards certain scenes far more than others. Lean into them:
- Night streets and city scenes — mixed tungsten, neon, and LED light is exactly what this film was built for; it's the single best subject.
- Rain and reflections — wet pavement multiplies every light source and amplifies the teal-and-orange separation.
- Interiors under artificial light — bars, diners, subway platforms, and shop windows render with natural warmth against cool ambient shadow.
- Blue hour and overcast exteriors — the cool balance turns flat light into moody, cinematic atmosphere.
- Portraits under streetlamps — skin stays warm and believable while the background cools, isolating your subject like a movie shot.
Because the whole look depends on mixed color temperature, the film shines brightest wherever warm artificial light meets cool ambient light. Seek out those transitions — a lit doorway on a dark street, headlights on wet asphalt, a neon sign against dusk sky.
Shooting Tips for Authentic Results
Commit to the cool white balance. The instinct is to "correct" the blue cast, but that cast is the look. Trust the recipe and let the ambient world go teal — it's what separates a cinema frame from a snapshot.
Hunt for mixed light. A single warm light source in an otherwise cool scene is the Vision3 sweet spot. One glowing window, one streetlamp, one neon sign — that contrast is the whole aesthetic.
Underexpose slightly and protect highlights. Motion picture negative loves to hold bright detail. A touch of negative exposure compensation keeps neon and headlights from blowing out and deepens the cinematic shadows.
Don't fear high ISO. This is a fast film by nature. Noise reads as grain and adds authenticity — let the ISO climb rather than dragging your shutter and risking blur. For sharper handheld night frames, review our snap focus and zone focusing guide.
Compose for the frame. Think like a cinematographer: leading lines, negative space, a single subject held in the light. The vignette and cool palette do a lot of work, but composition is what sells the "movie still."
Preview in the recipe, commit to the look. Shooting JPEG in this recipe gives you the finished cinematic rendering on the LCD, training your eye to see in tungsten tones. If you shoot RAW+JPEG, you keep a color safety net while previewing the Vision3 grade.
Final Thoughts
Kodak Vision3 500T endures because it's the actual language of modern cinema — a tungsten-balanced negative engineered to make artificial light beautiful and ambient light cool, moody, and filmic. By setting the Ricoh GR III to a deliberately cool white balance, muting saturation, softening contrast, and protecting highlights, you turn a pocket camera into a genuine cinematic tungsten machine, ready for rain-slicked streets, glowing neon, and moody night portraits alike.
Load this recipe into a User mode, wait for the light to turn artificial, and go shoot as if a fresh roll of movie film were loaded. You'll find the look — teal shadows, warm highlights, and quiet cinematic restraint — makes even an ordinary street corner feel like the opening shot of a film.
Want more cinematic and night inspiration? Pair this with our CineStill 800T recipe, cinematic photography settings guide, night photography settings, and neon city lights guide to master the after-dark look on your GR III.
Get a free recipe + 15% off your first order
Our Natural Analog recipe (exact settings for the GR III, GR IIIx and GR IV) and a personal discount code, straight to your inbox.
No spam. Unsubscribe in one click.