Hong Kong Street Photography with the Ricoh GR III: Settings, Neighbourhoods and Recipes
Every city guide teaches you to look across a street. Hong Kong is the one that makes you look up.
This is a city built on a 45-degree slope with nowhere to expand, so it expanded vertically — forty storeys of flats stacked over a ground floor of noodle shops, with signage bolted into the gap between them. The photograph is almost never at eye level. It's above you, or it's in a one-metre gap between two buildings, or it's the ten centimetres of red-lit steam coming out of a kitchen vent.
Tokyo is an order problem. London is a contrast deficit. New York is a contrast excess. Hong Kong is a density and moisture problem, and almost every setting below exists to solve one of those two.
The Core Hong Kong Setup
Load this into U1 — the U1/U2/U3 user modes guide covers how if you haven't set them up yet.
- Mode: Av
- Aperture: f/5.6 daytime, f/2.8 after dark
- Focus: Snap, set to 1.5m
- Auto ISO: 100–6400, minimum shutter 1/125s
- Metering: Highlight-weighted at night, multi-segment by day
- Exposure compensation: −0.7 EV after dark, 0 EV in daylight
- Image Control: your recipe of the day
- White balance: locked. Never auto. More on this below.
Three of those are Hong Kong-specific calls worth explaining.
Snap at 1.5m, not 2.5m. This is the closest working distance of any city we've covered. Sham Shui Po market lanes, the alleys off Graham Street, the corridors inside Chungking Mansions — you are frequently at arm's length from your subject with no option to step back, because there is no back. At f/5.6 and 1.5m the 18.3mm lens gives you roughly 1m to 3m of usable sharpness, which is the entire width of the space you're standing in. Push snap to 2.5m on Nathan Road and the harbourfront. The snap focus and zone focusing guide has the full depth-of-field tables.
Negative exposure compensation at night, and highlight-weighted metering. Hong Kong after dark is the highest-contrast night environment in Asia: a black vertical wall of building with a 2,000-nit LED shopfront at the bottom of it. Multi-segment metering sees mostly dark facade, opens up, and blows every sign in the frame into a white blob. Highlight-weighted metering plus −0.7 EV protects the signage, and the GR III's shadows genuinely hold up when you lift them later. See the metering and exposure compensation guide for the mechanics.
Lock your white balance. Auto WB is more wrong in Hong Kong than anywhere. A single frame on Portland Street can contain warm neon, cold LED billboard, green fluorescent tube from a shop interior, sodium street lamp and a phone screen. Auto WB will pick a different compromise on every shot and your set will never look like a set. Lock to around 3800K at night and let the colour casts be the photograph. The white balance guide covers how to set and hold a Kelvin value.
The Humidity Will Beat You Before the Light Does
Say this before anything else: the Ricoh GR III is not weather sealed, and Hong Kong runs at 80–90% relative humidity for most of the year.
The failure mode isn't rain. It's the air conditioning. You walk out of an MTR station or a mall at 21°C into a street at 32°C and 88% humidity, and your lens element, your viewfinder-less rear screen and — critically — the inside of the retracting lens barrel all fog instantly. Shooting through it is pointless. Worse, the GR III's barrel pulls that damp air into the body on every power cycle, which is the same mechanism behind the camera's notorious sensor dust problem.
What actually works:
- Acclimatise before you shoot. Ten minutes in a pocket or an open bag before you take the first frame. A sealed ziplock bag with the camera inside lets the bag fog instead of the lens.
- Don't power cycle outdoors in summer. Leave it on between frames and let the battery take the hit.
- Silica gel in the bag, every single day. Cheap, and the only thing that reliably keeps a compact alive through a Hong Kong August.
- Typhoon season runs May to October. A T8 signal shuts the city down — and the T1/T3 days on either side of it give you the best skies of the year.
Shoot Vertical. Actually Vertical.
The GR III's 3:2 sensor rotated to portrait is the correct Hong Kong frame more often than it is anywhere else, and most visitors never turn the camera. A washing-line balcony stack, a ladder street, a bamboo scaffold running eight storeys up a facade — none of those fit in a horizontal rectangle.
Two settings make this practical. Turn on the level indicator (MENU > screen display) because you will be tilting up and converging verticals are the fastest way to make a Hong Kong photo look amateur. And consider the 1:1 crop mode for signage and balcony grids, where a square removes the argument about which edge matters — the crop mode guide covers the trade-offs.
Pro tip: shoot the vertical from a horizontal position. The Central–Mid-Levels Escalator is an 800-metre moving platform that carries you at second-floor height past open windows, roof lines and signage you can't see from the pavement. Stand still, snap focus at 2.5m, 1/250s to kill the escalator vibration, and let the city move past you. It is the single best shooting position in Hong Kong and it costs nothing.
Neighbourhoods Worth the Walk
Sham Shui Po
The most photographically honest district in the city and the one most visitors skip. Fabric market, electronics stalls on Apliu Street, hardware, old signage, and street life that is entirely uninterested in you. Daylight here is hard and directional between buildings — f/5.6, ISO 400, snap 1.5m. Kodak Gold 200 handles the warm chaos of market stock without oversaturating the reds. See the street market and bazaar guide.
Mong Kok and Yau Ma Tei after dark
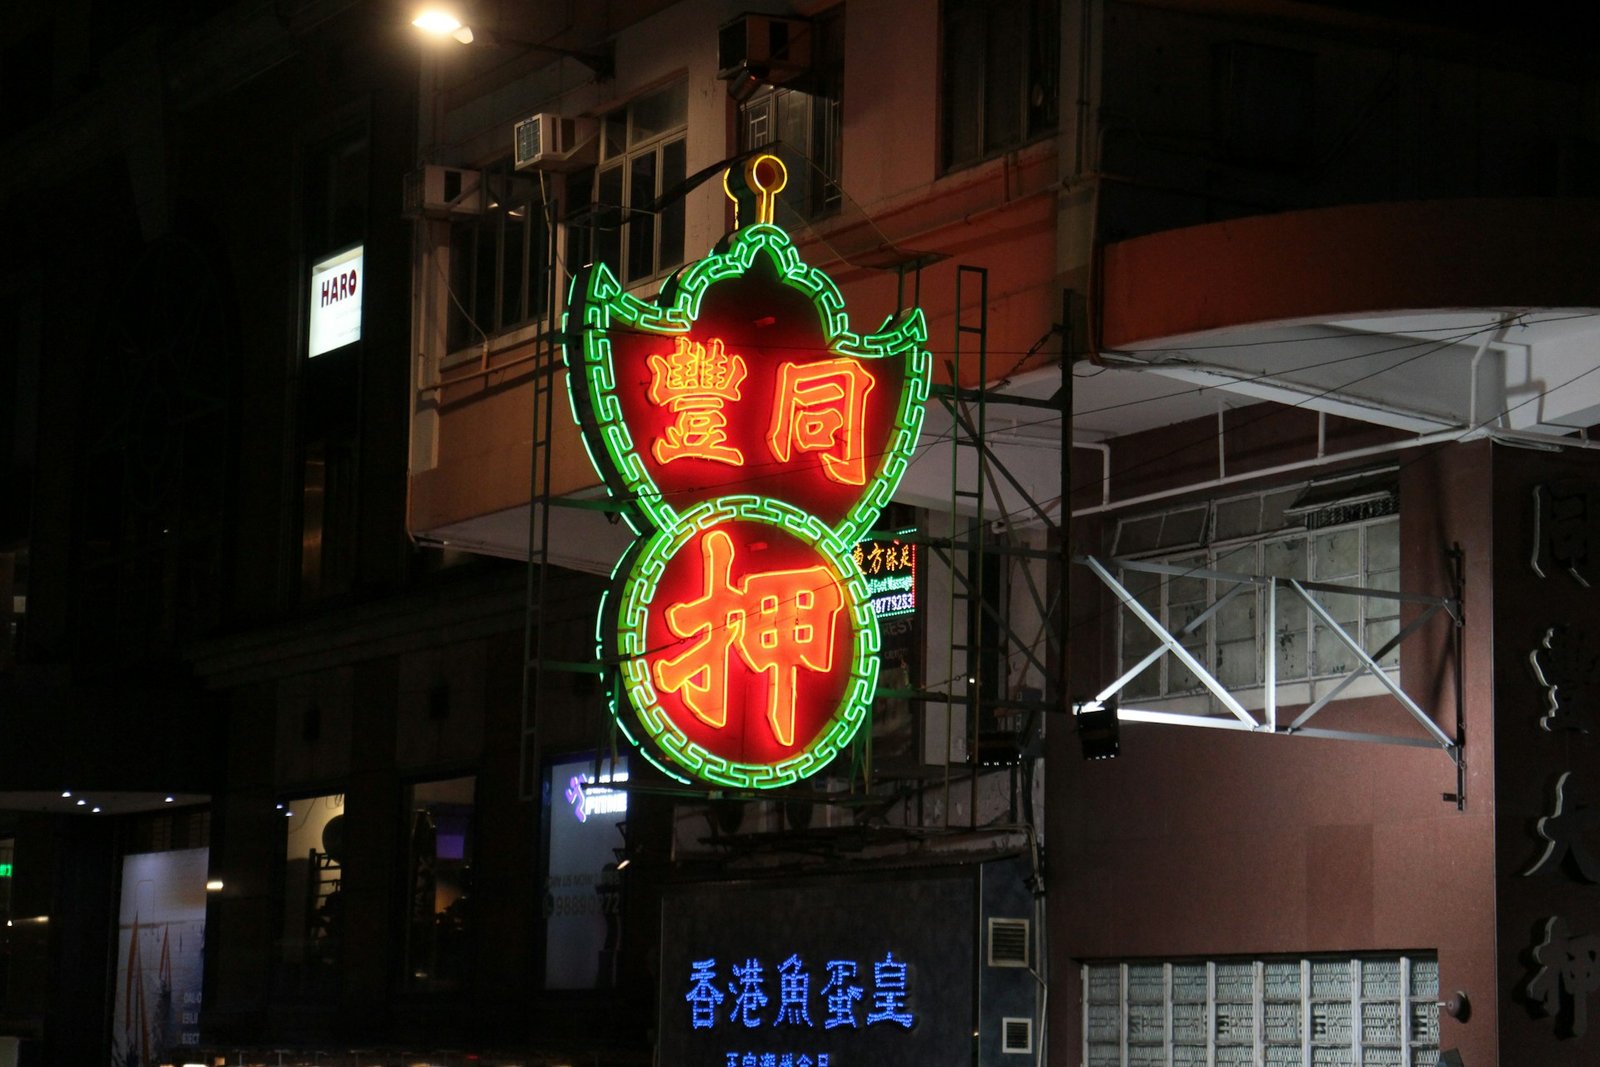
The densest signage left in the city, and Temple Street Night Market at the bottom of it. Go f/2.8, ISO up to 6400, WB locked at 3800K, highlight-weighted metering. Indigo Film 800 is built for precisely this — mixed tungsten and LED, deep blue shadows, saturated sign colour that doesn't go plastic. The neon and city lights guide and the night photography guide both apply directly.
Go now, seriously. Since the Buildings Department's signboard control scheme began in 2010, Hong Kong's neon has gone from tens of thousands of signs to fewer than 400. They are not being replaced with newer neon — they're being replaced with flat LED panels, which photograph like a laptop screen. Removal orders have been running above a thousand a year. The Hong Kong in your head is being switched off on a schedule.
Central, Sheung Wan and the ladder streets
Pottinger Street, Ladder Street, Tai Ping Shan. Stone steps climbing between colonial facades and dried-seafood shops, with light falling down the stairwell in a hard vertical shaft. This is the best shadow and light geography in the city. Classic Chrome reads the stone and shopfront paint as material rather than colour and is the right call here. Tai Kwun, the restored former police compound, is free to enter and photographable throughout.
Kowloon waterfront and the Star Ferry
The skyline shot everyone comes for, plus a seven-minute crossing that costs under HK$5 and puts you at water level with the whole of Hong Kong Island rising behind you. Shoot the crossing, not just the view — the ferry's wooden benches, the crew flipping the seatbacks, the ropes. Blue hour here is roughly 25 minutes and is worth planning the entire day around. For the skyline itself, f/5.6, ISO 100, brace on the rail; see the rooftop and skyline guide.
Chungking Mansions and the covered walkways
Seventeen storeys of guesthouses, curry houses, phone stalls and one of the most genuinely international spaces in Asia, lit entirely by fluorescent tube. ISO 3200–6400, f/2.8, WB locked cool. Grain at 6400 on the GR III reads as film rather than noise — the ISO and noise guide explains why. Be a person first and a photographer second here; ask, and people are generally fine with it.
Quarry Bay — with a caveat
The Yick Cheong "Monster Building" courtyard is the famous vertical-density photograph and it is a residential home to hundreds of people who got tired of Instagram in 2018. Management restricted photography, barriers went up, and the current position is that you may shoot if you are quiet, quick and respectful. Posted signage asks you to seek permission. Take the shot, take one shot, and go. There is equally good density on almost any resettlement estate in Kowloon with none of the friction.
Three Things That Will Save Your Trip
Photography from a public street is legal in Hong Kong, including of people and buildings. There is no general right to privacy in a public place. Common sense limits apply and the usual courtesies go further here than the law does.
Be deliberate around police, protests and government buildings. Since 2020 the legal environment around anything that can be read as political has changed materially, and a foreign visitor with a camera is not the person best placed to test its edges. Avoid photographing police operations, government complexes and anything resembling a demonstration. This is not an abstract caution.
The MTR allows handheld personal photography — no tripods, no flash, no obstruction, no shooting the staff. Given that the MTR is how you'll cross the harbour a dozen times, that's a real gift; the subway and metro guide covers the settings.
The Short Version
- Snap 1.5m — the closest working distance of any major street city
- f/5.6 by day, f/2.8 after dark, minimum 1/125s
- −0.7 EV and highlight-weighted metering at night. Protect the signs; the shadows will survive
- Lock white balance at ~3800K. Auto WB cannot survive five light sources in one frame
- Turn the camera vertical, and turn on the level indicator while you're at it
- Ride the Mid-Levels Escalator as a moving tripod at second-floor height
- Silica gel, acclimatise before shooting, don't power cycle in the heat. Humidity kills more GR IIIs than rain
- Shoot the neon this year. Under 400 signs left, and the number falls every month
The Ricoh GR III suits Hong Kong for a reason no spec sheet captures: this is a city of small spaces and short notice, where the photograph appears in a gap between two people on a two-metre pavement and is gone in a second. A camera you can shoot from the hip in a Mong Kok crowd, one-handed, while holding a cup of milk tea, is worth more here than any amount of sensor.
If you'd rather land at Chek Lap Kok with the market-daylight, Mong Kok-neon and ladder-street looks already sitting in U1, U2 and U3, our full preset collection has them ready to copy straight into the camera.